Every bike in the concours.


Every bike in the concours.
5: Brifters! My first ever brake lever shifting bike. Maybe my second ever even riding one. I thought they were genius when they came out, I was just too poor and riding fixed all the time.
4: 1×12 drivetrain. Ratio upgrade kit for 10sp SRAM shifters is pretty cool. I needed the shop to make the internal swap.
3: Left lever controlling the dropper post. Awesome. 1000% awesome. 200mm OneUp silver dropper is pretty and pretty similar in feel to 190 and 175.
2: 180mm cranks. I usually ride 175s, but I got these beautiful XTR square tapers at the museum swap meet, along with some other cool stuff like the XTR skewers (from Jeremy Sycip’s booth). If everyone is cutting down to 165s, that’s my cue to go the other way. Maaaybe there’s a little more pedal strike stacking up the smaller tires (48s) with the longer cranks and the 80mm BB drop.
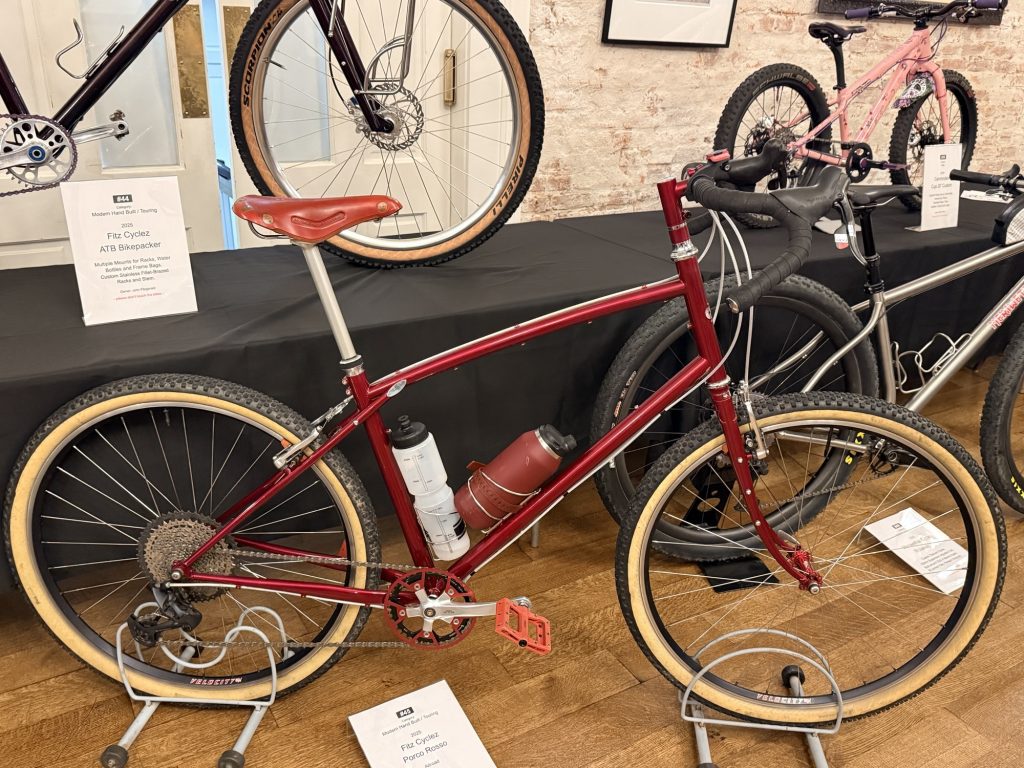
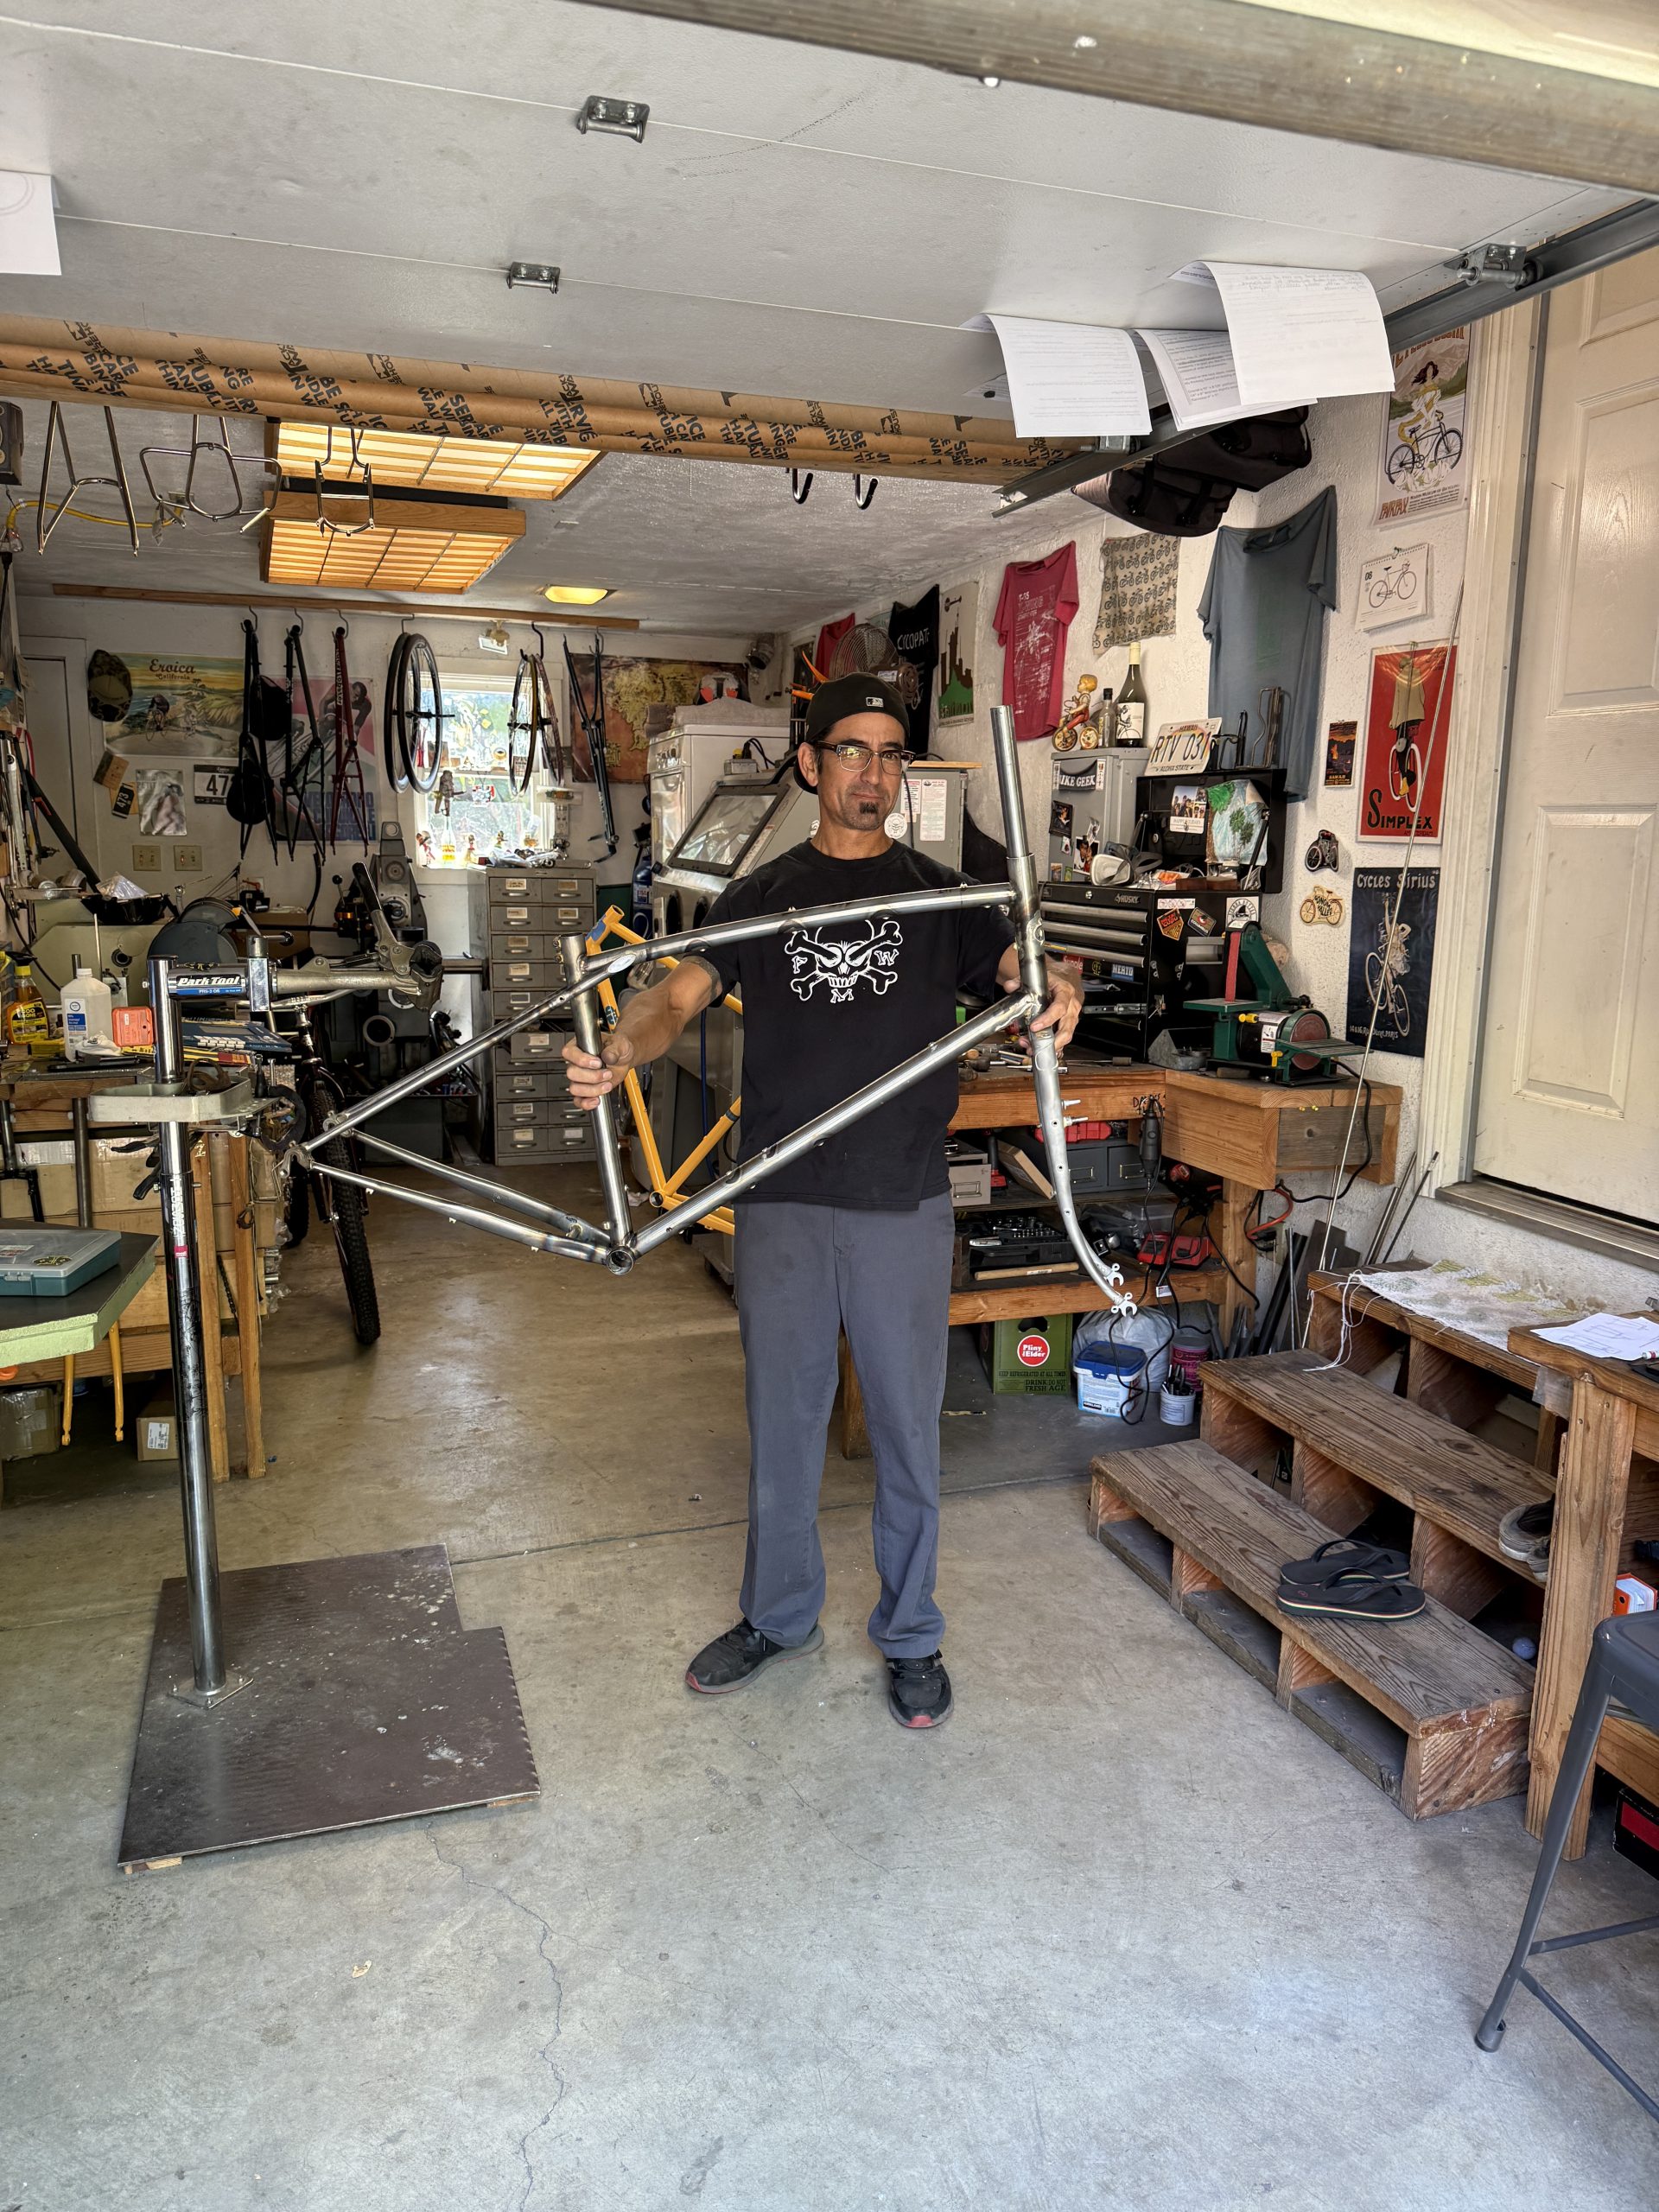
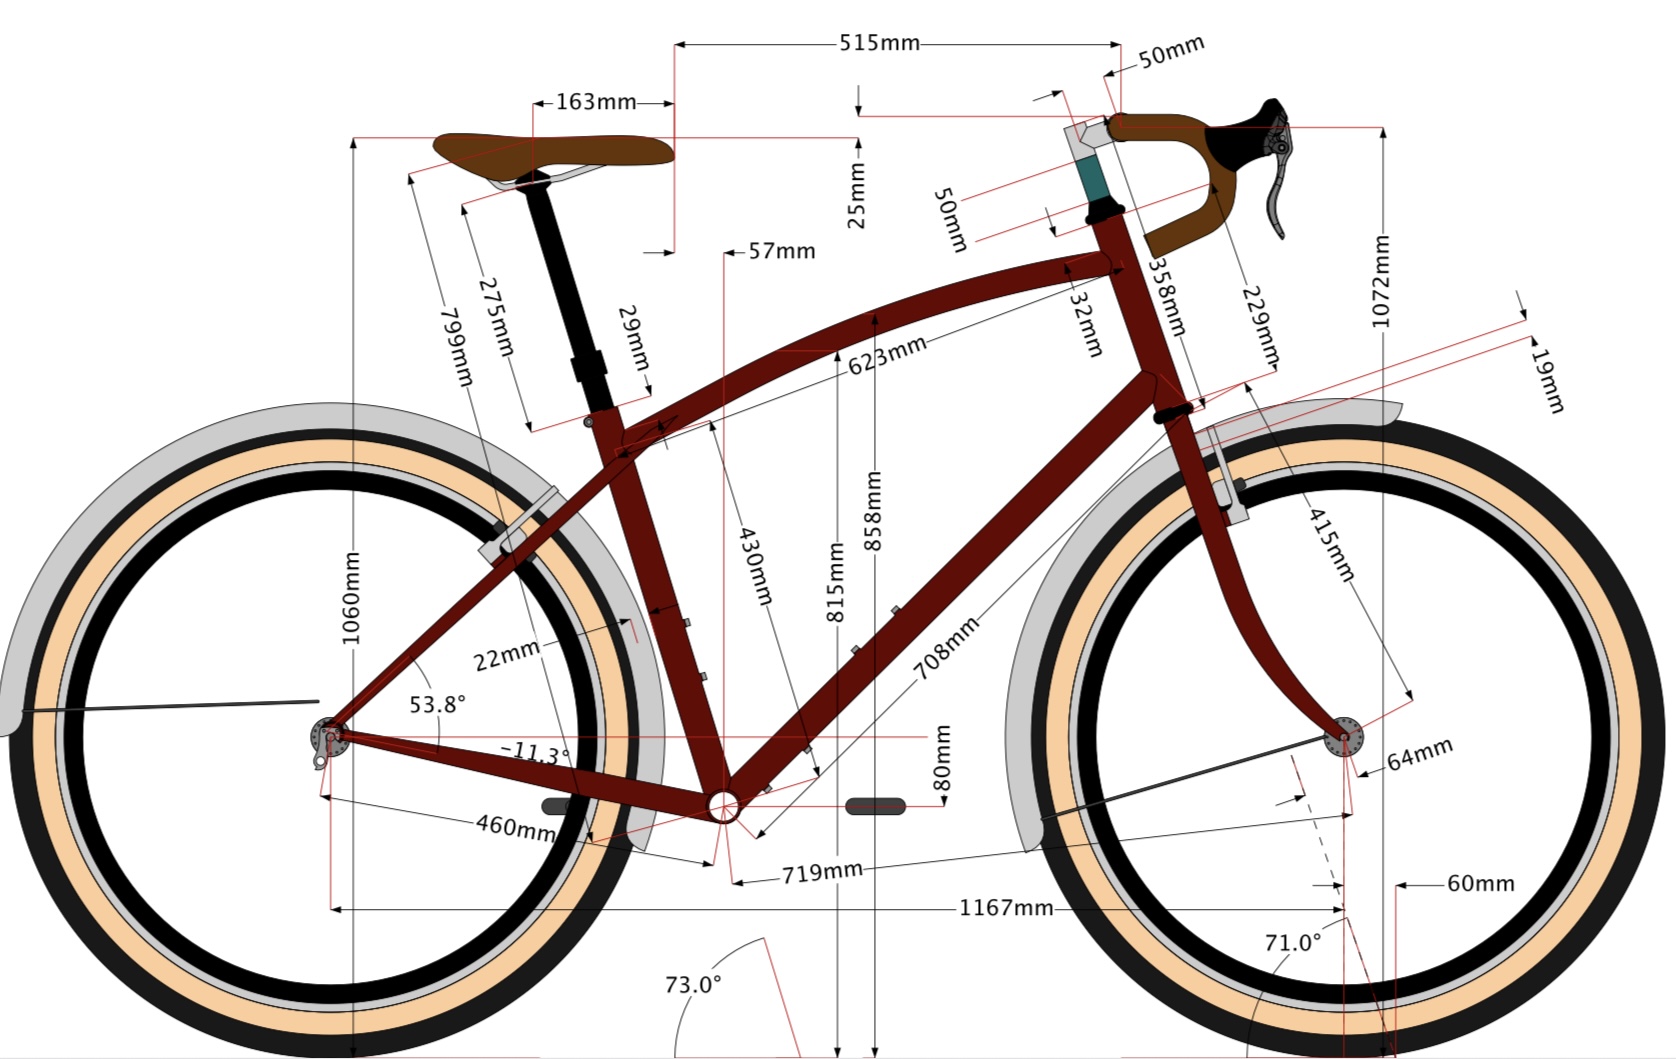
1: This killer new Fitz Porcorosso!

This is a fancier modernized version of the 2019 Fitz Supermoto (seriously thought that bike would be on the blog here oops). That bike was pushing the limits of downtube length, and fork offset with the straight blade forks, Tubing makers have stepped up and made butted tubes longer for modern geometries, and I relaxed into letting John do curved blades.
I also relented on internal dropper routing. I think it’s stupid (longer cables, heavier housing, holes in your bike), but external dropper choices are limited to one PNW 31.6 175mm. Once you (I) relent on the internal routing for the dropper, you’re sending a cable down the downtube. Once you can’t run everything under the top tube like a proper Bontrager setup, then you’re open to running MOST cables down the down tube. And running full housing, and treating it like a decorative border instead of hiding it. Another difference from the Supermoto.
Geometry is longer, less “front load low trail” and more “bikepackery.” When John built the Supermoto, I was like “I don’t want zits all over my bike, I don’t do that bikepacking stuff.” So then I immediately started doing bikepacking stuff with it. This bike has All The Zits, including frame bag mounts. There’s like $500 worth of extra mounting points. So far no dedicated frame bag.
And… fancy!! The Supermoto was purposely purposeful, but the Porcorosso might need to replace my Frances as the prettiest bike imaginable without being overwrought. Curved top tube, polished stay eyes, stainless Fitz gusset, stainless dropouts, fancy Illusion Cherry sparkly paint. Curved fork. People like those.
PS: I like those Ortlieb snap-on bags, too. REI had a big sale, and they worked out.
Sayonara 2025.
Fun couple hours riding up out of Fairfax and down into Sleepy Hollow. Gorgeous day, and I didn’t injure myself!


I always love the Gestalt Haus jackalope sausage, but the M&G burger was really calling me. Next time.


Nicassshhio Reservoir was beautiful, and The Mighty Kia is always fun over D Street into Petaluma.

Oh yeah, I started my day taking a cat to the vet. Here he is interested in the toy, but not fooled by the toy.
Laser eye surgery! My eyes (cataract growth) got dramatically worse over the last 6 months and I had one eye laser-surged this morning.
Three eye drops 4 times a day is a lot.
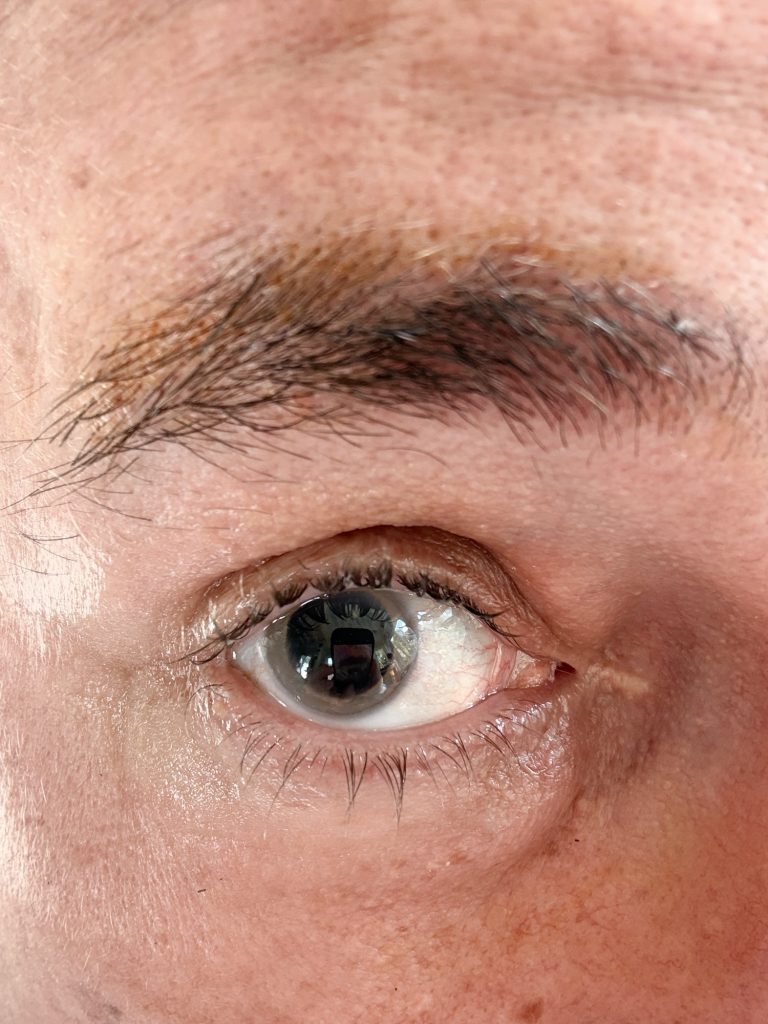
Walking around all day without glasses seems super normal, even after wearing them since the 5th grade.
I have been shooting cameras and guns with my left eye for years since my right eye was so trash, but the nurse assured me I’m right-eye dominant. I practiced using my right eye with my cameras and no glasses, and it seems pretty game changing and maybe I’ll be a good shot again, too.
One day (and 6 hours) update: I can read my phone AND see across the street. This morning, 24 hours after surgery I thought “Maybe they put in the wrong lens??” Close vision wasn’t there, and I wasn’t getting the halos around everything I was promised. Now the close focus is pretty good. Left eye sees small type clearly three inches closer to my face than the right eye with the new lens, but won’t work for things at arms length.

Getting my anemia fixed.
I broke my wrist right before New Year and spent some time in the hospital for surgery intake, and they did a bunch of blood tests. The results show up in your phone app in about 20 minutes!
Turns out my iron levels and hematocrit were abysmal. Like “no wonder I suck at bicycles” bad.

Kaiser had said, “oh your iron is a little low we might look at that in a year or two” United said, “dood you’re anemic here’s what we will do.” And then they did it.
So if you feel weak and asthmatic riding bikes and your poops are often almost black… talk to a doctor about anemia!
Quad Lock phone mounts for bike and car.

I have a terrible sense of direction and it takes me repeated visits to understand the spatial relations of a place. So I tend to go places I already know. Having a phone/map mount where I can see it and follow the map is a huge help for me to get around and try new routes.
I use it more in the car than on the bike, but I hope to change that in 2026.

Overall, Quad Lock is good, it needs a dedicated case, and I like the ring back thing because it aids in holding the phone easily and securely.
The only downside is that it smooths out the movement of the phone on the bike so I don’t get “steps” in my activity app.

Paying retail money for new and stylish clothes
Ornot hooded trail shirts. And other Ornot shirts.
I think the purple and stone Ornots look good on me, and they dry fast after riding. The striped Gaultier look is nice but I reach for it least.


Kuhl riding shirts (but don’t ride in it because you’ll look all sweaty after), and Kuhl pants (every pair has a slightly different fabric).

These things are all spendy at about $100 shipped and I’m told you can feed a hungry family for a week for that money, but I’ve spent most of my life thrifting clothes so I now amortize new clothes over the rest of my life.
Also, fancy jackets this year, but I got them on deep clearance. Old habits die hard.


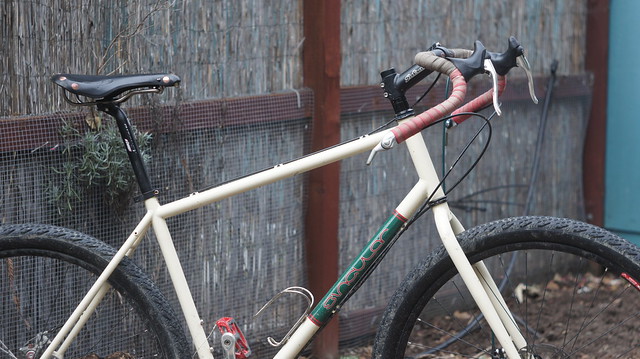
Upright bars. I’ve been riding flared dirt drops for decades, but swapped in Velo Orange Tourist bars to recover from my broken wrist.

I like them! I like that silver Ritchey Force stem, too.
I also tried-and-liked the Grant Petersen DIY wool grips. they feel great, look great, and wear well. They’re finished with used Velox tape for when I get up on the lever mount for climbing.

I got this pretty SimWorks rack from Analog Cycles, but the TravelAgent conflicts with the mounting rod.
I’d need to switch to a cantilever brake in the back to make this work. Or… just move a pad washer to get the brake off the rack strut… hm.
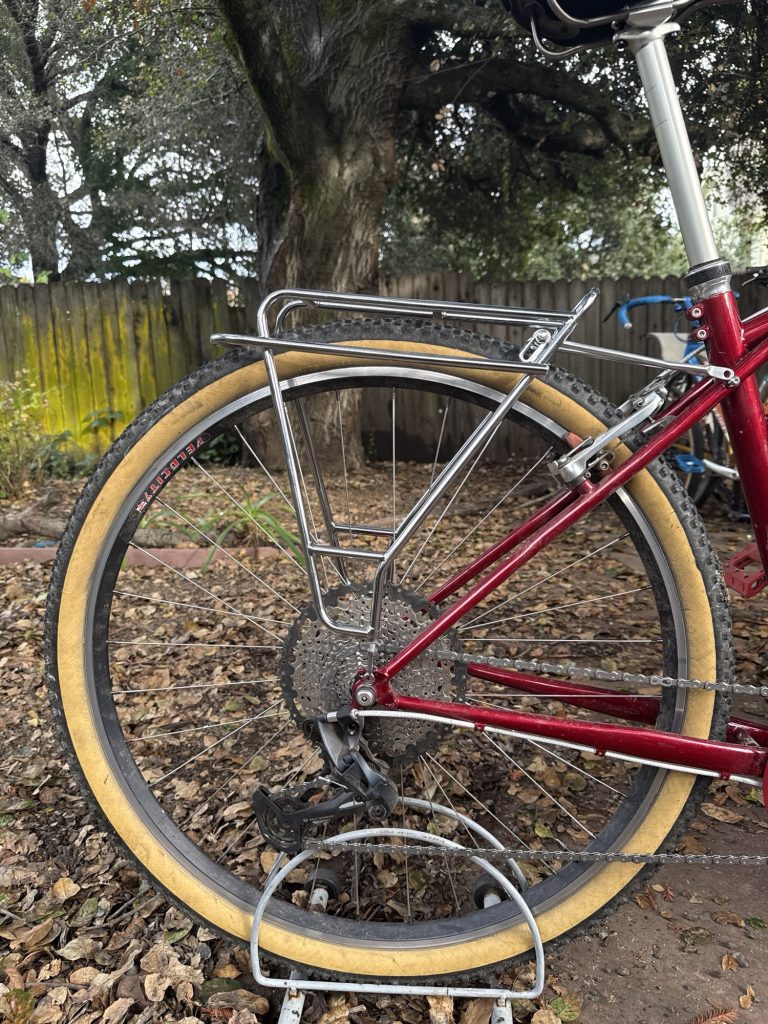
Cleaning the rim seemed to help the crazy squeal, so I put the shiny brake and new pads (sanded of course) on the Fitz for tomorrow’s road run out to Forestville.
UPDATE: better braking and no shrieking!
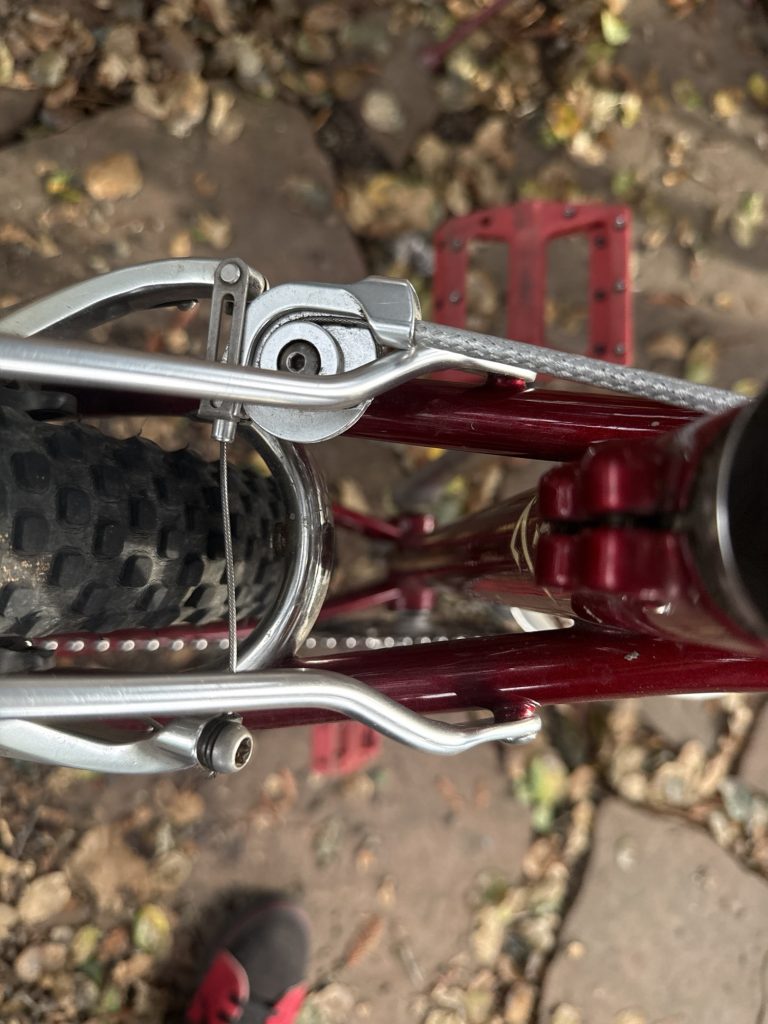
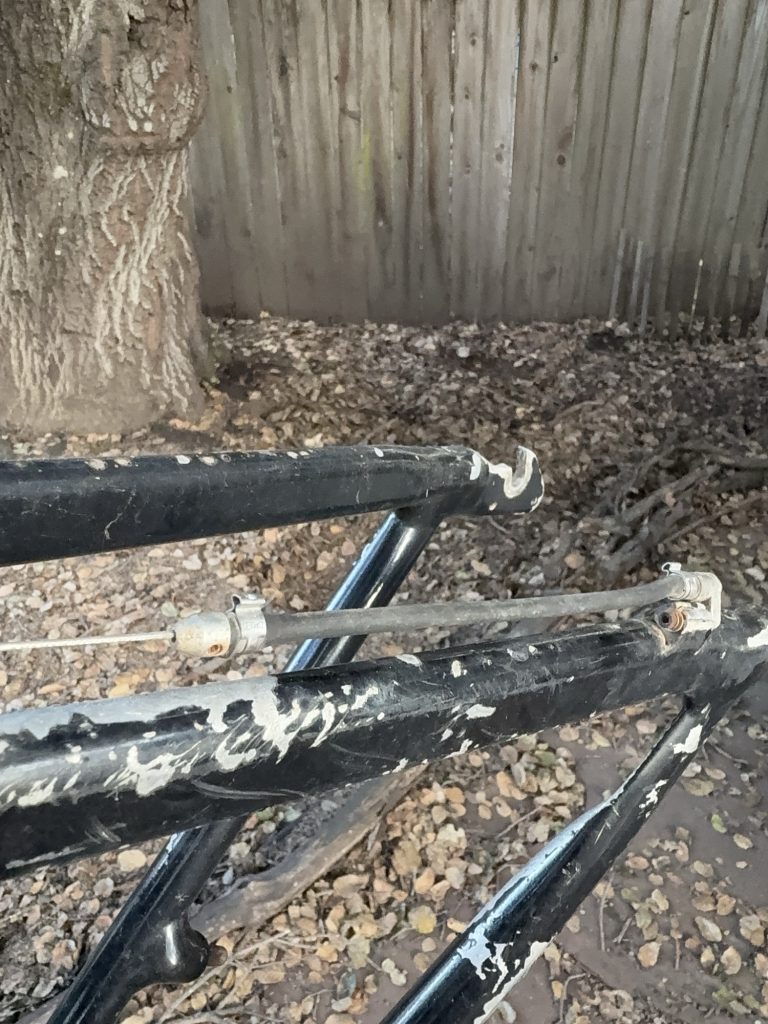
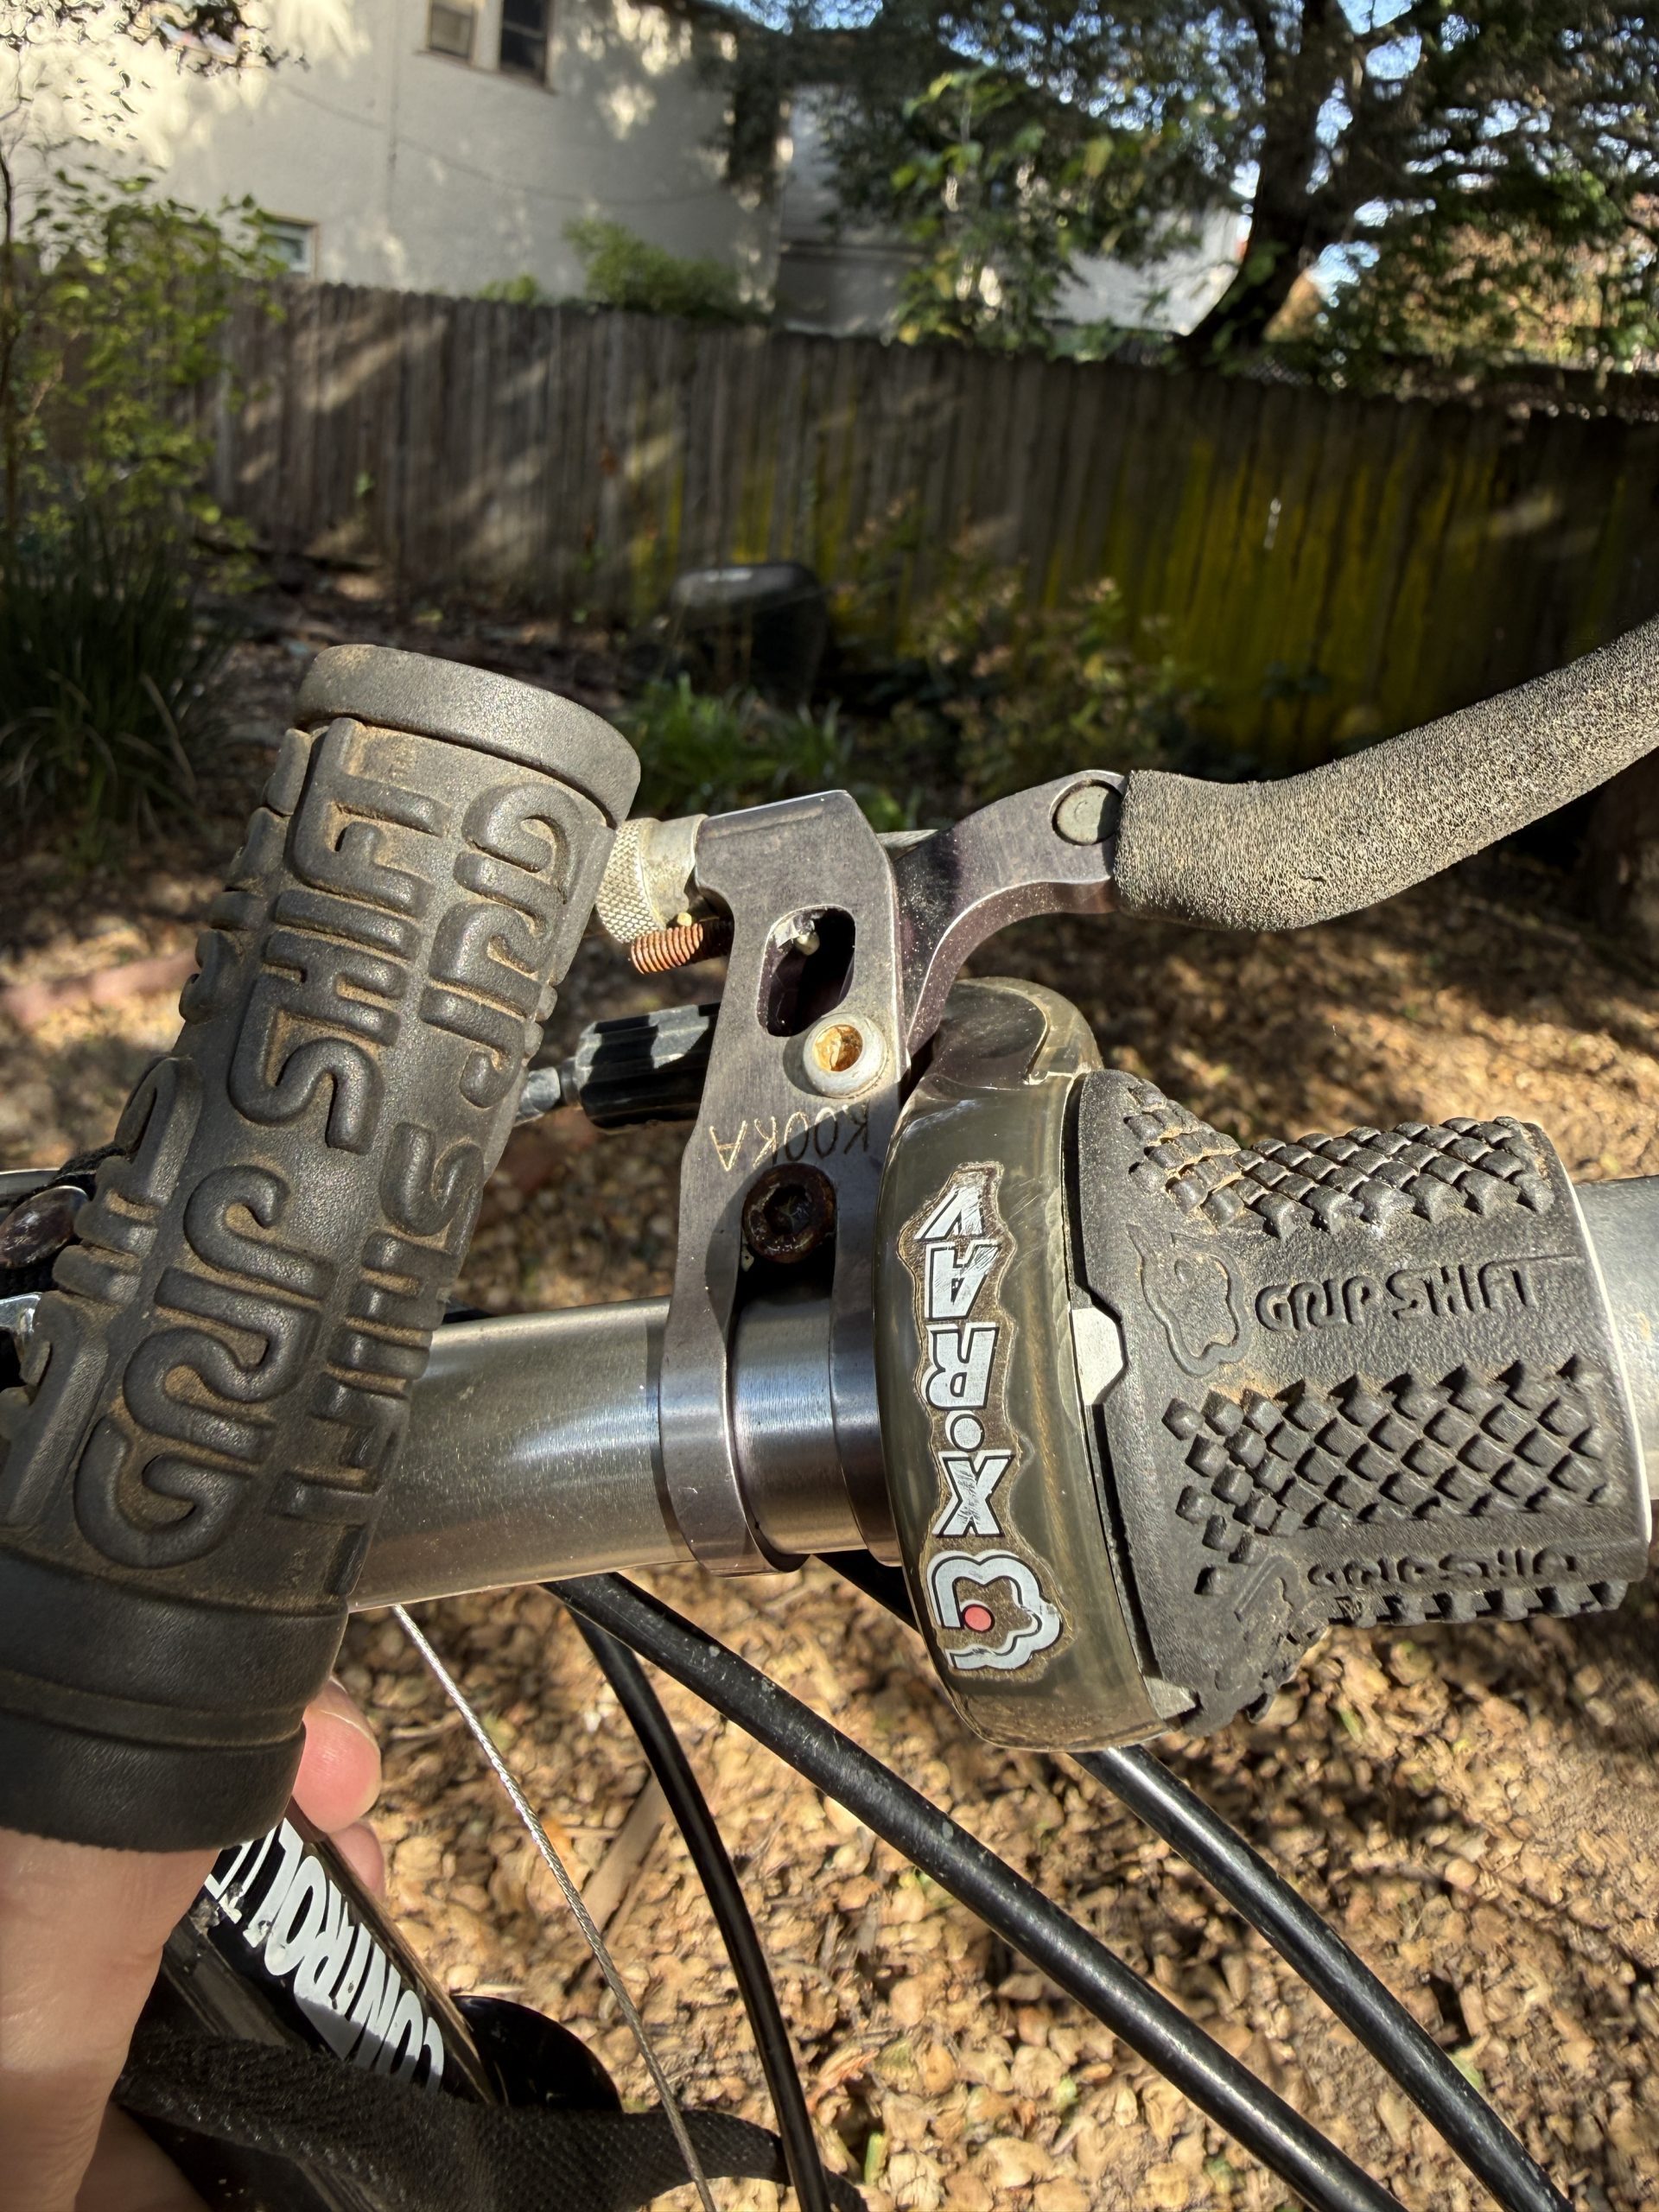
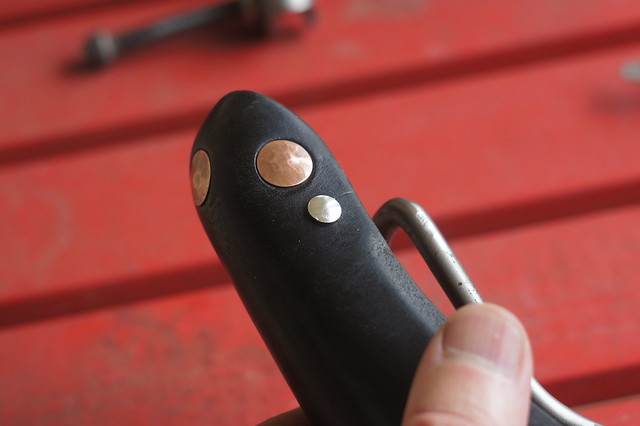
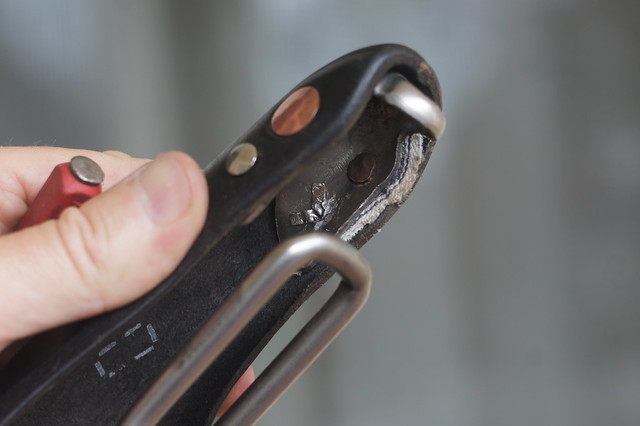
UPDATE (full story below): this is a Gripshift Bassworm invented to add more “spring” to Gripshift shifters to work with updated Shimano derailleurs.
This looks like a special way to keep the gunk out of a derailleur cable. The rubber tube has a metal connector at one end that holds the cable with a grub screw. There is a strange swinging stop that attaches to the frame stop, and looks like they work together in such a way that I couldn’t steal the swinging stop for another bike.
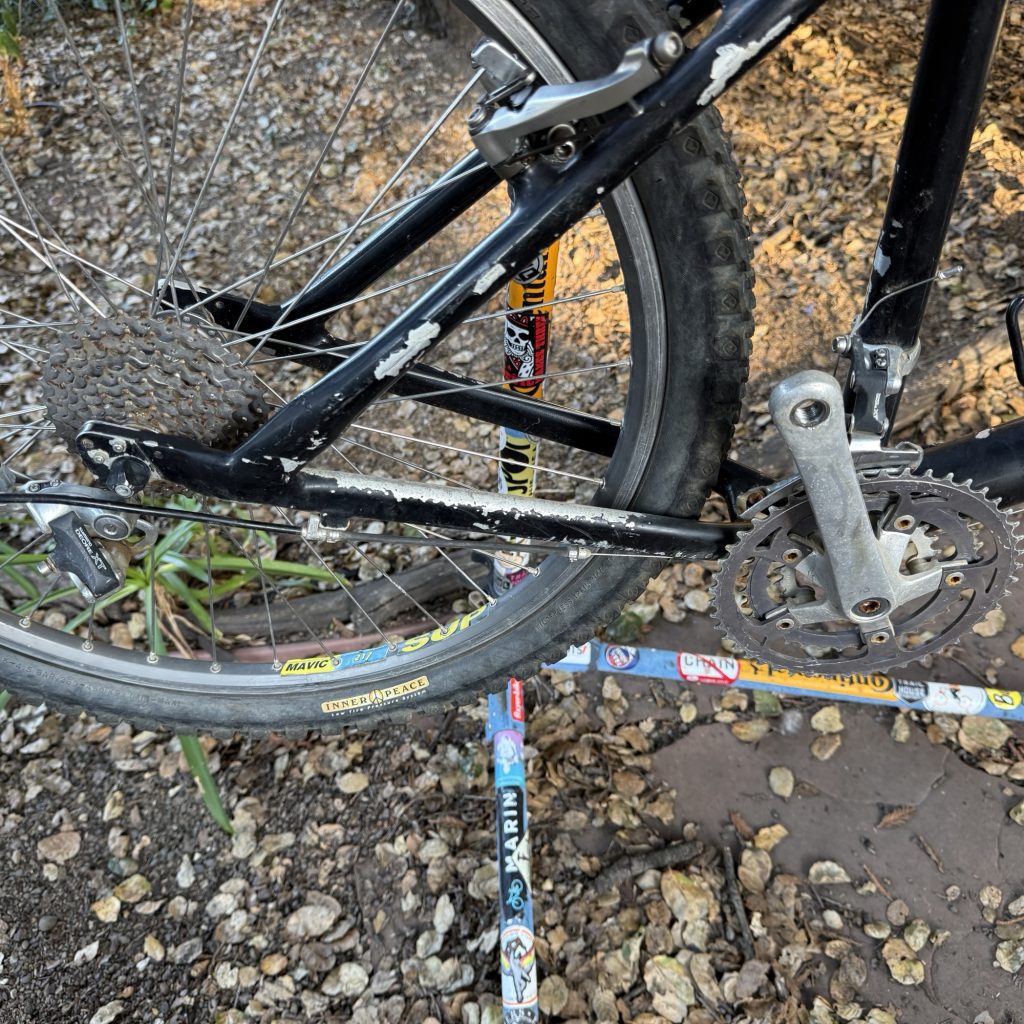
A friend returned a bike I put together for them, and included an old Cannondale! Yay! But… 1.25” headtube, blown Judy fork, bent derailleur.
Kind of made me mad, since I’d just got a new bike (the Fitz), and sold a bike (the Swobo), and I was looking to downsize not metastasize. Which is why there isn’t any kind of documentation to this weirdo bike.
It was also a bad sign that my friend “CannonDave” who will drive four hours to buy a $50 Cannondale frame wouldn’t take the whole bike off my hands for free.
Sam, a reader and iBOB writes:
Hi Philip
I saw your post about the weird vintage detail on the Cannondale frame you received. I totally see how it would also keep gunk out, but the set screw that clamps the cable is a clue to its true purpose. That is a Gripshift Bassworm. It came out in the mid 90s as a shifting “upgrade”. As Gripshift gained market share and replaced Shimano rapid fire shifters both in the oem and aftermarket, Shimano lightened its return springs in the rear derailleur. The Gripshift have a coil of cable in the shifter adding just enough friction to make their performance quite poor with the light action return springs while leaving rapid fire shifters unaffected. Coincidence or aggressive competition tactics by Shimano? We’ll probably never know. But Gripshift put these out to increase the return springs pull and make up for the extra friction in a Gripshifter. The rubber tube is the “spring” and you were supposed to install it with a bit of stretch while in the smallest cog. As you shifted through the rear cassette, the rubber tube would stretch and then when you shifted through back down to the small cog it would yank that cable back through the housing, effectively increasing the return spring. Gripshift didn’t want to advertise that there was a problem with its shifters and Shimano derailleurs, so it marketed these as an upgrade for everyone (and it worked the same on any bike so it was universal I guess), but it truly was a way to bridge a cunningly engineered compatibility gap. Soon after Gripshift became SRAM and started making its own ESP derailleurs and the rest is history. Anyway, thanks for ringing a bell in this old mechanic’s memory, and sorry to bend your ear with an unsolicited tale of bike industry intrigue from the mid 90s. I do enjoy your blog, so chapeau bas!
Thanks,
Sam in Brooklyn (ibob member)

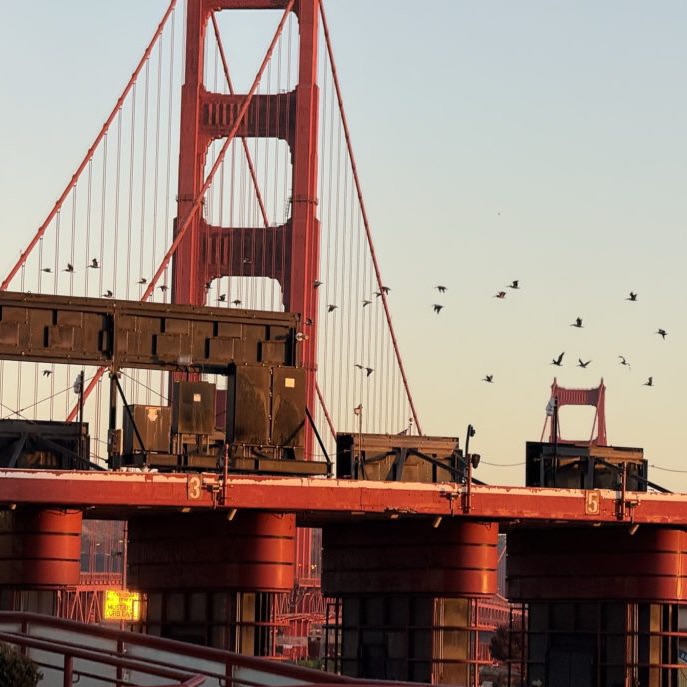
Seeing Sonoma and Marin and SF as the sun comes up.

Curved top tube lots of custom details. Illusion Cherry powdercoat. Fitz Cyclez


I’ve had this bike for almost two years about six years now. Here’s a New Years 2022 update photo:

People are shocked that it’s ‘new,’ since it’s steelier and beautifuler than most modern bikes. It’s a Frances, out of Santa Cruz, custom built by Joshua Muir for someone who is not me. I like it.
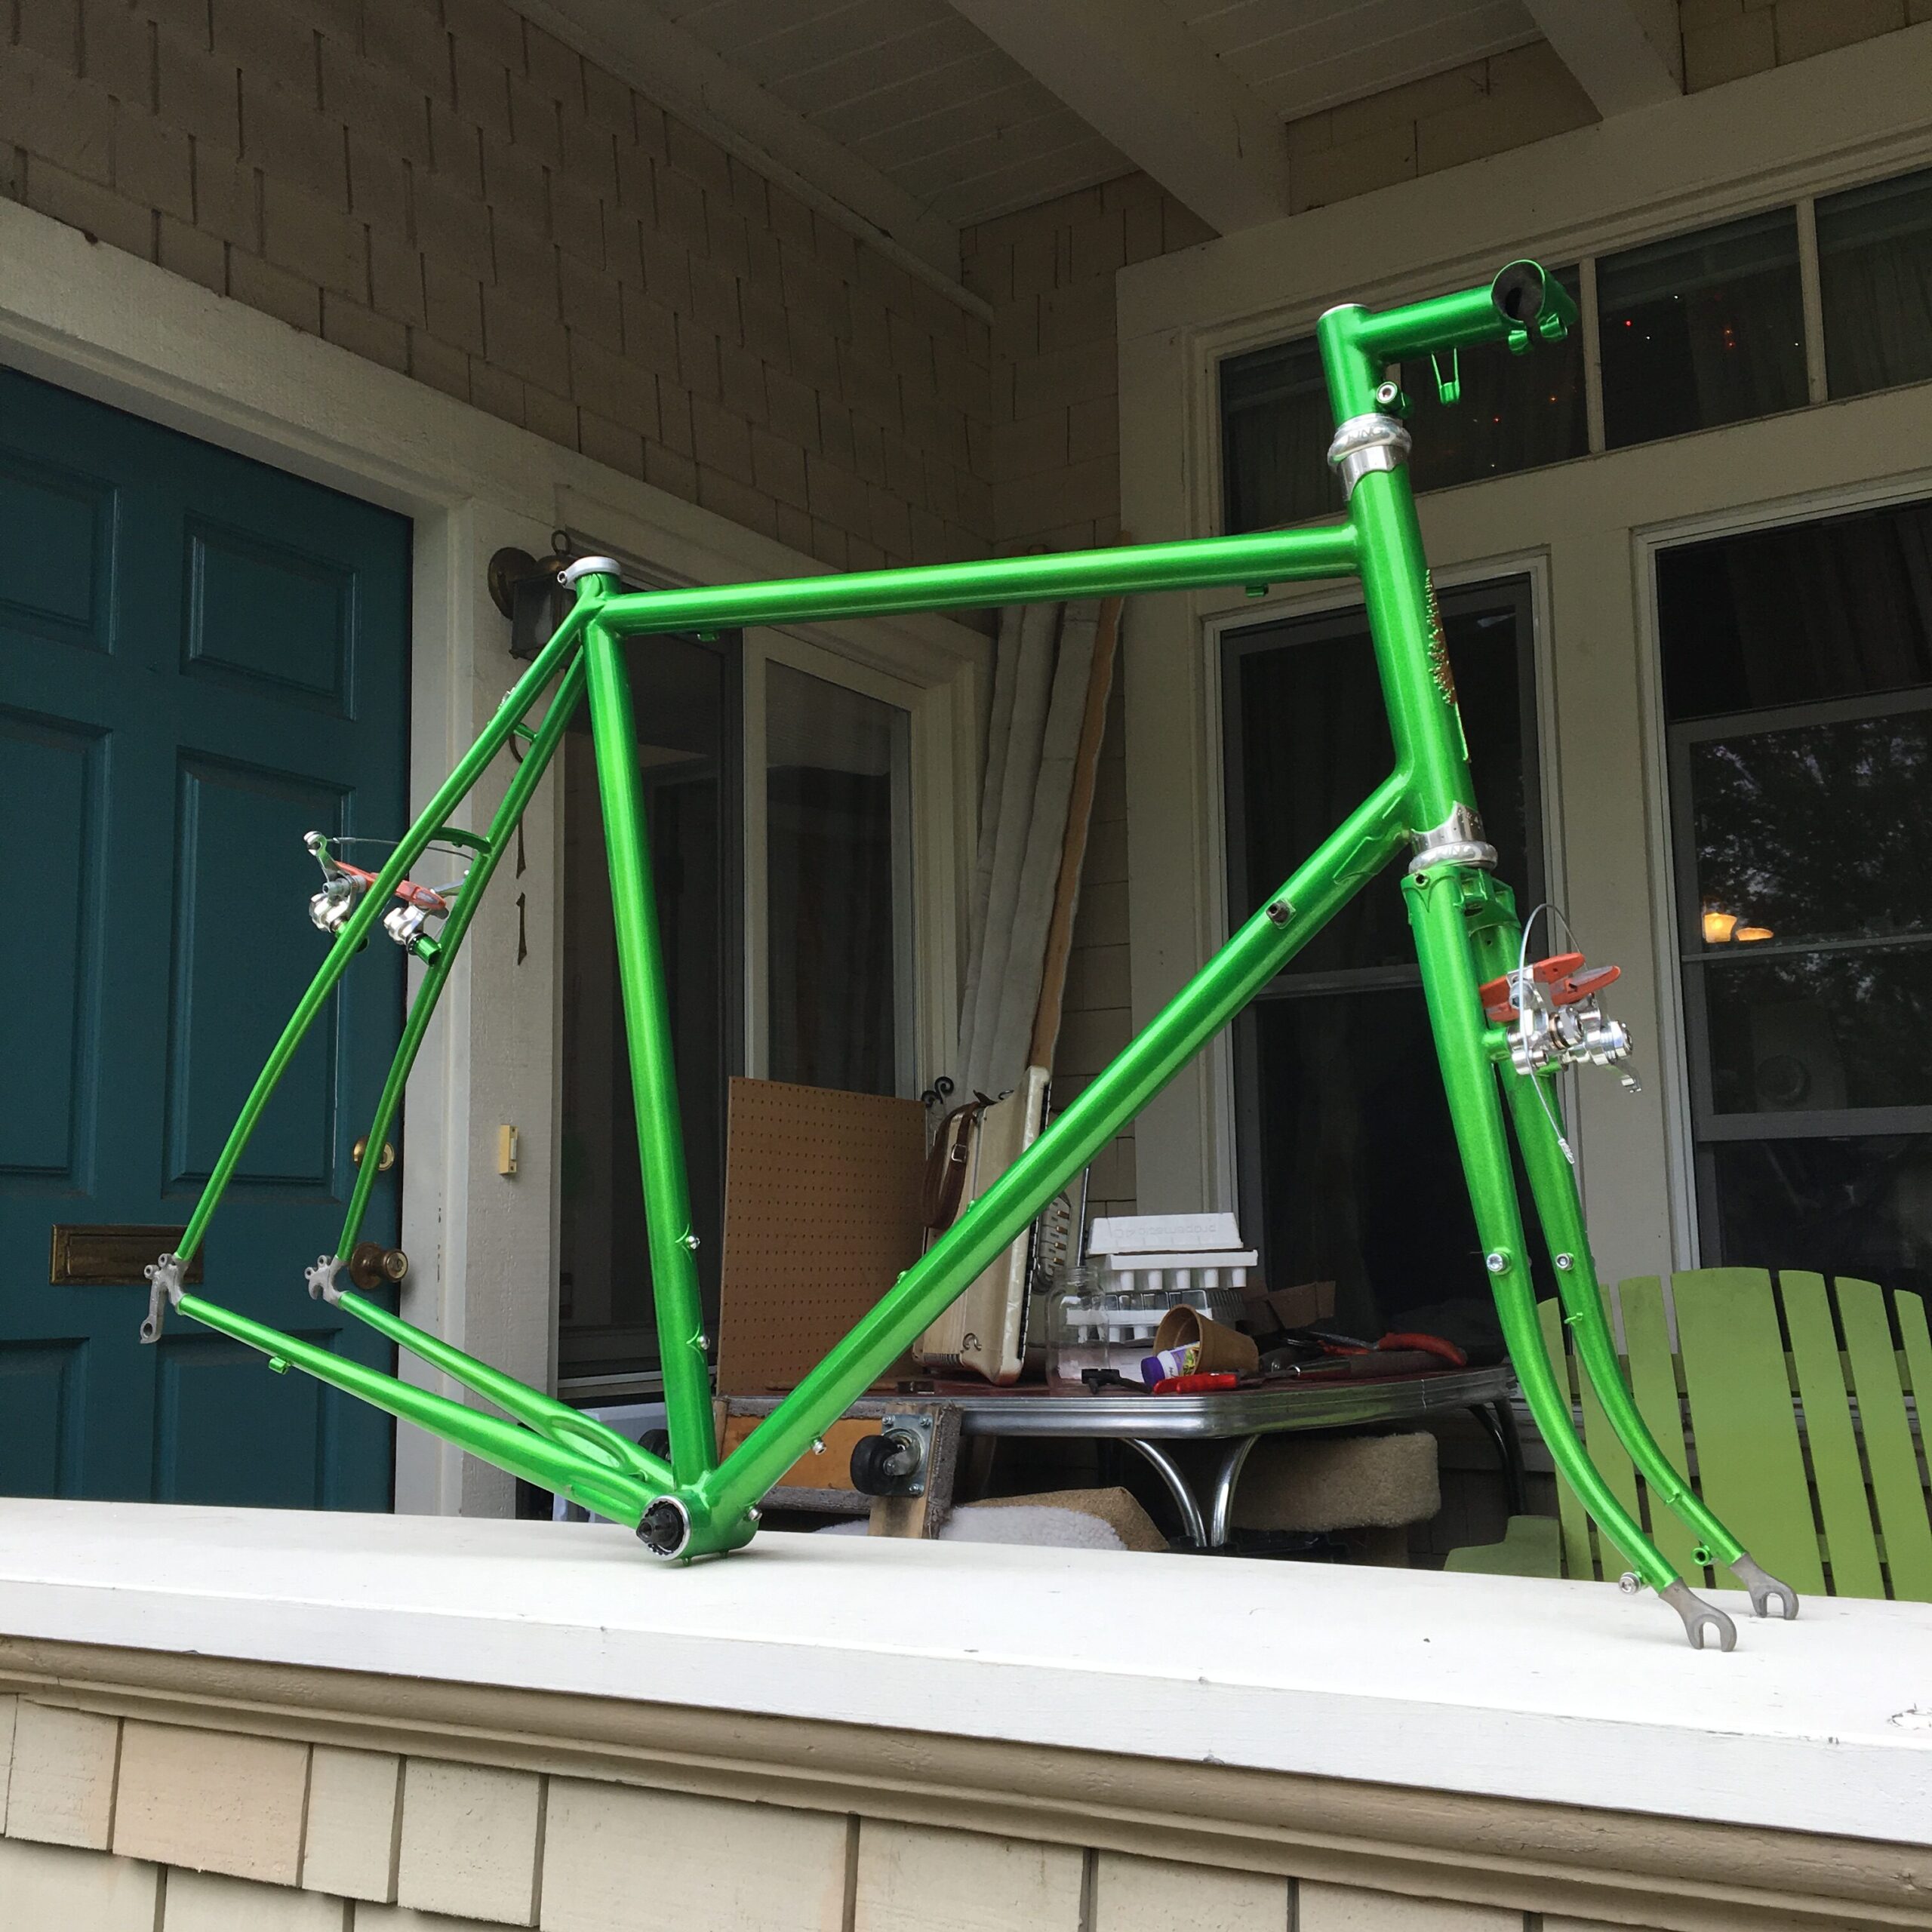
It checks all my boxes: steel, fillet, gigantic, “all this by hand” custom, built with American tubes and fitments. Also a crazy color I did not pick. Color-matched stem and custom racks. I’ve met the builder and I like him. I think he’s a genius. Have you seen his cargo bikes??
I have three friends that regularly text me links to green bikes “YOU SHOULD BUY THIS.” This one I saw on Craigslist, looking for “custom.” The ad didn’t even say “Frances,” just “custom by Joshua Muir.”
“I know who that is!” I met Josh at a Portland NAHBS, or similar bike show, and fell immediately in love with the bikes and the pretensionless air of his whole presentation. Zero other builders had Nashbar brakes on their bikes. Josh had borrowed back bikes from his friends and customers, and they all had workmanlike quotidian builds, instead of self-conscious overwrought bling like everyone else.
This frame is unselfconscious bling. The color is amazing. It’s a metal flake green called Illusion Mist. The stays are bowed in a trademark way, and the stay ends and custom stem feature whale fluke details. The tubing is all True Temper, because Josh bought up as much as he could afford when TT got out of the bike tube business, and the fitments (dropouts, lugs, crown) are all Henry James or Pacenti. The stem and racks match the frame. Maybe one day I can afford a Wayfarer trailer, painted to match.
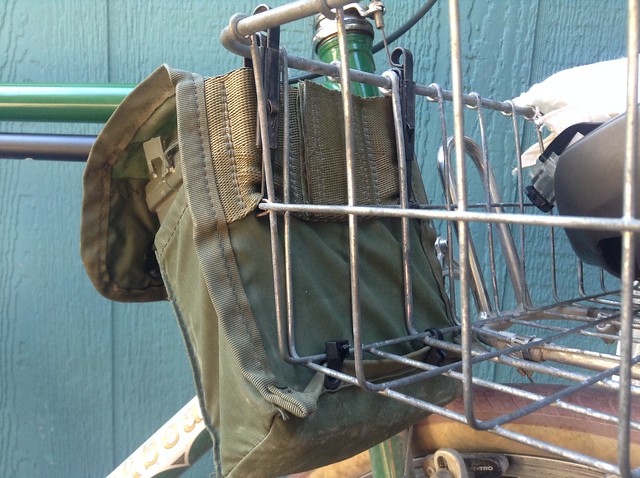
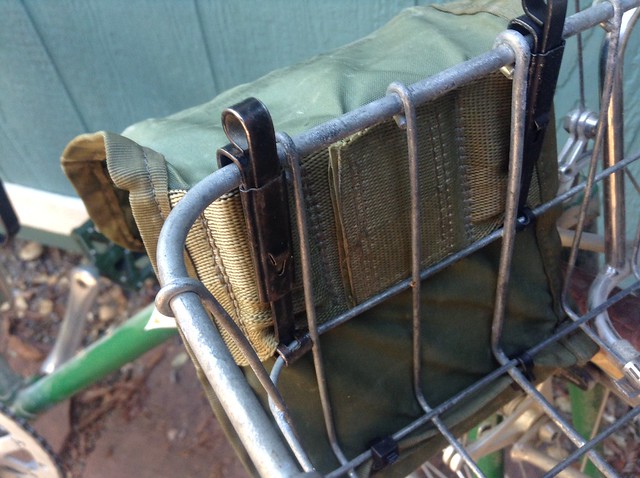
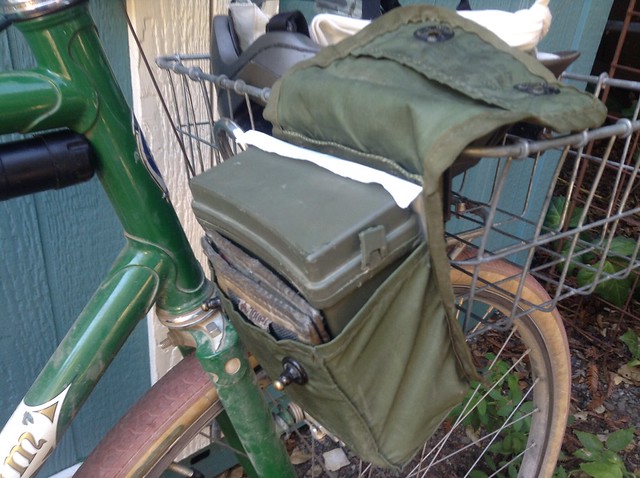
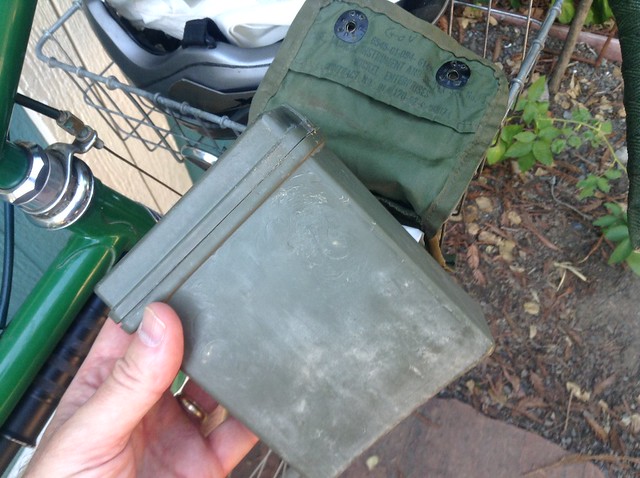
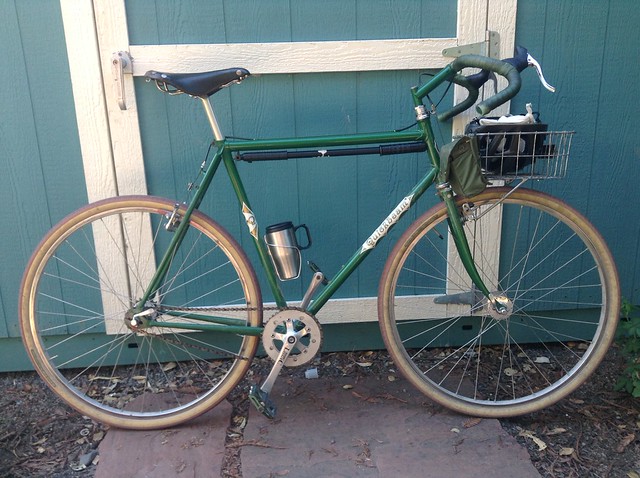
My kid and I stopped into a military surplus place in Cotati, and I picked up a little medical kit. It’s a green nylon pouch with a green plastic box inside. The box closes, and the pouch has nice snap-through hardware. On the back of the pouch are two metal clips that lock.
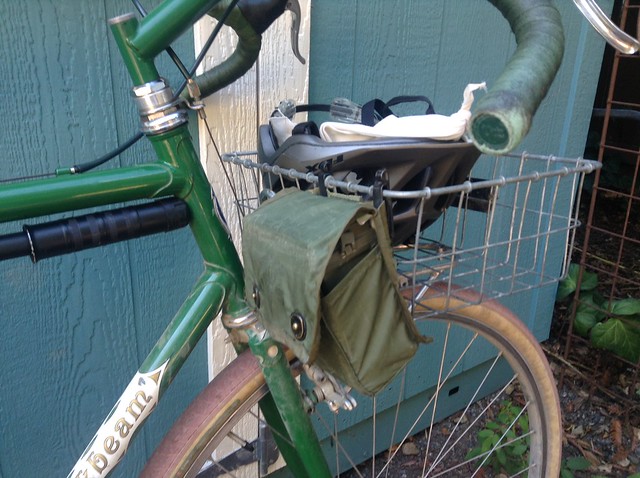
It turns out these two clips are EXACTLY the height of two Wald basket wires, top to bottom on the medium.
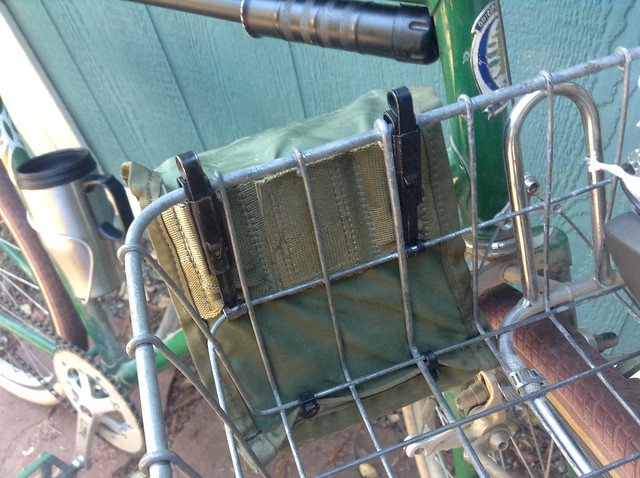
The clips snap down and lock, and there are two grommets at the bottom of the pouch that you can zip tie to the bottom wires of the basket.
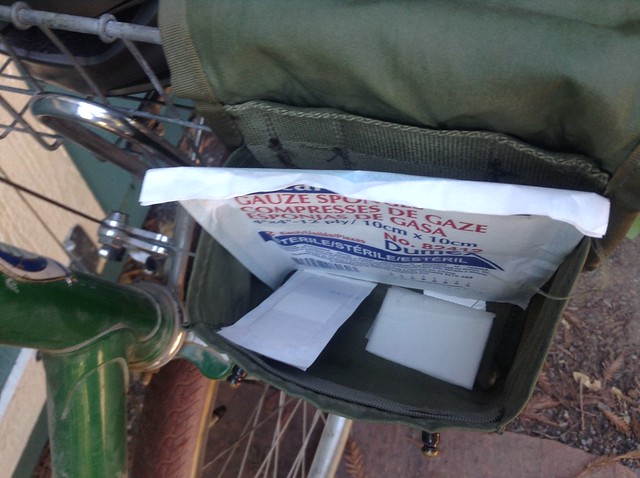
I put some first aid stuff in the pouch (since it’s a medical kit), and big gauze pad fits behind the box.
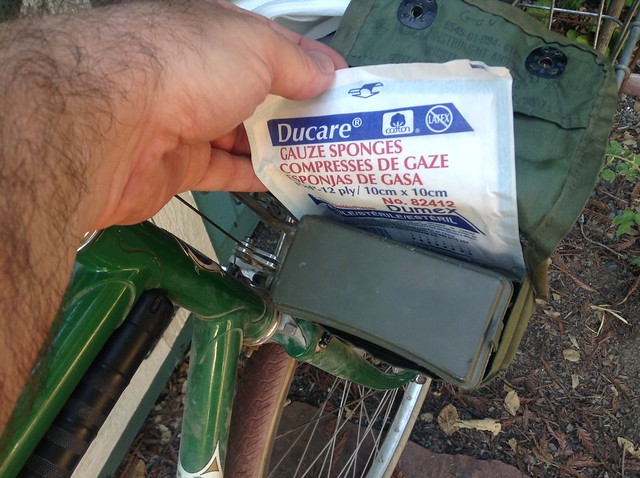
My wallet fits in front.
Inside is a tube, tire levers, some allen keys taped together, and an inhaler.
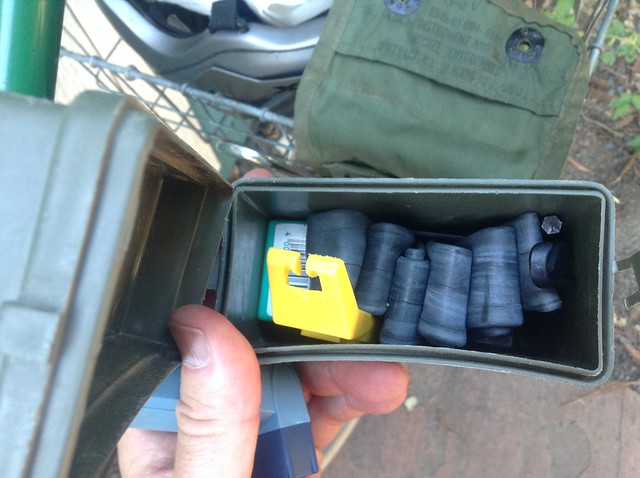
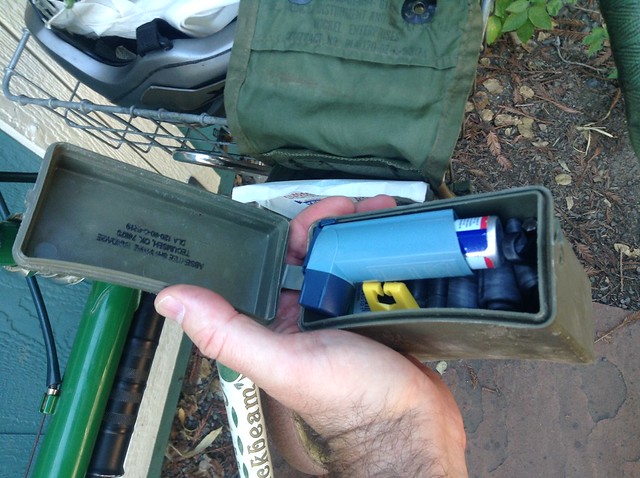
The box is easily removed for use.
And overall it complements a green Quickbeam quite well.
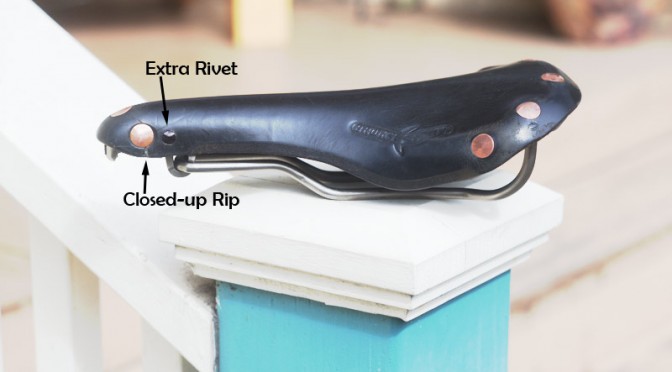
I bought a bargain-priced titanium-railed Brooks Swift from one of my internet friends. The Swift is a ‘racier,’ ‘sportier,’ ‘spendier’ leather saddle than my B17, and a whole different category of throne altogether than Angelina’s B72. I needed a new saddle for either the Singular Gryphon (more on that later), or the Ross (as it gets the Singular’s gears), and I liked the idea of narrower (for the Gryphon), and lighter (for the Ross).
The price was right, but with one drawback. The leather was ripped at the nose, cutting underneath one of the rivets. The seller said it was “ride-able as is,” but at 240 lbs, I figured it would last me about a week. Simply squeezing the ‘roof’ of the saddle towards the rails made the stretched leather pull away from the nose rivets. My first thought was to glue Tyvek to the back of the leather as a reinforcement. Tough, and free in the form of Fed Ex envelopes, I figured it would at least buy me time. Guess who doesn’t have free Tyvek Fed Ex envelopes anymore?
I raided my wife’s sewing supplies, and got a square of mattress ticking material. Tough, cool-looking, and free. Those are like my favorite qualities in a material! I cut it to go around the post of the rivet, removed the cantle from the nose of the saddle, and glued the fabric to the back of the leather.
The backing definitely helped keep the leather rip from spreading under pressure, but it didn’t seem strong enough to do the job on its own. I added some Crazy Glue to the torn edges of the leather and squeezed them together while I moved on to Plan C.
Plan A was actually to buy a new leather top and some rivets and just replace the leather entirely, but apparently I just dreamed that possibility. When I went looking in the usual places, no new Brooks leather tops were to be found! The titanium undercarriage alone costs about as much as a whole new saddle, though.

So my brainwave here was to add some rivets to reinforce the leather at the nose, and spread the stresses. I had some rivets from my last project, in a couple types and sizes. I would have liked to use some real Brooks rivets from Wallbike, but I was seeing a funky server notice on their domain, and was afraid to order from the site.
I went to Orchard Supply Hardware in my town, and asked the lady by the gazebos and chaises longueses where the rivets were. “We have some kits. Like rivet guns? Pop rivets?” “No, I just need some rivets to hammer in by hand. Do you have a section with fasteners and things? Little drawers with different sizes of nuts and bolts?” “No, we don’t have anything like that.” (dumbfounded) “Would you like to see the kits?” (I thought you were a hardware store!) “Uh, no thanks.”
So I pawed through my own little drawers of fasteners, and came up with a handful of different rivets I’d bought as spares. The best bet seemed to be a pair of split steel ones. They were longer than the others, and it seemed like it would be easier to peen them over (Angelina – “‘Peen?’ Is that a word?”) in the awkward space inside the nose of the saddle.
So I needed to drill two holes through the leather and titanium. There’s plenty of extra material behind the existing rivets, and I had a Dremel with an 1/8″ bit. I marked each spot, and drilled neat holes in the leather… and made tiny dents in the titanium. Lots of nasty dentist-drill whining, lots of holding the Dremel exactly perpendicular, and very little progress. After about 10 minutes and a noise complaint from the child, I put the project aside and emailed a cycling work friend who is a mechanical engineer.
He said that with titanium, you want low speed, lots of torque, and probably a drill press. So… the opposite of a Dremel. He probably just Googled it, but it was helpful. I got out the de Walt 12v drill, set it to “1,” and used a different 1/8″ bit to drill the holes, never pushing the trigger more than halfway, keeping it slow. It was work, but at least it made progress. For the second hole, I put a cork inside the nose to protect the bit when it finally popped through.

I used a small hammer with a smooth striking face to drive the rivets into the holes, then popped them out to wallow the hole out a little wider), then tapped them back through. I wanted the rivets snug in the holes but they didn’t go as flush as I would have liked.
I separated the ‘legs’ of each rivet with a sharp steak knife (the least used knife in a vegetarian household), and used a nail set and the hammer to beat them flat against the inside of the nose. I have a large antique monkey wrench I used as a makeshift anvil.


It actually worked! I put the head of the wrench inside the nose, and did the final beating-down of the rivet with the hammer, and then went around and touched up the original rivets that were coming away from the leather a bit.


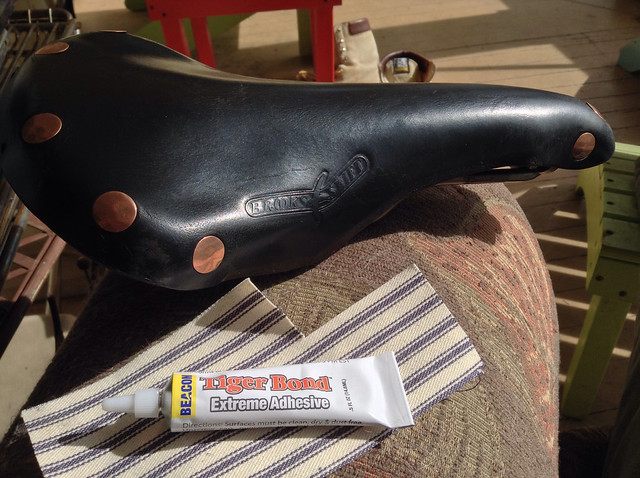
“Bam bam bam!” Much nicer. “Oh, that was easy.” Next time, I’ll definitely get the official Brooks copper rivets.

I put a little Sharpie on each rivet head (lasted 30 seconds of riding), and also on the ragged edge of the fabric I used as the backing reinforcement (lasted much longer).


So this makes two Brooks saddles I’ve rehabilitated with rivets and the Internet! After three rides, I can say that it’s a very comfortable saddle, maybe more so than my B17.