Blog

  • New blogs for old subjects

    I set up two new blogs, one for my portfolio and resume, and one for my bike tinkering stuff. I may just leave my unpalatable political philosophizing over here.

    www.PhilipWilliamson.com: my portfolio and resume. Stuff I’ve made over the last 20 years, professional and personal work from the last 20 years. PlayStation game console interfaces, toy store website design, assemblage sculptures, weird comics and more.

    www.BikeTinker.com: Me breaking stuff on my bike and having to fix it. I’d like to showcase people’s bike makeovers there, too. Maybe sell some bike-related kits or artwork.

    I also made a blog about my dog, but I haven’t put much time into it… I kind of went on a WordPress bender, there.

  • Optimal Tire Pressure for bicycles

    Optimal Tire Pressure for bicycles

    EDIT 2022:

    Just use Jan’s calculator:

    Run it for your bikes and write the pressure on the tires or the rims.


    Ignore all this old stuff:
    Here’s a short overview of tire pressure on the Problem Solver’s blog. It’s a little more concise than this page, and has more pictures.

    The Calculator

    The pressure calculator was created by Dave Adams, who sent it to me because of a tire pressure post I’d put up with an extended chart. You can open the spreadsheet in Open Office, Excel, or Google Docs and use it for free. Just remember “Dave Adams” when you use it.

    How to Use It

    Fill in the yellow fields in the spreadsheet (tire width; bike and rider weight; percent of weight on each tire). Go pump your tires. You can make (copy) a tab for each of your bikes, and make the tires and rider fatter or thinner over time (or adjust for touring loads).

    The Science

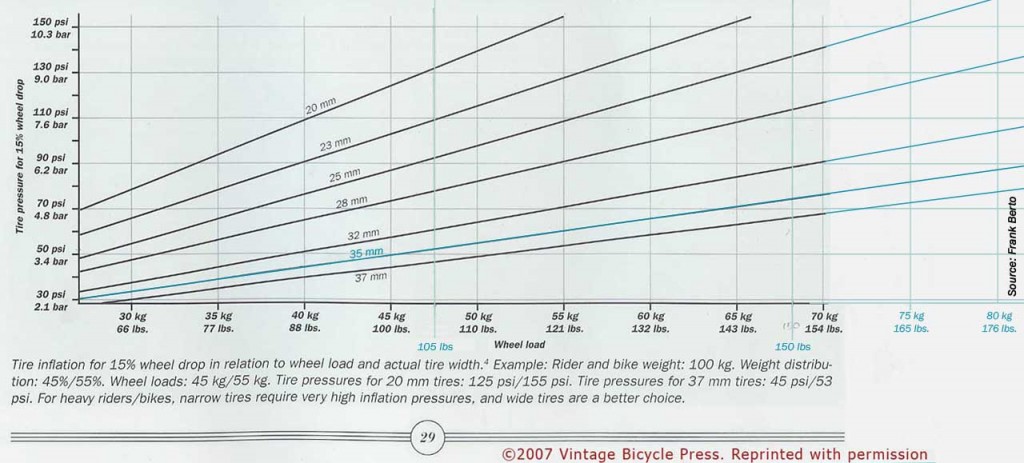
    According to Frank Berto and Jan Heine (of Bicycle Quarterly magazine), two top bicycle science guys, the most efficient bicycle tire pressure is one that gives you a 15% drop in tire height when you get on the bike. “This tire has too little air!” It’s squishy and hard to turn. “This tire has too MUCH air!” It loses energy bouncing off small surface irregularities. “This tire is JUST RIGHT!” Fifteen percent is the Mama Bear of tire drop.

    Given that you want each tire to ‘drop’ 15%, and bikes don’t weight the front as much as the rear, you don’ t want the same amount of air in each tire. It seems obvious when you think about it, but it was  revelation to me.

    Most bikes put 60% of the weight on the rear, for a 40-60 fore-aft weight distribution. The “Quickbeam” tab in the spreadsheet is set up this way, and I actually weighed the bike with me on it to get the split. I could have saved some work and trusted to Bicycle Quarterly, but I like to check things for myself.

    Low-trail French Randonneuring bikes are different, with only 55% on the rear. The “Ross” tab in the spreadsheet is for my low-trail Ross Super Grand Tour fixed gear tourer. Also weighed out accurately to confirm the BQ numbers.

    Dave says his equation looks like this:
    PSI = 153.6 * Weight / (TireSize^1.5785) – 7.1685

    History

    A few years ago, in the Spring of 2007, Bicycle Quarterly had a “Tire Drop” article based on Frank Berto’s research about proper inflation for best efficiency, in which they published a very useful graph, and instructions on how to set up your tires.

    It didn’t have a line for 35mm tires, which I used at the time, so I added another line, and extended it to allow for heavy loads. Jan Heine gave me permission to republish the Bicycle Quarterly graph with my additions, and it turned out to be pretty useful for some people. I actually had an internet friend send it to me, not knowing I’d posted it in the first place.

    graph showing optimal inflation for bike tiresDave Adams saw the post in his research on the same subject, and sent me a copy of his spreadsheet, which I’ve been using ever since. With his permission, I posted it to the  RBW (Rivendell Bicycle Works) Google Group, where it’s also archived.

  • Mountain bikes with drop bars

    Mountain bikes with drop bars

    I’m a big fan of flared drop bars on mountain bikes. Any bike, really. These days, there are several to choose from, and more on the way.

    The trick with the off-road drops, is getting a stem that will get the bars high enough. Proper high-rise stems are less common than the bars that need them. My Bontrager has On-One Midge bars, but uses a kludged stem-and-extender setup to get the bars high enough.

    Winter Bicycles makes stems that fit the bill. The super-high-rise stem Eric made for a Fat Chance “Monster themed” bicycle looks like a perfect match for the Bontrager. Four-bolt face plate, extra tall, and with bike mojo.

    Read all about it.


  • Torpedo internals

    Torpedo internals

    The newly rebuilt and reinstalled wheel seems to be in high gear all the time, so I’ll have to pull it all apart again.

  • Hubstripping site is for sale

    The Hubstripping site is a great resource for learning about internal gear hubs, and connecting with people who can actually help you get one back on the road.

    It was a great resource for rebuilding the Sachs Automatic I bought on eBay. Through the comments section, I met very helpful people. One fellow had scanned the original maintenance poster and put it on Flickr, and Jens at Scheunenfun.de sold me a replacement driving ring after I broke the original. Where else can you get something like that?

    Apparently Marco has moved on to other things, and has put the site up for sale. I hope the new owners maintain and expand it. I wonder how much a site with 15,000 visitors a month goes for?

  • What is a Torpedo Automatic hub anyway?

    What is a Torpedo Automatic hub anyway?

    Ha.

    We’re glad you asked.

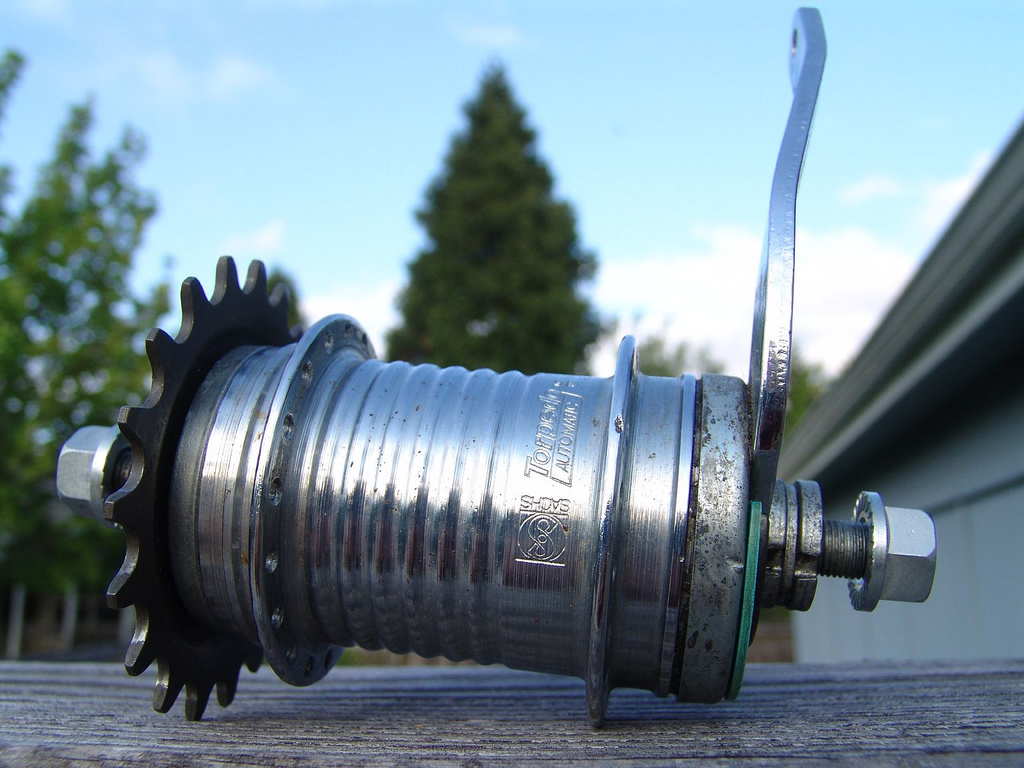
    Fichtel & Sachs Torpedo Automatic "blue" hub

    A Sachs (Fichtel & Sachs, or F&S) Torpedo Automatic is a two-speed internally geared hub. It’s like a Bendix kick-back, but German, and you don’t have to kick back. It changes gears automatically at a preset speed.

    At a certain speed, governed by a tiny spring, centrifugal force kicks out two brass “wings” inside the hub, and they engage the overdrive. About halfway across an intersection (7 to 10 mph), the high gear will kick in by itself, and you’ll suddenly be pedaling harder and going faster. It’s pretty perfect.

    The hub is incredibly cool, incredibly heavy, and really fun to ride. For me, the only downside is the coaster brake.

    The low gear is the direct drive (1:1), which means that when you’re cranking up a hill, you aren’t running through the gears. Everything’s locked together and you aren’t wasting any power on the transmission.

    The 1:1 low gear is why Bendix Blue-band kickback hubs are the most desirable ones. The Red and Yellow band Bendix hubs have high-gear as the direct drive. The Sachs hubs are regarded as better-built, more durable, and with a better coaster brake than the Bendix hubs.

    Speaking of which, similar hubs are the aforementioned Bendix kickbacks, Sachs Duomatic kick back hubs (like this Automatic, but you backpedal to change gears), and the new Sturmey-Archer (Sunrace) S2C. The SA S2C is the bargain deal, since you can get one for ~$65 brand new, and these Torpedos cost ~$160 shipped from Germany.

    As far as I know, the Sachs Automatic is the only two-speed hub ever invented that will shift for you.

    Sprockets are the widely available three-notch ones used on Shimano and Sturmey-Archer hub gears for the last million years. New ones run $8-$15, and can be ordered from your local bike shop.

    For more information on this, and internal gear hubs in general, visit the Hubstripping site. If you have a Duomatic or Automatic that needs parts, email hansen auf scheunenfun.de. He provided a replacement driving ring for this hub.

  • Gear ratios for Torpedo 2-speed hubs

    Figuring your gears is a little tricky with a two-speed hub that shifts by itself. The low gear is 1:1, the high gear is 1:1.36.

    The low gear is direct-drive. There’s no fussing; the gear you calculate on Sheldon’s gear calculator is the actual low gear. It is the 1:1 gear.

    The high gear is 36% larger. I plugged in larger cog sizes until I got ones about exactly 36% larger. I just noticed that Sheldon’s calculator will let you add fractional cogs!

    I’m a double idiot – I just noticed that Sheldon’s gear calculator lets you choose a “Sachs Duomatic / Automatic” hub in the Internal Gears dropdown. This way is a little easier to read, though.

    I have a 19t sprocket, and a 22t sprocket. I also have 39, 40 and 42 tooth chainrings I think might work for this project.

    The “high gear equivalent” for the 19t is 13.97 (let’s call it a 14). The “high gear equivalent” for the 22t sprocket is 16.18. Again, 16 is plenty close.

    With a 19t cog and a 39t chainring, I get a low gear of 56″ and a high of 76″

    39
    40
    42
    19t low
    56.1 57.5 60.4
    36.0 %
    high 76.3 78.2 82.1

    With a 22t cog and a 42t ring, I get my ideal setup:  52″ low and 71″ high gear.

    39 2.6 % 40 5.0 % 42
    22t low 48.4 49.7 52.2
    36.0 %
    high 65.9 67.5 70.9

    The Sachs Torpedo 2-speed gives a slightly wider ratio than my double fixed setups that use a 17/21 Surly dingle cog and a four-tooth chainring difference.

  • New F&S Driving Ring!

    A new driving ring for my Sachs Automatic hub!

    Last year I tried to get one of these to replace the one I broke. I contacted Jens Hansen at Scheunenfun.de, and got another ring, but it had 10-knobs, instead of 9. That was the first either of us knew that there were two styles.

    So… last week I emailed him again, to see if he’d encountered any 9-knob rings, and he had one. He was also willing to take Paypal, which is 10x cheaper than Moneygrams.

    Today the part arrived! I was so excited I went ahead and took the hub internals apart and replaced the broken piece. I’ll put up a post about the process in the next couple of days.

    So far it looks good – I’m just checking gear inches.

  • Magical Wheelism’s fantastic machines

    ferdinand (li’l red), originally uploaded by magical wheelism – corey todnem.

    Magical Wheelism, a Flickr contact of mine, draws the most beautiful bicycle machines. I love the way the drawings look, and I love the ideas behind the concepts (so to speak).

    Treadle-powered bikes, bike where you lie prone, bikes with baroque curlicues. Amazing and inspiring. The bikes speak for themselves.

    He says he’ll soon have a prototype built. He’s doing the mitering, brazing and painting himself. I think that’s really cool. Fabricating is when tinkering goes pro.

  • Protected: Seats and posts

    Protected: Seats and posts

    This content is password protected. To view it please enter your password below:

  • New Words

    Bigly
    Smilable
    Motoristic (it means be-engined)

  • Skate Deck pedals

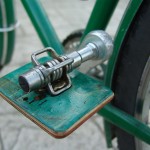
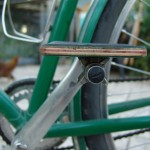
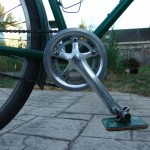
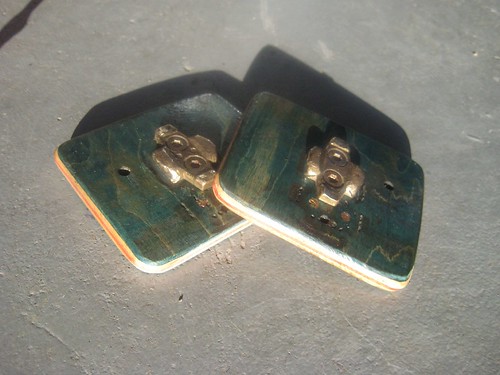
    You can make platform pedals out of recycled skate decks with a saw, a drill and a wood rasp. The platforms clip into clipless pedals, so you can ride your race bike in sneakers.

    skate pedals

    I’ve been riding these for about 5 years, almost exclusively. They’re the most comfortable pedals I’ve ever ridden, by a wide margin, and very grippy in all conditions except slick mud. Plus, they let you switch your pedals from clip-in to free-pedaling in about four seconds.

    (more…)

  • Grant Petersen shows how to draw a bicycle frame.

    Grant Petersen shows how to draw a bicycle frame.

    This is pretty cool. In the “Peeking through the Knothole” section of Rivendell Bicycle’s site, Grant is going to walk people… the world, I guess, through how to draw a bicycle frame, one baby step at a time.Grant Petersen's favorite eraser

    Step 1. Get the drawing tools. 11×17 graph paper, 360° protractor, metric ruler, metric triangle, pencil… and an eraser.

    I think in an old Reader, he did a similar thing, where he showed you how to make a full-size production drawing of a bike frame. Maybe it was the Bridgestone Catalog.

  • Cork light-mount

    Cork light-mount

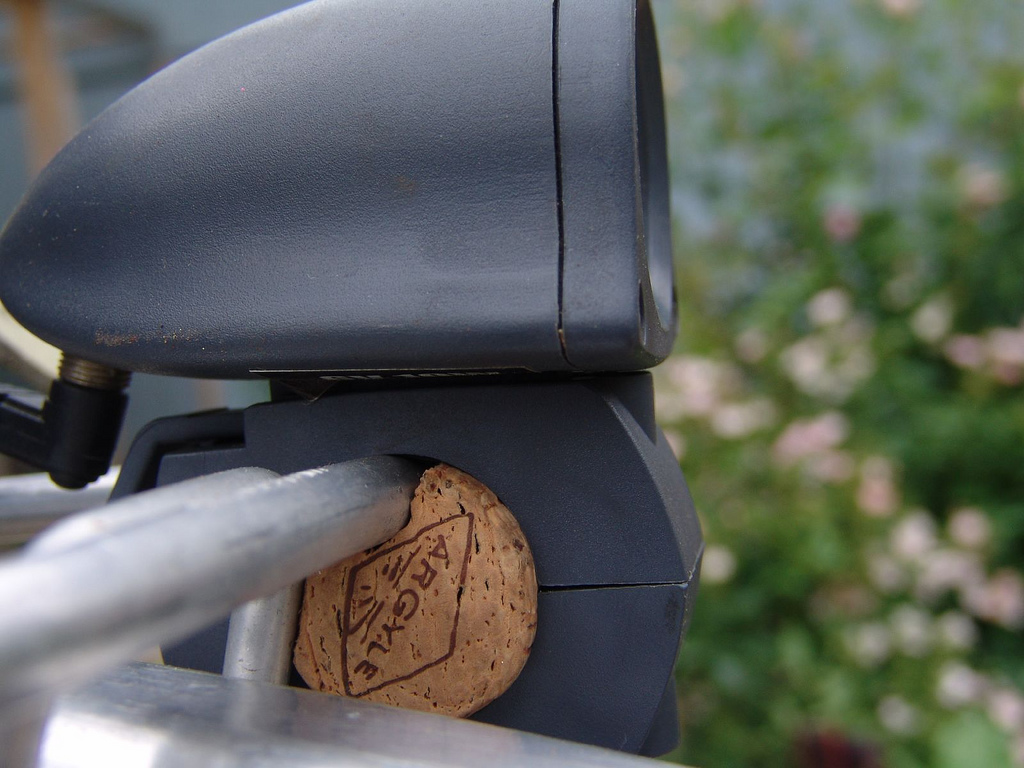
    The light on the rack, shimmed with the cork
    cork shim to make a handlebar-mount light fit on a front rack

    A light handlebar mount is shimmed to fit a Blackburn front rack with an Argyle champagne cork.

    (more…)

  • Copper wire handlebar twine


    Grant Petersen of Rivendell Bicycle Works has popularized “twining and shellacking” bicycle handlebars to finish off the bar tape.

    I agree with Grant Petersen most of the time; I’ve gone back to cloth tape, tried a Brooks saddle, and I haven’t ridden clipped-in in two years, even on technical-ish singletrack. I don’t know where my cycling gloves are.

    While my bars are an inch above the saddle (but not with a Nitto stem), and I only use electrical tape on black cork bar tape, I don’t like the idea of melted bug parts coating my handlebars, and I think hemp twine looks pretty darn rustic. I’ll stick a feather on my bike any day, but I’m not into the twine look.

    I wanted something that made a fancy transition, without going all nature-boy, and I have a spool of copper wire left over from an art project. We put on a kids’ collage festival with decent materials, not egg cartons and toilet paper rolls*.

    So… copper wire bar twine.


    Make a little loop-y, and place it across the area you’ll wrap. Here I’m covering a half-assed wrap that has lasted for more than a year, but I want a more substantial and clean ending for my bar tape.
    You begin wrapping from the open end of the loop, up to, but not over, the closed part.

    Wrap, wrap, wrap. The new wire kind of slides in between the old wire windings, and fills them in.
    When you get to the end, you poke the free end through, in order to pull the free ends back under the wire.

    Pulling the beginning strand pulls the loop and free end back underneath the wire wrap.


    I hope you like the look, and consider wrapping your bars with any twiny, wiry material you may find. Brightly insulated phone wire might look cool…

    *It’s a crime to give students crappy art materials, even if they’re making trash art.