Blog

  • S3X gears I’m considering

    Gear chart using Gear Inches

    For 700 X 38 / 38-622 tire with 170 mm cranks and Sturmey-Archer 3-speed fixed gear S3X hub.

    1.0 (1:1 direct drive high gear), 0.75% (reduction); 0.63 (Low)

    40 tooth chainring, 15 tooth cog.
    40×15 : 72.9 – 54.6 – 45.5

    42 tooth chainring, 15 tooth cog.
    42×15 : 76.5 – 57.4 – 47.8

    44 tooth chainring, 15 tooth cog.
    44×15 : 80.1 – 60.1 – 50.1


  • Sturmey S3X arrives!

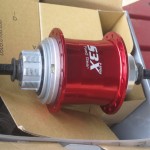
    Sturmey S3X arrives!

    Very exciting.

    red S3X fixed-gear hub, originally uploaded by BikeTinker.

    I wanted a black one, with a bar-end shifter, but they only come in 36 hole spoke drillings. The only option for a 32h hub with 120mm track spacing is the red one, and it comes with a thumbshifter. It shouldn’t matter, because I want to do the Pants Pants seatstay-mount with it.

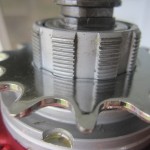
    I did see that since it’s splined for a cog, and also threaded to receive (supposedly) a freewheel, it might be possible to stack two cogs up for ‘dingle’ (sextingle, actually) setup. The splines appear to be cassette or singlespeed/BMX cogs, rather than classic three-tab Sturmey or Sachs internal-gear hub cogs.

  • Protected: Carradice front bag hack

    Protected: Carradice front bag hack

    This content is password protected. To view it please enter your password below:

  • shoe-tongue mudflap remount

    shoe-tongue mudflap remount

    shoe-tongue mudflap mount, originally uploaded by BikeTinker.

    I moved the mudflap I’d made from an old shoe tongue (green leather PF Flyers Hi-Tops, to be precise) from the inside of the fender to the outside. I used the same double eyebolts I’d used on the inside, and cut the flaps down to the wide part.

    side view of the Quickbeam with the mudflaps movedThe flaps on the inside would catch the tire on bumps, and get sucked up inside the fender. Partly it was the size of the tire, and the vestigial knobs (they’re IRC Mythos CX Slicks, and I cut the side knobs off with scissors), but mostly the problem was that when the flap was swept back by the rushing wind of my incredible speed (about 4 knots), folded origami-style, and poked a ridge straight at the tire. Fold a paper cup in half, and you’ll see a similar ridge.

    flap on the outside of the fender nowI used a hole punch to punch the holes, which worked a lot better than the awl on my Swiss Army knife.

    Tools - hole punch, nut driver, hex tool

  • skateboard grip tape on MKS GR9 platform pedals

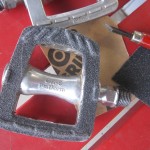
    skateboard grip tape on MKS GR9 platform pedals

    I’ve had these pedals for a while, but found them to be too narrow for my size 12 feet. I put them on my wife’s 3 speed Steyr when she broke a pedal axle.

    They get a little slippery in the rain, at least for me. Hopefully the grip tape will add some gription when it’s wet. She wants rubber block pedals again, so I’ll probably try them with clips and straps on another bike pretty soon. I don’t know if the tape will make it too hard to use clips, or not.

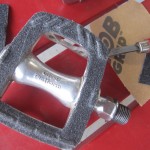
    I cut out a square of “Mob” grip tape for each pedal, and used a woodworking blade to cut around the pedal shape.
    I also used the flat of the blade to press down around the bumps on the surface of the pedal. In some cases, I scored the edge of the bump in order to make it look ‘raised’ enough.

  • Prototype skate-deck platforms for quill pedals

    skate-deck_mks-pedal, by BikeTinker.

    At any rate, I’m experimenting with attaching the skate platforms to other kinds of pedals, starting with the uncomfortable and slippery ones I already have.

    Quill pedals always hurt my size 12 feet. There’s a big spike at the end, and the cage digs through my shoes. I don’t find them to have much gription, either, especially in the rain.  In order to use these pedals without clips or straps, I decided to see if applying Skate Deck Technology to them would make them more comfortable and more usable.

    I’ve been riding my skate-deck clip-in pedals on Crank Bros pedals for years. I love the feel and grip of the skate deck platform, but I never ever ride clipped in, so the ‘convertibility’ factor isn’t useful for me anymore. I think there’s still a lot of value in the idea for people who do clip in for long rides, but would like to jump on their good bike to ride with the family, or run some errands.

    I may go to a BMX pedal with tape, but first I’m going to see what I can do with my Campy Victory aero pedals with the foot-guillotine rear cage.

  • superglue E6 plastic tab

    superglue E6 plastic tab, originally uploaded by BikeTinker.

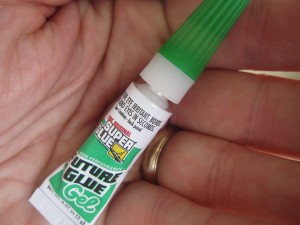
    I broke a second E6 lens! This cheapness of using discontinued bargain lights is getting darned expensive. I glued it with Pliobond, which failed, but the Superglue Gel has been holding for a couple of weeks now. future glue superglue for hard plastics

    Different plastics work with different glues, but so far the cyanoacrylate is a good choice for the brittle clear plastic of the E6 mounting tab.

  • E6 on lower nitto M12 mount

    E6 on lower nitto M12 mount

    E6 on lower nitto M12 mount, originally uploaded by BikeTinker.

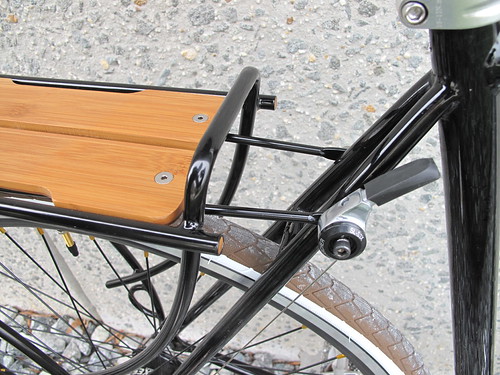
    I had to move my E6 down to the lower mounting point on my Nitto M12 rack. The top edge of the lens came up above the rack, and I broke the lens tabs on two lights. Luckily superglue gel seems to be holding.

    The lower mounting boss is M6, and the upper one is M5, so I had to buy another long bolt, and some aluminum tubing for the spacer.

  • 3 speed shifter mounted on the seatstay

    Friction shifter for 3 speed hub, originally uploaded by antbike.

    I’ve wanted to do this for a long time, but assumed I’d have to fabricate a special mount for the bar-end shifter. I was thinking I’d mount an inch of handlebar side-on to the tube (big hole on one side for the allen key, small hole across for the bolt).

    This is an Ant bike, presumably with a downtube shifter brazed onto the seatstay, but according to Pants Pants’ flickr stream, apparently you just need a longer M5 bolt!

    The whole story is here on Pants Pants’ photo (he doesn’t didn’t used to allow bloggeration of his pictures). A closeup picture of the seatstay mounted shifter.

    3-speed shifter

    His bike is the impetus for me to finally buy the S3X hub I’ve been talking about for years!

  • NAHBS 2011 pics on Flickr


    Naked Bikes, originally uploaded by dirtragmag.

    I couldn’t make it to Austin for The North American Handmade Bicycle Show (NAHBS 2011), but I’ve been following all the new pictures from the show on Flickr.

    This is a DirtRag shot. I’m happy they’ve got the pro photo setup there. (“Streetwear enthusiast, etc.”) John Prolly, BikePortland and N.Gawa have been putting good stuff up as well.

  • transformer rack – YipSan


    transformer rack

    Originally uploaded by YiPsan bicycles

    Total genius. The porteur rack comes apart simply, and reconfigures into lowrider mounts and a narrow rack. YipSan!

  • Sylvan wood lugged bike


    Sylvan wood lugged bike, originally uploaded by BikePortland.org.

    Wooden bike faceted like a pencil. At NAHBS 2011, photographed by BikePortland

  • DIY bike lanes – paint them yourself!

    Art, graffitti, or infrastructure? Cyclists in Guadalajara made their own bicycle lane!

    Read more here: Takeapart.com – guadalaraja-diy-bike-lane

    They say in the movie that they made a mile and a half long bike lane for $1000. It costs their government a million dollars to do the same job. I had an epiphany a little while ago, where I realized that wherever you find ‘government waste,’ you also find private enterprise taking the money.