Blog

  • Mango in Duvall

    Mango in Duvall, originally uploaded by Watson House.

    A velomobile on the Seattle-to-Portland run. Tres chic. I am fascinated by these. They’re like the future… today!

    There’s one in town a local gentleman made. I have pictures, but I’d like to get an interview.

    I originally saw this in the “Biking with dogs” group on Flickr. I wish there was more activity on that group… (hint hint).

    Casey and Duncan, originally uploaded by Watson House.

  • Oregon Manifest 2011 announcement

    I’m very excited about the announcement of the next Oregon Manifest Constructor’s Challenge. I covered the 2009 Manifest for Bicycle Times. Modeled on the French Technical Trials of the 30s, the Manifest seeks to encourage innovation, and then test it with a road trial.

    Here’s what the Manifest organizers have to say:

    ANNOUNCING THE 2011 CONSTRUCTOR’S DESIGN CHALLENGE
    We’re looking for the ultimate modern utility bike! The Oregon Manifest Constructor’s Design Challenge is a unique design/build competition in which some of the country’s best custom bike craftsmen and select student teams vie to create the best bike for lifestyle cycling. We know that the two-wheeled revolution won’t come on the saddle of a race bike or a tricked out fixie. The utility bike is the transportation mode of the future for millions of Americans who want to live healthier, more sustainable lives, but don’t think of themselves as “cyclists.” Find out more on our newly updated website.
  • Porteur-style rack design

    Porteur-style rack design

    I was inspired by this gallery of a French Jacques Schulz porteur bicycle, to copy its rack with some changes to its mounting points. I also connected the swoopy bit at the back, so you could hook a bungee and carry a jacket or sleeping pad. Or maybe a can of coffee.

    I think the attachment scheme has some potential, but probably needs refinement. The bottom and seat collar mounting points are slotted, and the collar would mount with the bolt at the front or back, giving a wide range of angle adjustment to mount the rack flat.

  • upcoming projects

    Stuff I’ve been doing instead of bike tinkering

    1. I’ve been working on some bike-y things, but not bringing them to fruition.
    2. Spending a lot of time prepping and photographing non-bicycle art for sale on Etsy. Sold a couple pieces, which is very gratifying.
    3. Lots of time with the family (birthday, thanksgiving, birthday), which will continue on into 2011 (birthday, christmas, new year, birthday, anniversary).
    4. Also, quite a bit of reading (The Lost Cyclist, Surface Detail, Spook Country). My son asked me “what’s your favorite thing?” And I said, “reading, probably.” He said, “My favorite thing is doing things with you and mom, like going out to eat, or playing games with you.” I said, “ouch!”
    5. And going to bed at a reasonable hour, which is kind of novel.

    Bike projects hanging fire

    1. Take apart the Sachs Automatic, and adjust the spring so it actually shifts. I got some great information off the Bike Forums from a guy who learned to wind his own springs(!!) to get the exact shifting he wanted. Hopefully I’ll just have to rotate my spring 90°.
    2. Someone sent me pictures of the bamboo bike they made, with lots of custom details. I need to put up a post on that.
    3. I cut up some skateboards to modify road quill pedals, but haven’t finished that project.
    4. I freshened up a Gary Fisher Utopia for my son, but he thinks it’s still too big, and he still loves his Redline Junior. So I need to take some pictures of the bar wrap, figure out why the dingle setup skips in the high gear (horribly embarrassing), and figure out what the bike’s purpose will be.
    5. I may actually shellac some bar tape, which I’ve resisted for years. I may also mount a basket with zip ties, as an experiment. I feel zip ties are just a good way to lose your basket and beer, and crash, but people swear by them.
    6. I have some ideas for a couple of novel bike racks.
  • Haworth Swing Pedal

    Haworth Swing 02, originally uploaded by gmacleland.

    This isn’t tinkering – this is engineering. I saw these pedals on Flickr a while ago, and was quite taken with them. For about £300 (a million American monies), you can possibly have a pair of these produced.

    Geoff Apps, the designer, has this to say (or just click the picture and read it for real on Flickr):

    A new version:

    A re-design of these swing pedals is now complete and the drawings are with the engineer machinist. The bearings are slightly bigger and have full shields on both sides; the bearing is almost flush to the crank, so Q-factor is reduced. Additionally the platform is wider (fore/aft).

    Who thunk it up? Did you invent it?

    No, I didn’t invent this type of pedal; for possible patent purposes I carried out some research, and the earliest version I can find dates from 1904.

    However, this particular design is my own work and came out of my head.

    Why this? (Aside from plain cussedness, and/or coolness)?

    The design has a number of advantages:

    1. The swing action cradles your foot, reducing the ‘throw-off’ effect of conventional pedals ~ the reason toe-clips, SPD and the huge spikes on DH pedals have become generally accepted.
    2. It allows a (relative) lower saddle position to be used ~ in my case I have a very high bottom bracket height. However, these pedals would be useful for a very tall person, or shorter person who lacks confidence.
    3. Knee health. There is some research to suggest that the motion of the pedal platform is beneficial (or less harmful) for the knee joint.
    4. Conventional pedal bearings are small, and getting smaller. They wear relatively quickly and are difficult to maintain. These pedals have substantial bearings which are straightforward to maintain and replace.
    5. I can’t think of anything else just now, but one thing is for sure; they don’t make you go any faster!

    Who’s Howarth?

    The name Haworth is in honour of the engineer who made the first prototype pair; he hand-made the pedal threads in stainless steel!

    Can I buy me some?

    I thought it may be possible to market these, but haven’t found anyone who is vaguely interested in them ~ too unconventional, I suppose.

    Will need buckets of dosh to get them into any form of production.

    No really, can I buy me some?

    If you know a machinist, I could send you drawings and you could get some made up (mine cost about £300, was quoted up to £1,200).
    In return you could make a small donation to my Prototype Fund!

  • Tapebubba’s Grip King pedal mod

    My RBW list (and etsy) friend TapeBubba modified his Rivendell/MKS Grip King pedals to have more lateral support. Watch the video and see how he does it.

    I think it’s a great hack. I’ve had that ‘roll off the side of the pedal’ feeling myself, and my feet are fairly narrow.

    He removes the cage pieces from the pedal, makes a U out of aluminum strap to go around the body of the pedal. The bottom of the U makes an outside edge for the pedal, and the cage pieces are screwed back on, sandwiching the strap in place.

  • Onya Cycles “Front-End Loader”

    Cold Iron says: “A leaning trike with three wheels on the ground. Not possible with other cargo trikes. Stable like a three-wheeler (because it is), maneuverable like a two-wheeler. Very cool.”

    Cool? Or super-cool? How do they do it??

    Onya Cycles in San Francisco… says they’re ramping up production of these leanable trikes. And they appear to be affiliated with these geniuses who can turn a 3D structure into a set of flat, stitchable (able to be sewn together) panels for hot air ballons and the like. OtherLab. Holy Cow these guys are cool: HowToons.

    The machine itself was fabbed (bike lingo for ‘made’) by Joel Hirschfeld at Hirschfeld Fabrications.

    Well color me impressed.

  • Just about time to retire the Redline Junior

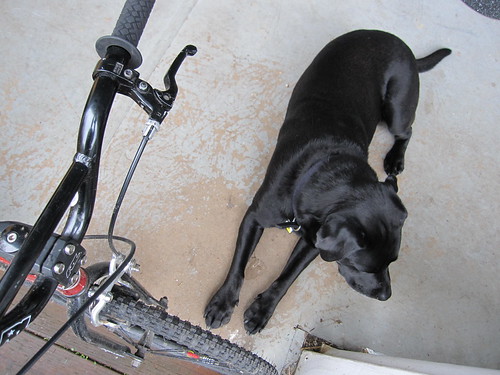
    redline junior and dog, originally uploaded by BikeTinker.

    Bike is sold, and soon will have a new home with a new kid!

    The kid has had this bike since he was five, and the seatpost is about six inches past the min insertion mark. There’s still about four inches in the frame, and he’s not racing it, so I’m not worried.

    It’s a big jump from a 20″ (ISO 451) tire to a 700c, but that’s what we’re doing.

    Pictures to follow. I’d do it now, but it’s dark and cold. Plus I forgot to buy headset spacers and mountain brake cables when I bought the shorty stem for the new bike.

  • Taking the dog for her run

    quickbeam and dog, originally uploaded by BikeTinker.

    I sometimes I vary our walking routine with a fast ride around the neighborhood. She’s running further, and going faster overall, so I think she’s getting back in shape after the sedentary summer. We actually get out more in winter.

    I’m only holding the leash this way for the picture.

    The leash-end is usually in my right hand, tight around the back of the stem, and held again in my left hand against the bars. There’s not enough slack for her to get ahead of the bike, it’s pretty stable against jerks and lunges, and I can reel it in a bit to make passing drivers more comfortable.

    It’s hard to get a picture of the bike-leash-hands setup without an assistant.

  • Spear Bike – too cool

    Spear Bike, originally uploaded by richardmasoner.

    Fantastic-o apocalyptic recumbent chopper machine. My favorite part might be the two in-line rear wheels. As seen in Richard Masoner’s SF Bike Expo 2010 flickr set.

  • How to mount two lights on a Nitto rack

    How to mount two lights on a Nitto rack

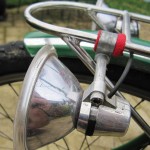
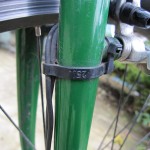
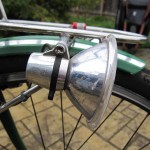
    Here’s how to mount two dynamo-driven E6 halogen lights to a Nitto M-12 mini front rack. This older-style M12 has two mounting points, but they’re on the same side – one is for an m5 bolt, the other an m6. The newest version of the M12 has two light mounts, and they’re lower.

    Mount the lights upside-down

    Mounted in the normal way, the lights stick up above the edge of the rack. To keep using the rack to carry things, you have to mount the lights upside-down, BUT when the lenses are upside-down, they have a bad beam pattern.

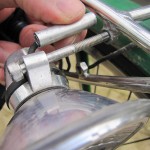
    So, you need to turn the lenses over, but you have to modify them a little to do it. There is a large ‘ear’ and a small ‘ear’ on the lens that fit into notches in the light body. Use side-cutters and a nail file to trim the larger ear down so it fits in the smaller notch.

    Use long bolts and spacer tubes

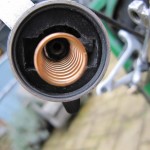
    You need two 3″ m5 bolts, and about 6″ of aluminum tubing. The tubing at ACE wasn’t all the same, so I used a long m5 bolt to check the fit. Use the snuggest tube that doesn’t bind.

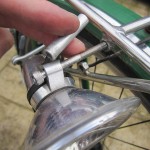
    The right mount goes together easily, and looks legit. Measure and cut a piece of tubing long enough to stand the light off the rack, but engages all the bolt threads in the eyelet. Line up all the holes and tighten it up!

    The left mount looks… quaint. Use a stainless P-clamp, an m5 Nylock nut, and about 8″ of cotton bar tape. Remove the rubber from the Adel clip, and put about five wraps of tape on the rack rail. It is a sturdier mount than just the clamp with its rubber sleeve.

    The left mount is sketchier than the right, but the second light is very nice at speed. I understand that an LED light like the Cyo or Edelux puts out more light than both of these together, so if you’re setting up one of those, just use one bolt and spacer and keep it clean. I plan to replace these two with a single Cyo LED light in the future.

    Trim the wires and run them neatly

    I hate cluttery cables, which is why I like multi-speed fixed gears.

    Trim the wires to length, and tie them down. I used a plastic cable tie at the top, and copper wire on the fork leg. If you think you’ll ever want to mount your lights on the bar, or sell them to someone with a bigger bike… do something else.

    E6 Rack Mount Picture Gallery:

  • Multi-speed Fixed Quickbeam

    Quickbeam, originally uploaded by gjtramey.

    From one of my Flickr and RBW group friends. I like his gear spread for a go-anywhere fixed gear bike. He’s using the Surly Dingle double-fixed cog and some larger rings than the stock Rivendell setup.

    Rings: 39/45
    Cog 1: 17/21 Surly Dingle cog
    Cog 2: 23
    Gears: 46, 50, 58, 62, 71.5

    I’ve migrated toward larger rings on road cranks, too, but I like his 23t flip cog better than a 15t cog. That’s a beautiful spread. He can drop from 72″ to 50″ without taking the wheel out of the dropouts. Flipping the wheel, his biggest and smallest gears have the exact same axle position.

    39
    rings 45
    17
    61.9″
    71.5″
    cogs
    21
    50.1″ 57.9″
    23
    45.8″ 52.8″

    Running the numbers, we can see that he must be using 32mm tires. And, uh, plus we can see them. 38 or 40mm tires will give slightly taller gears.

  • Furly® Surly Pugsley


    Furly® Surly Pugsley, originally uploaded by Mr Dewhurst.

    That is insane.
    It’s like a Yeti. Not the bicycle one, the Abominable one.

  • English Cycles mountain bike

    This bike has haunted me, ever since OHBS.
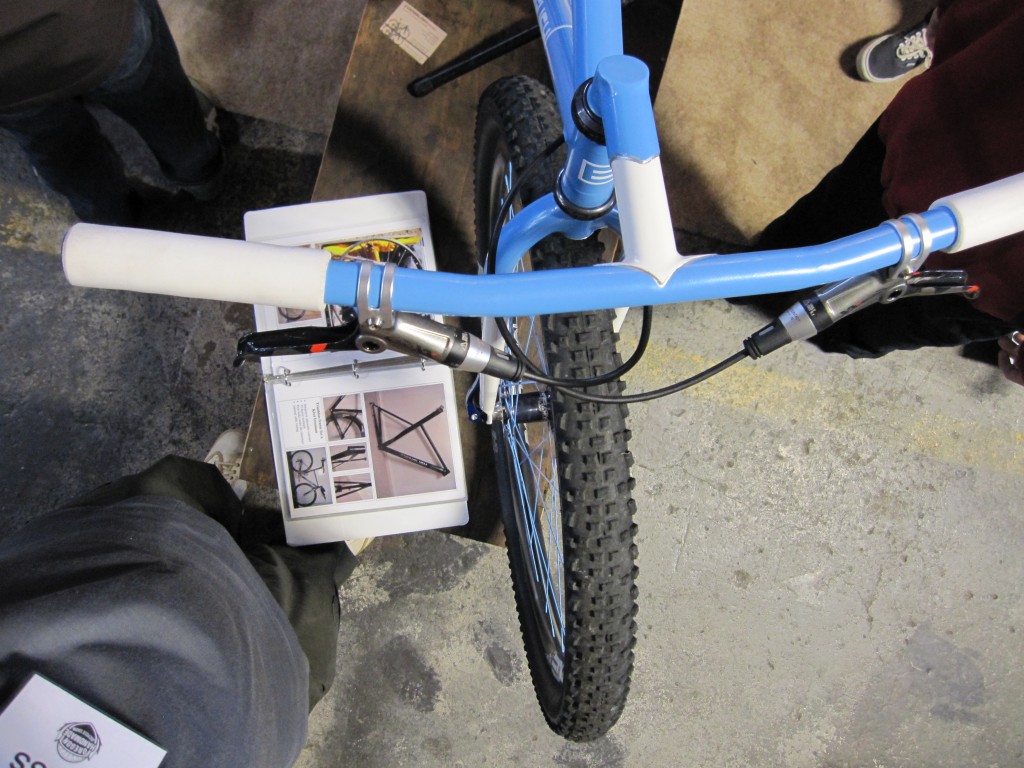
    The English Cycles bikes were beautiful, different, super-light and had extremely interesting engineering details.A  belt-driven singlespeed 29er, with internal hydraulic line routing, full-height seatmast, and integrated bar and stem that attach to the fork with a topcap under the fork crown. I saw several belt drives at the show; they’re starting to grow on me.

    The seat stays look like bird bones. Rob English assured me they were plenty strong enough, but they’re the lightest-looking I’ve ever seen. The thin wishbone is an English trademark – his 10.5 lb roadbike is even more spare. I like wishbone seatstays – it’s the Bontrager fan in me.

    english cycles mountain bike seat stays

    The seat mast is dead sexy. The other ones I’ve seen (Gordon, Speedvagen, Tsunehiro) use top caps, I think. Rob English’s design uses an internal wedge seatpost, similar to a quill stem. He says you need to remove the seat to adjust saddle height, “but how often do you change your saddle height anyway?” Mm. Depends. Maybe I’d drill a 9/16″ hole in the seat for access.

    Rob English and English Cycles custom mountain bike seatmast and rear triangleThe “one-piece” (two, I guess) bar/stem and fork setup was impressive. I love the fork style, and I’m a big fan of integrated stem-and-bar combos. Kind of like a seatmast, they preclude adjustment, but if you know your size and your setup they look really slick, and can save some weight. This 29er is 18.5 lbs.

    The headset top cap is actually under the fork crown, and it’s the stem that has the steerer tube (if I have that correct). The fork has two bolts on the back to clamp it on.

    I keep fantasizing about what an English Cycles snow bike would look like, and how light it would be. Perhaps a Schlumpf two-speed carbon Gates belt drive… *sigh* The breakthrough thought I had was that with the massive air cushion of a 4″ tire, you could build a very delicate machine on roadbike lines, instead of the overbuilt machines that snowbikes tend to be.

  • gloveless fingers – bike gloves

    gloveless fingers – bike gloves

    It was frosty cold this morning, and the backs and tips of my fingers and thumbs hurt like crazy on the bike.

    Finger Warmers!

    Really painful, and my right thumb still feels burnt. So I’m going to make some reverse-o bike gloves with just the fingers and thumb. An elastic strip will connect the thumb and pinkie together, and each finger-end will have a short section of elastic connecting to the next one.

    Soon to be all the rage. You saw it here first!

    Yes, this is kind of a joke, but it’s a lot like short sleeve jerseys and arm warmers, right? Fingerless bike gloves… and finger warmers! Shorts and knee warmers. Those weird sock-shoes with the toes built in…