Category: Projects

  • Jeff Lyon / Lyonsport trailer cycle

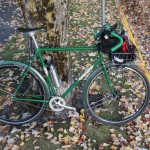
    This is extremely cool. If you poke around joe’s photo stream, you’ll see he’s doing something even more extremely cool with this bike…

    **Update: Racked and fendered! Way way too cool.

    Via Flickr:
    see also:
    www.ctc.org.uk/DesktopDefault.aspx?TabID=3614

    storkbitesman.blogspot.com/2007/08/ebay-gorgeous-jack-tay…

    www.blackbirdsf.org/taylor/8513.html

  • OX Brand Ti Cruiser


    OX Brand Ti Cruiser, originally uploaded by unclefuzzy_ss.

    That’s a cool bike – I hadn’t heard of them before BikeTinker commenter RA mentioned he’s getting a Groovy Cycles LD stem for one. I really like the double top/stay tubes and “triangulation” tube.

  • skate deck pedals – SOLD

    To a fellow Quickbeam owner. I have more on Etsy, but they’re all cleaned and polished. I like the punk-rock versions with the left-over graphics, myself.

  • finally, the joy of riding

    finally, the joy of riding

    You know… to work. And… with the dog. Still, the silence of the chain and bottom bracket, and the smooth shiftability of the bike, the gripness of the bars, and the pure attractiveness of the cleaner more colorful bike make me really happy.

  • More Tinkering

    More Tinkering

    After getting the Quickbeam’s S3X squared away, I mounted giant-sized 47mm Schwalbe Marathons, but the front couldn’t quite clear the fender.

    wtb dirt drop bars, rivendell quickbeam, newbaum's tape

    • Remove extra large Marathon tire, install Kenda Kwest in 37mm. Looks pretty good!
    • Pinch the tube under the tire bead, and have it blow 20 minutes later sitting in the entryway. 6″ blowout in a never-patched tube.
    • Put in a new tube. Lots of patches on it, so it’s got to be good.
    • As long as the wheel’s off anyway, clean the rim, hub and spokes.
    • Putting the wheel back in is a little fussy, because the allen bolt on the front fender stay pokes way in and makes it hard to get to the spades for the dynamo wires to attach. The rear stay is even worse. It almost touches the cog, and looks stupid.
    • Change out all the stay mount nuts for shorter ones that don’t crowd the hub or the dynamo wire tabs. Make sure they all take full-size hex heads.
    • As long as the nuts are out, I should reorient the V-O fender stay mounts that don’t quite “stay.” They’d been pointing up to get more of the stay inside the mount, but that didn’t help the grip anyway, they may as well hang down properly.
    • Hey, look, the front brake pads could use some sanding…
    • Snip the S3X shifter wire shorter. That’ll look better. Boom! Crazy hair! Wire strands splay out everywhere. Dammit.
    • Remove left crank and bottom bracket cup. Something down there’s been creaking. Grease up the cup threads, and inside, where it contacts the bearing. Reassemble. It only took a minute, and I think it worked.
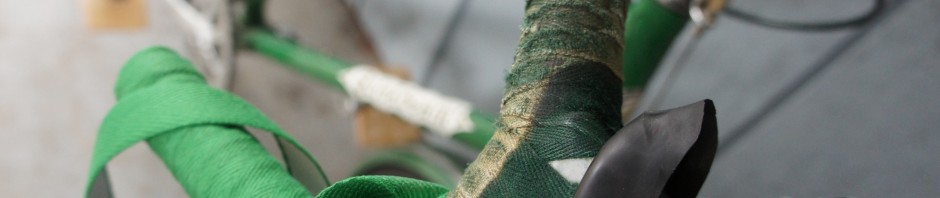
    • The rest of the bike is really starting to look fresh, and the tape is really skanky. I think I bought a roll of green Newbaum’s from Rivendell when I got the orange and blue for the Bontrager and the red and black for the Gary Fisher.
    • Peel off top layer of tape. Wow. That looks positively Victorian under there, like something a coal miner would wear. Cover it up, quick… with a single roll of tape for both sides.
    • That’s pretty half-wrapped; it barely comes past the hoods. Make up the difference with the tail-end of a black roll, and be done.
    • Go ride with the dog.
    • Suspect that the new oft-patched tube has a slow leak.
    • Ride to the store for 6 lbs of sugar, 6 pack, two sodas and a half liter of red wine vinegar in the front basket.
    • Find that the fender front fender is loose. The load is a littel wiggly, and something rattles when you whack the basket. Pop the wheel out, tighten the bolt that mounts into the rack, and get the wheel back on in seconds. All the practice has paid off!
    • Buy a fresh tube (SEVEN DOLLARS??) and remount the tire. Do all the stuff as before, but with fingers crossed.

    finally got this thing dialed in!

  • Tinkering

    After taking the dog for a long ride with the mountain bike (note to self: spend more time maintaining bikes than tinkering with them this winter), I got into the final adjustments on the S3X.

    • Adjust the cones.
    • Throw away the aluminum washer and replace it with one of the old thick anti-rotation (tabbed) washers. Looks pretty slick. The aluminum washer had already smashed into the thin steel washer, and was locking up on the axle threads. I don’t think I can get the aluminum washer off the steel, since it’s kind of grown around it.
    • True up the wheel. Easy peasy. I’m still doing the Jobst “only quarter turns” thing, but I still don’t like it. It makes it easier to grab the nipple, but I don’t feel you can get the wheel as true as using 7/8 turns and 19/32 turns.
    • Mount the new Schwalbe Marathon 47-622s I just got. Yeah, yeah, they shouldn’t fit on the Quickbeam with metal fenders, and they rub on the brake bridge mounting bolt, so…
    • Pull the rear fender and clean up the mounting. Replace the brake bridge hanger with a rivet! Rivets are low profile, and leave enough room for the hanger bolt. Also cut a new leather washer for under the mount, and file the mounting slot longer, to get the fender a micron higher. Replaced the cork chainstay bridge mount with an old bearing. Looks cool. These fenders need a respray, but I’m out of the Quickbeam-matching spray paint.
    • Mount the fender and wheel and Yay! It fits pretty well. That top fender mount nut had been a killer, even on smaller tires. Feel so good about the rear, I mount the front Marathon as well.
    • Whoops. Appears to rub on the nut mounting the fender to the Nitto rack. There may be a way around this, but I doubt it. The clearances are minuscule. I’m putting a different tire on tomorrow.
  • Sturmey S3X new guide nut

    Sturmey S3X small parts, originally uploaded by BikeTinker.
    David at Sturmey-Archer North America (yes, we’re on first name basis, and no, I didn’t have to tell him where I live) said he couldn’t really remember anyone breaking their guide nuts but me, and certainly not without dropping the bike.

    Nevertheless, the new guide nut is a lot sturdier looking than the original, and the previous replacement nut. No high-shine chrome, no sexy inscribed ring, and especially no extra set of holes!

    Before installation this time, I also put all the washers on the axle and tightened the nut all the way down and MEASURED THE GAP. It was 1mm wider than the thickness of my dropout. Oh.

    The gap on the left side was small enough to get tight, but the drive-side nut wouldn’t be able to tighten down all the way. Bear in mind that this is a different axle and internal mechanism than the one I broke the first guide nut on, so I’d measure before installation on any bike. Measure the dropout width, measure the gap left after tightening all the nuts and washers up finger-tight. If the gap is bigger than the dropout, add a washer.
    David did say that adding an extra washer would NOT mess up the shifting the same way using a long (AW-sized) guide nut would.

    I added the washer, and the wheel seems tight, and the shifter shifts fine. I rode the bike a few miles, and I’ll adjust the cones tomorrow and ride it some more.

  • Baggins Little Joe Saddlebag – howzit work?

    Baggins Little Joe Saddlebag – howzit work?

    I just bought a used Little Joe saddlebag, a nice-looking canvas and leather number that matches my old Banana Bag pretty well.

    My only issue is that I don’t know exactly how the bags are supposed to be fitted with straps! There are 8 d-rings on the flap and bottom of the bag, which seems like a lot, but at least 4 and maybe 6 are for the straps to cinch it closed. If anyone has instructions, I’d much appreciate it.

    Duluth made this a long time ago for Rivendell, under the since-discontinued “Baggins Bags” line. Rivendell retired some Tolkein names at the request of the copyright holders (not the film company). Quickbeam was one, and Baggins was another. The new Riv line is “Sackville,” which is also a Tolkein reference, but made the cut. Less famous, maybe.

  • skate deck pedals on Etsy

    skate deck pedals, originally uploaded by BikeTinker.

    Jim Greco skate deck pedal platforms on Etsy – no cleats.

    I added a pair of skate deck pedals to my Etsy store. This pair still has the graphics on the bottom for extra punk. The other ones are maple-bottomed, but I haven’t added them yet.


  • ah hell no!


    ah hell no!, originally uploaded by BikeTinker.

    I noticed the chain was a little slack (and the new S3X internals seem to have much less slop than the old, so I’m thinking “win!”), and the wheel has slipped a little – it’s cocked between the stays.
    Loosen both nuts, straighten up the wheel, tighten the offside nut, tighten the drive-side nut, and CRACK! with a couple chrome flakes raining down.
    Kind of bummed out my Sunday.

  • LD stem replicas

    LDs, originally uploaded by Joel Greenblatt | Clockwork Bikes.

    Ibis LD stem replicas! From Clockwork Bikes… $200, with a choice of clamp size and style (2-bolt or 1-bolt), color, etc.  These look great, and if you click through to Joel’s photostream (click the pictures) you can get his contact info and see the stems being made.

  • Gravel Roadster – Big Apples on the Utopia

    Gravel Roadster – Big Apples on the Utopia

    I bought some 60mm Big Apples for Jim’s old Gary Fisher Utopia. These things are so fat that when I opened the box, I thought there were two big pythons in it!

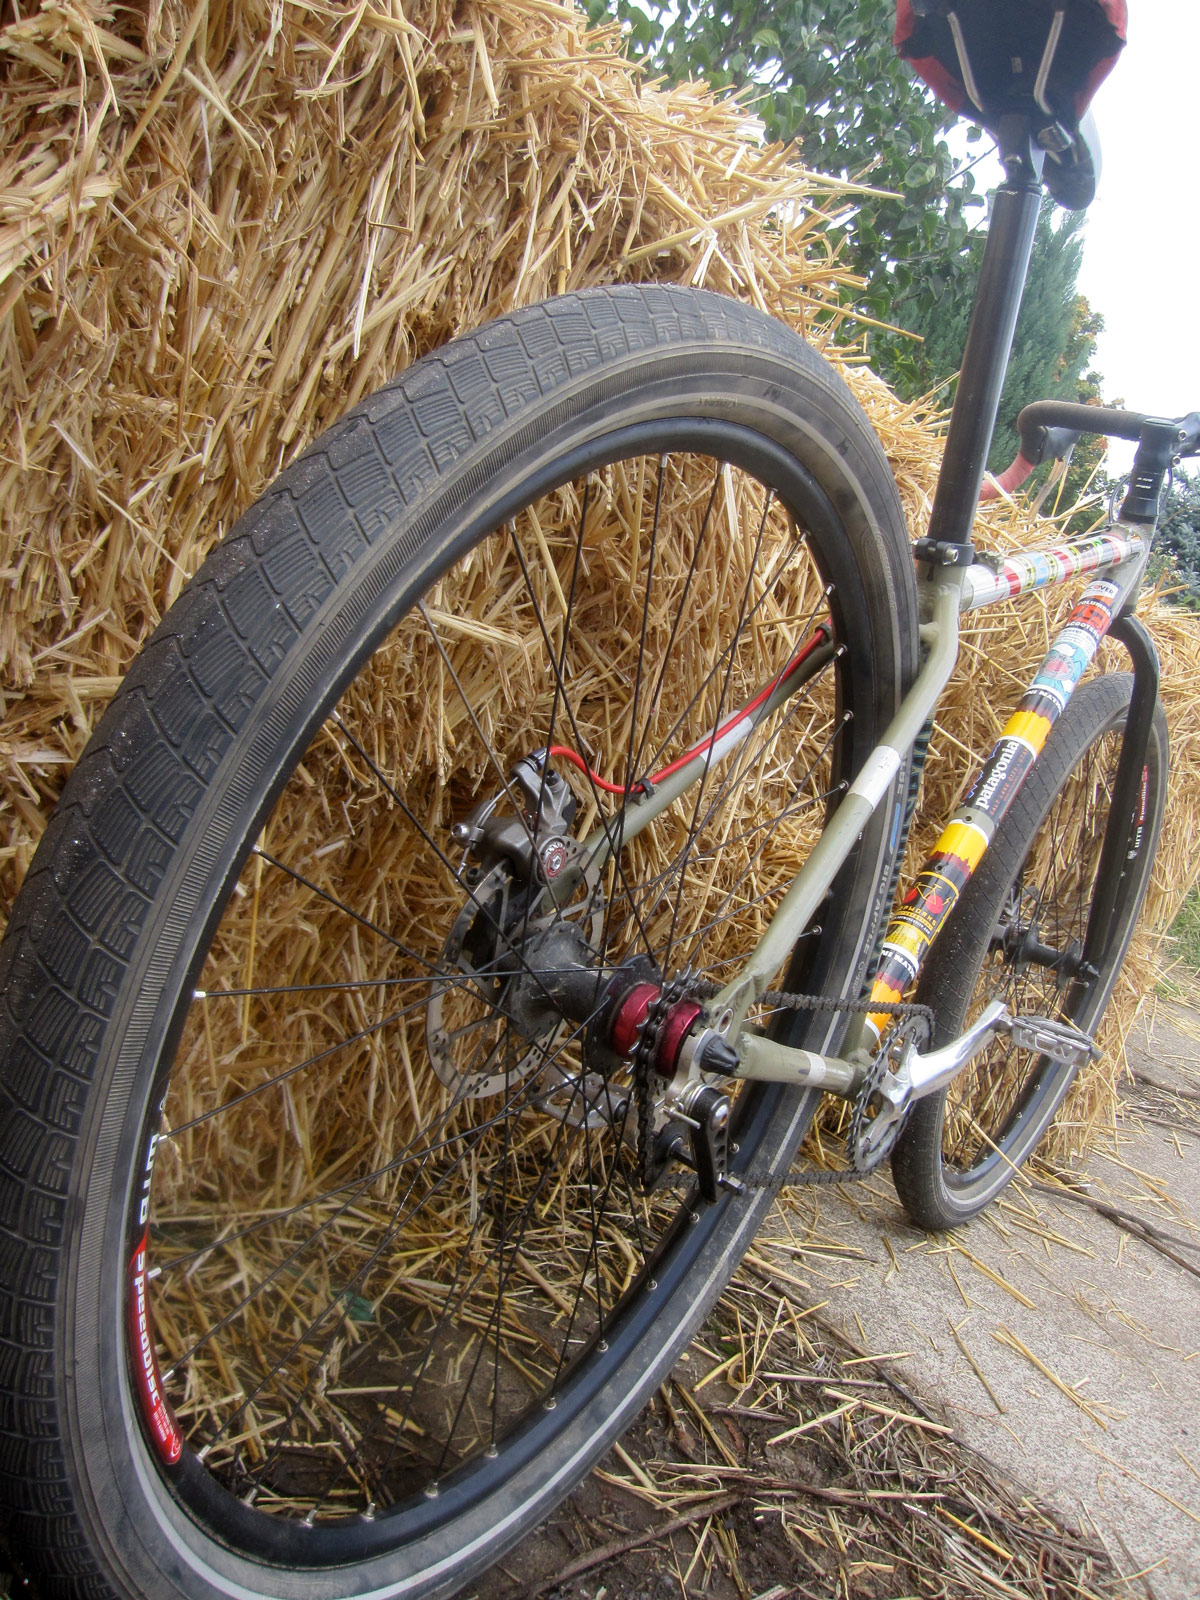
    Schwalbe Big Apple bike tires - 700x60 in red and whiteThese tires make this bike into an ideal Gravel Roadster.* Two speeds, super fat tires, flared drops, rigid fork. It’s pretty light, even though the tires are not. The tires barely fit in the back, solely because of the front derailer cable stop, which I filed down two millimeters for a little extra clearance. You have to look at the gap square on to see that the stop doesn’t actually touch the crown of the tire.

    60mm Schwalbe rubber on a Fisher Utopia

    I did see with these tires that the wheel needed a little dishing adjustment – the tires almost rubbed on the right stay, but had lots of room on the left. I gave the left-pulling spokes a half turn tighter, and the right-pulling spokes a half-turn looser, and it seems perfect now. I don’t know if the frame is misaligned, or the wheel was improperly dished, but it doesn’t really matter now, and I can always adjust the wheel later if it’s an issue. These 60mm Big Apples actually measure 53mm on these WTB SpeedDisc rims

    I like that chainstay yoke for extra clearance

    “Roadsters” apparently lack of any form of weather protection, but I’d like to make some demi-fenders like Sycip’s Oregon Manifest trike. A full fender in the rear would take a lot of modification: a slot for the seat tube, and possibly a split at the seatstay bridge. I plan to buy a dynamo hub for the front, but not for a while yet.

    * Near as a Google search can tell me, I picked up the term “gravel roadster” from someone on the RBW list describing their Rawland rSogn, and “dirt roadster” appears regularly on Coconino Cycles’ blog.

  • new Sturmey Archer S3X internals

    Sturmey Archer’s U.S. rep got the parts to me in TWO DAYS, no questions asked. New internals for the S3X, and a new shifter because some of the first ones had been mis-indexed, and may have caused the problem in the first place.  I could have shipped the wheel to Napa, and the rep would have done the repair, but this seemed faster and more fun.  It kind of was.

    I had to take it to Tommy’s to get the left cone nuts removed. They were on so tightly that I bent my old Eldi cone wrenches trying to remove them. I ordered a pair of Park wrenches for the future.

    While I was there, Ben was like, “It’s out – do you want me to just put the new one in?” Umm, “yes please.” I was on my way to the Oregon Manifest party, and didn’t really want to be doing the operation in Chris King’s parking lot. Might’ve garnered some attention, but still…

    I need to adjust the cones, I think. I read something on the internet about setting the right cones exactly, and then adjusting from the left, but didn’t want to get all “I read this on the internet” to a professional bike mechanic.
    So I’m happy, the bike rolls well, it works in all three gears, and the slightly higher gear I chose when I put it back together is better for keeping up with traffic.

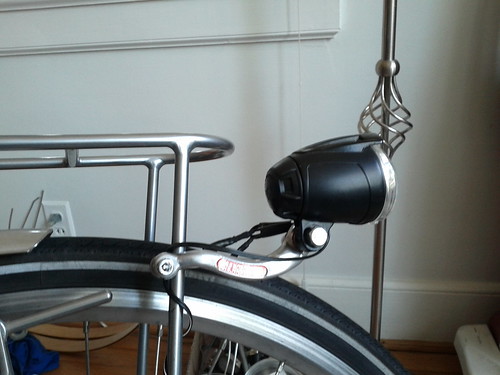
  • Brake arm light mount extension.

    Super cool idea from John Potis, spreading via Flickr. .

    What we’re looking at here is the Mafac ‘Racer’ centerpull arm used as a bracket to put the light where he wants it. I think an eBay Racer would cost more than a new Herse bracket, though.


    bottom of the rack, originally uploaded by john potis.


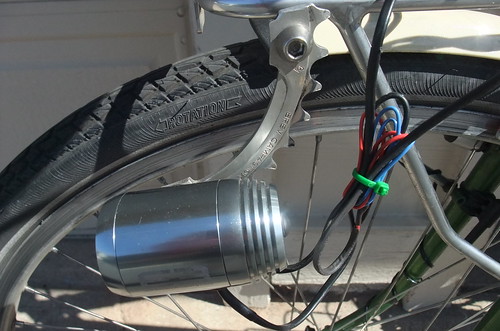
    The phoenix bracket
    , originally uploaded by somervillebikes.


    light mount based on somervillian’s design., originally uploaded by skvidal.

    And another direction, also very cool… “Campy Light Mount” for the win. You could get 4 or 5 out of one chainring. Depending how big it is, I guess…

    new light mount, originally uploaded by ericmplatt.

  • Ha! Old blogspot blog folded into the WordPress blog!

    From now on…

    Clicking this link »
    http://sooper-genius.blogspot.com/2007/09/silver-wire-bar-wrap-finisher.html 
    Should now redirect to »
    https://www.biketinker.com/2007/projects/silver-wire-bar-wrap-finisher/ 

    I used the “Import” button under the “Tools” menu to bring in all the posts. I deleted the non-bike posts (“The Truth About Circumcision” is no more), recategorized all the imported posts, and used the  Blogger to WordPress Redirection Plugin to make redirects on the blogspot blog.

    Easier than I expected it to be. I almost forgot – I also added a “nofollow” to the blogspot blog, so hopefully Google will forget that content was ever there.

    It makes me happy to clean up that outstanding stuff, and I’m pleased that the comments came over, too. If you commented over there, it should show up here, including what I think is Keith Bontrager complimenting my mountain bike…

    I probably did break some links on teh internets, though, and I apologize.

  • Thumbies as stem shifters

    thumbies, originally uploaded by aaron schmidt.

    I really like Aaron’s idea! He’s using Paul “thumbies” (handlebar mounts for bar-end shifters), in order to make a set of high-quality stem shifters.