Category: Projects

  • Alfine 11 IGH on a Quickbeam

    IMG_0857, originally uploaded by jimcwarren42.

    Jim installed an Alfine 11 internal gear hub on his green Quickbeam. He had a shop spread the rear triangle to 135mm, and he’s running a thumbshifter on Rivendell Bullmoose bars. He says when (and if) a dropbar shifter for this hub becomes available, he’ll switch to drops.

    It looks like he’s using Rivendell’s down tube clamp-on cable stops to run the wiring, and then zip-ties on the chainstay.

    Cool setup. One could do something similar with the new SimpleOne without too much trouble.

  • Ross with dynamo hub

    Ross with dynamo hub

    I built up a budget dynamo wheel for the gravel roadster, but chickened out on putting Big Apple balloon tires on the narrow Cold Fusion rim. Instead I pulled the low trail Ross touring bike out of the dark corner of the garage and fitted it out with the new wheel.

    ross fixie in front of Red Fox BakeryI hung an E6 from the front rack with a simple P-clamp, and used a modified lens that mounts correctly on an inverted light. It’s the bike I’ve been riding to work this week, and I really like it.

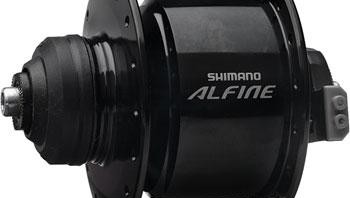
    shimano alfine dynamo hub and E6 lightI also put a giant sized Schwinn (Karrimor-made?) saddlebag on the front rack. I like that, too. It’s like a trunk. I’m going to attach it more firmly to the rack this weekend, either with grommets and zip ties, or with mini-P clamps and little bolts. Right now it’s strapped tightly with a toe strap, and hangs from the moustache bars with two more toe straps, because the saddlebag mounting straps weren’t long enough.

    low trail ross with large front bag and moustache barsToday I took a couple of pictures of the bike, and ended up chatting with Matt, who works at Red Fox and according to his workmate, “Loves bikes. And cameras.” Hey, me too! Matt’s moving to Whitefish Montana, and is excited to ride the Divide, since it’s right there! I told him to check out Kent’s blog. Matt has my friend Nathaniel’s old Karate Monkey, and the Suzue Pro-max track wheels I traded for Nathaniel’s SON dyno wheel and lights.

    ross, moustache bars and big bag from the frontWhich is what made me realize I need dynamo lights on all my bikes in the first place.

  • World’s Cheapest Multi-Tool

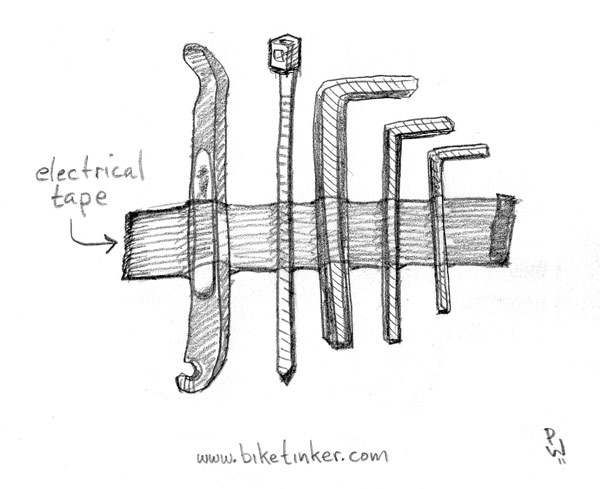
    World’s Cheapest Multi-Tool

    Also the world’s lightest.

    world's lightest and cheapest multi-tool

    I’m going to make up one of these for each of my bikes, tailored to the bolts on that bike. I’ve already got a patch kit, blinkie and asthma inhaler on each bike, I just need to get a packet of handy-wipes and a small wrench. I guess technically, the wrench should be part of the “tool”…

    Does anyone have a better little kit? I used to have one that fit in a patch kit, with the ends of the wrenches sticking out a hole I cut.

  • Gravel Road test ride

    Gravel Road test ride

    gravel roadster on old bethel road

    I took the dog out on a few miles of gravel road as a test of the gravel roadster setup. Getting this bike on the road has had some silly setbacks, including two broken rear spokes at the beginning of two separate rides. There are other silver spokes mixed in with the black, so I bought three spokes when the last one broke. That should ensure that no more break!

    black dog with her tongue out, funky bike with pink fenders

    We had a great run, up some brief hills, and along orchards and blueberry farms, looking out over the valley to the West. The sun only cracked through the overcast a few times, but cold gray is weather I like. We rode out a couple miles, and I goofed around taking pictures of the bike. We turned around to head back, since I didn’t want to stay out too late, and you never know what might happen.

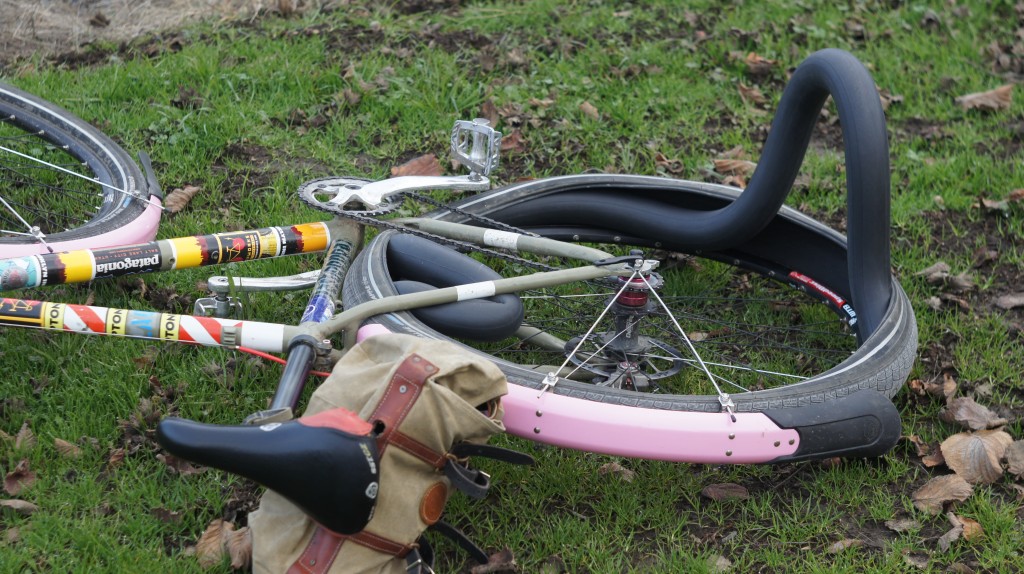
    happy dog!Such as the rear wheel making a weird noise and sliding around on a descent! When I stopped, I saw that the tire had unseated, and the tube, still inflated, had doubled in size, looped out like a giant intestine, and herniated itself. A loop was bound up in the stays, and two feet of it jabbed out in the air. The tire had rolled off the rim somehow, and wouldn’t go back on.

    inner tube unleashedI can put it on, but it just falls off. No matter how I try to mount it, I can see an air gap between the rim and the tire. I think the wire bead may have broken. I shlepped the bike back about a mile; sometimes carrying it, sometimes rolling it, but it didn’t roll that well.

    chick on old bethel road

    I had a good laugh at my own expense, and I was out having an adventure in the countryside, so it was fine.The dog was a little non-plussed, though.

    nice spot for next year

    I did find a half-mile stretch of unharvested rose hips. They’re already withered, but they might be a possible gleaning site next year.


  • How do you wire up a bottle dynamo?

    How do you wire up a bottle dynamo?

    I have a SON hub on my Quickbeam, driving an E6. I’ll get LED lights, but I have like 4 dynamo halogen lights, and 6 or 7 spare bulbs. My short term goal is to get more than one of them into use on more than one bike. I just built a very affordable Alfine dynamo hub, but realized the 19mm rim might not be the best match for the 53mm Big Apples on the gravel roadster. Probably wise, since today the rear SpeedDisc rim decided it was too small to keep the Big Apple seated. I don’t know if the bead broke, or what, but that tire will not go back on that rim… Anyway, I put the new wheel on the Ross, with an E6 I got from a friend. Works great, but I’ll probably have to trim the lens tabs to work right.

    So… the new plan is to set up the gravel roadster with a bottle dynamo I got from another friend.

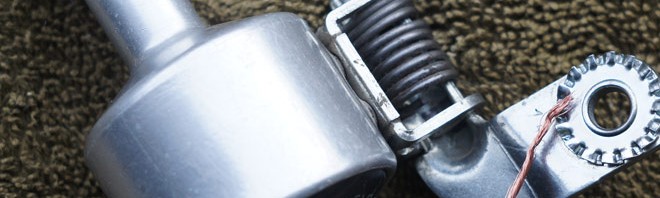
    Except I have no idea how to work those things. Surprisingly little internet resources are devoted to the question of how to wire a bottle dynamo to an E6, and half of those use clever black bottle dynamos with two explicit wire mounts. This one has a little capped-off recess that probably takes one wire. I found a picture that looked like the ‘extra’ lead is grounded to the mounting bolt, so I decided to run with it.

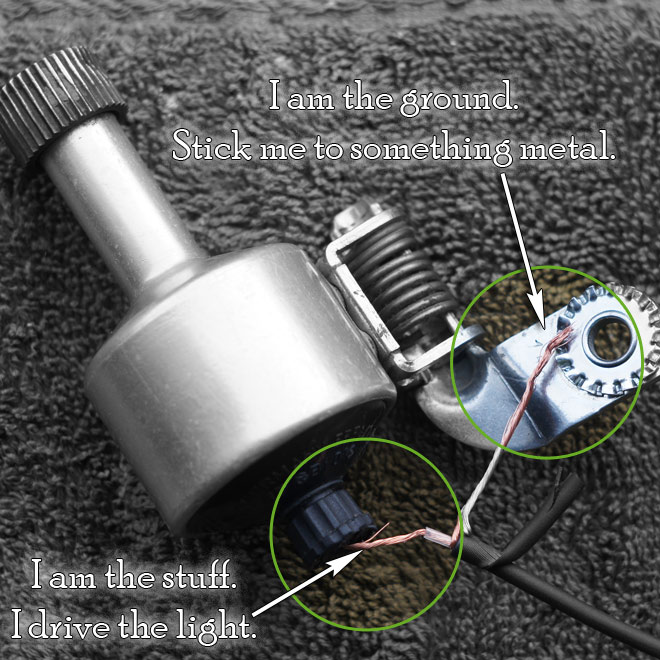
    I put a wheel with an inflated tire into a truing stand in order to test my dynamo, and started cutting off perfectly good spade connectors and stripping wires to get some bare leads. I connected the wires to various parts of the dynamo, and held the wheel against the tire. What seems to work is obvious in hindsight. One lead goes through the little plastic cap – through a hole, doubled back through another hole, and screwed into the bottom of the bottle, and the other lead goes to the connection bracket. Hold it all together and put the dynamo head against a spinning tire, and the light shines! Pretty magical.

    I bought some shrink-tube and a little box of circular wire-ends, but didn’t install them. I went for a bike-ride instead. Two, actually.


  • Easier nipple-driver hack

    Easier nipple-driver hack

    I went to make this again for an Instructable, and realized there’s an easier way, if you have cloth handlebar tape. I wanted a smaller screwdriver, and chose this little wooden-handled gem I found on a bike ride. The tip was a little mangled, so I cleaned it up with a file. I didn’t take pictures of that part – I just did it.

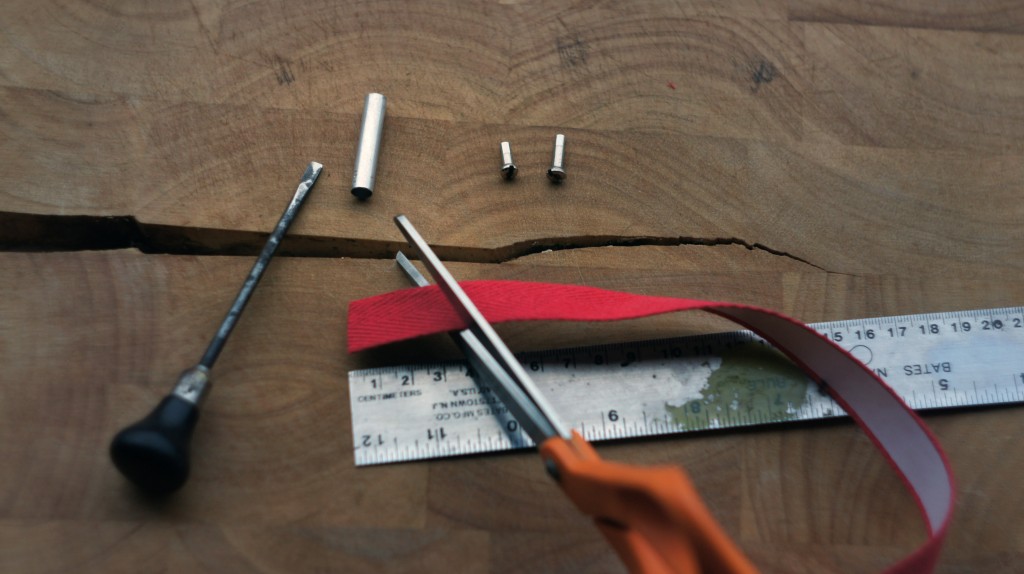
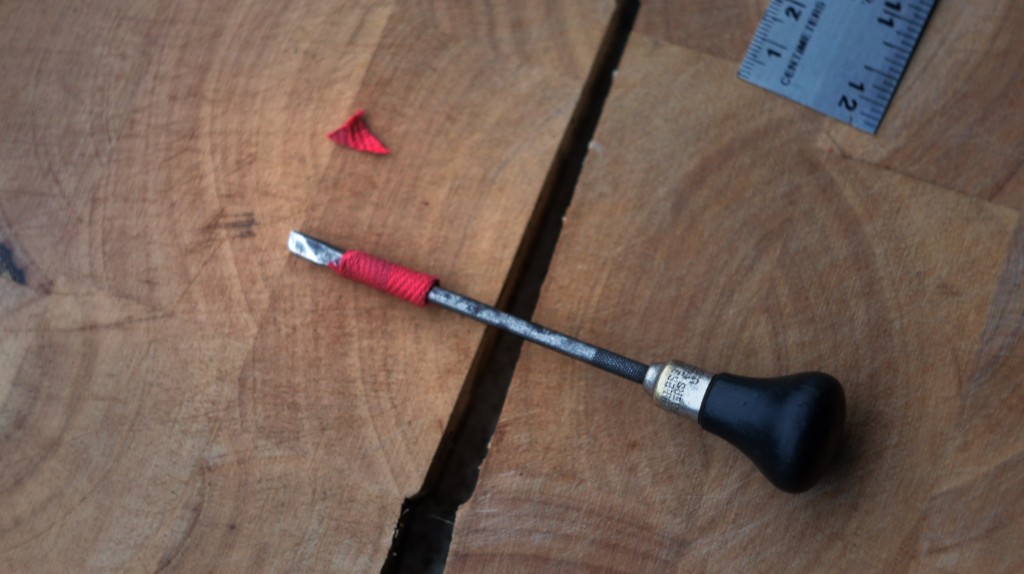
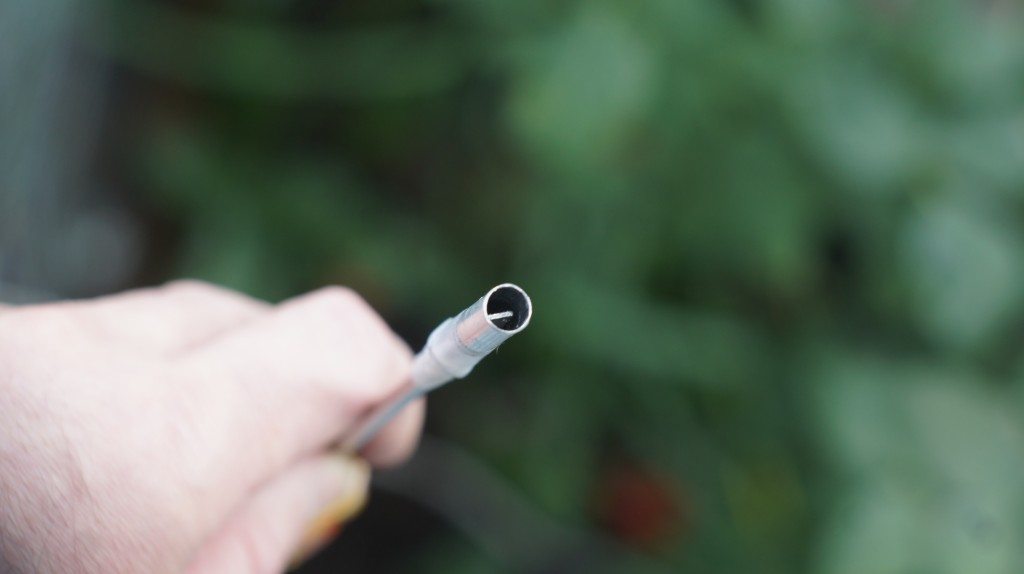
    Basically, you wrap the screwdriver with about 30mm of handlebar tape, depending on the thickness of the shaft, and slip the aluminum tube over it. Friction, rather than adhesive, keeps the tube situated.

    Everything you need to make your nipple driver: screwdriver, bar tape, aluminum tube and scissors.

    spokedriver materials - screwdriver, bar tape, aluminum tube and scissors

    Snip the tape at an angle. It makes it easier to slide the tube over.

    snip the tape at an angle - ~30mm worth

    I snipped my first one square, and angled it later.

    wrap the tape tightly around the screwdriver shaftSlide the tube onto the wrapped shaft (is it just me, or is it getting warm in here?).

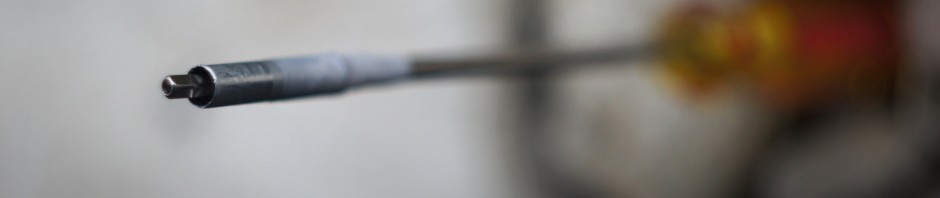
    Tube slipped over tape-wrapped shaft. Ready for use. And there you go – ready to hold your spoke nipple steady as you insert it into a deep-section rim to mate up to a spoke.

    huh. I grew up to have my dad's hands.

    You can easily remove the tube and tape and throw them in a drawer until you need them again. If you build wheels regularly, you might keep one permanently modified.


  • Spoke nipple tool for deep well rims

    Spoke nipple tool for deep well rims

    I just built a wheel with moderately deep section (the IRO “Cold Fusion”), and had a heck of a time starting the nipples without dropping them inside the rim. I hope my missing nipple didn’t end up inside the rim*…

    spoke-nipple starting screwdriver modification

    The last time I used these rims I didn’t have that problem but no matter. I devised a simple tool that helped immensely – a screwdriver (slightly magnetic) with an aluminum tube around the end to hold the spoke nipple. aluminum tube on screwdriver end

    I had some thin-gauge aluminum tubing left over from making a spacer to mount my dynamo light on my Nitto M12 rack. In fact, I used the exact 3″ tube I’d used as a spacer until it deformed too much.

    tape a tube to the screwdriver

    *My wife and 11 year old son both think the term “spoke nipple” is hilarious.

  • Removing the chain tensioner

    Removing the chain tensioner

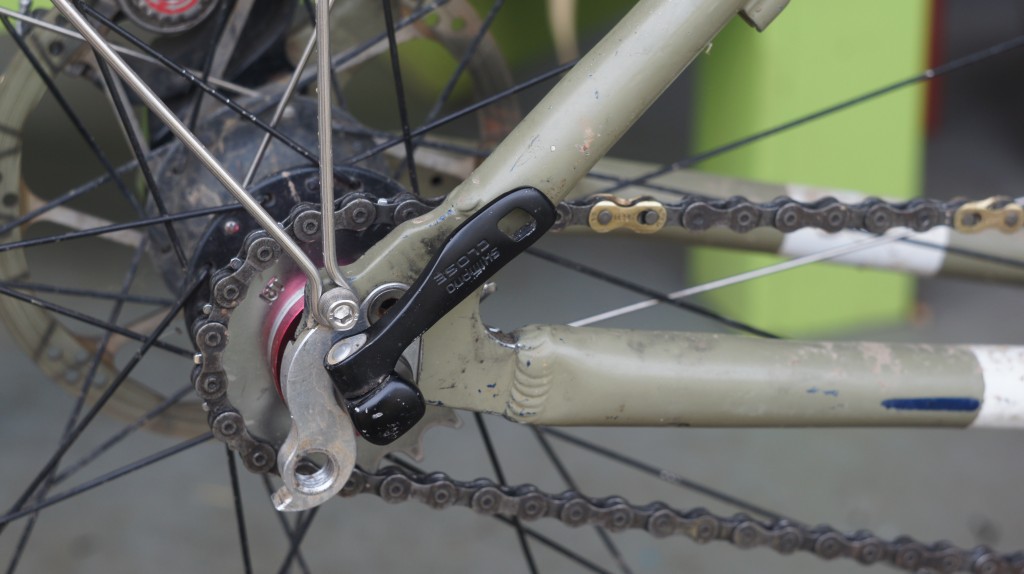
    While I was wrestling the Angel of Stupidity, deciding to mount my new fenders on the ‘wrong’ wheels, I did manage to remove the chain tensioner and rig up a “magic gear” that fits the chainstay length. I’m against chain tensioners. I think they’re inelegant and heavy (heavier than having none, at least), and the one I had only seems to work in an ‘outer’ position. It skips if you move the idler wheel inboard.

    No Chain TensionerSo I removed a link, and found a gear that works. I had to make sure my chainwheel was centered, though, since it was binding in one spot. I used the Sheldon method to center the ring – it worked perfectly, and was a lot easier than I’d thought. Surprisingly, it was the first time I’d had to do it in 12 years of fixed gear bike tinkering. Vertical dropouts. Go figure. I may go do it to the other 6 derailler-less bikes in my garage, though.

    The 36×18 gear I chose (or that chose me) isn’t that useful for flat-land riding OR the super-steep pitches I want to ride. My plan to remove a link and drop 4 cog teeth don’t look like they’ll work. I put the cog on and wrapped the chain, but it comes a couple millimeters short meeting pin-to-pin. It might work when the chain wears more, or I could file flats in the axle, or get a cog FIVE teeth smaller, but I’ll probably just ride it like this for a while. 36×18 is a classic singlespeed gear, and spinning it does move the bike forward…

    I am now looking for a 22t cog for a climbing gear, so I can re-dingle-ize the bike, but 22 teeth seems to be the point at which singlespeed cogs go couture and jump 10x in price. ~$3.50 for an 18t cog, to ~$30 for a 22t cog.

  • I’m thankful for my fenders

    I’m thankful for my fenders

    gravel roadster with fenders

    I mounted the pink Cascadia fenders I bought. They clear the 53mm (alleged/nominal/putative 60mm) Big Apples nicely, they look baller*, and they’re pink.

    new rear fender over 60mm Big Apple tires

    To make this work with the minimal clearance of the Utopia (and I saw a new-model Utopia with the same issue: fatter tires will hit the derailleur), I did a stupid thing. I mounted the rear fender on the front, and the front on the rear. I knew it was stupid, but I did it anyway.

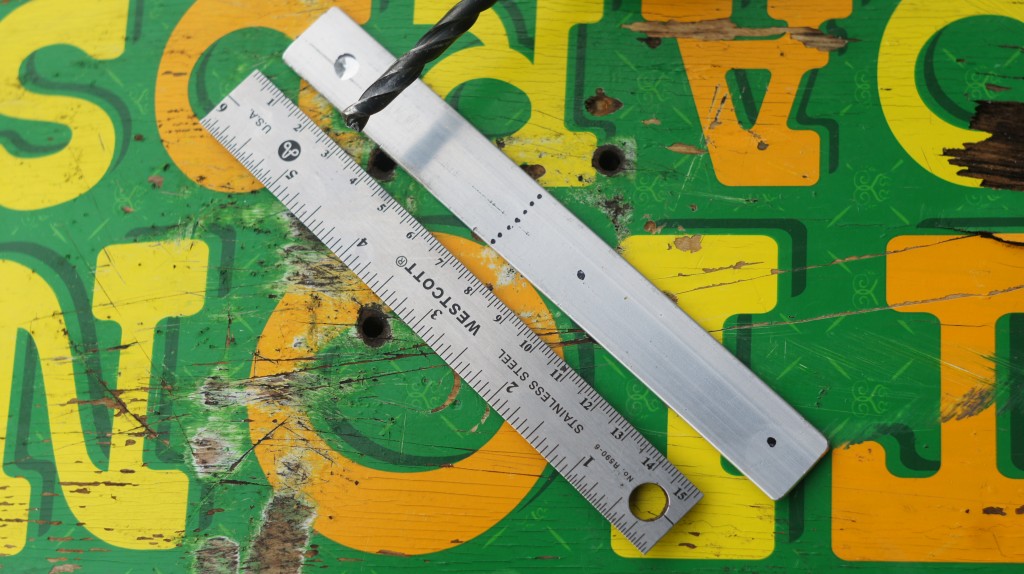
    front bracket before drilling. 3/16 for the rivets, 1/4 for the bolts

    Anyway, I took the flat aluminum stock I bought after seeing Tapebubba’s GripKing hack, and made two brackets, one for the end of the rear fender, and one for the front. 1/4″ holes for the bolts to attach them, 3/16″ for the rivets. Rivets are the only way to go for fenders that have clearance issues, and as far as I can tell, ALL fenders have clearance issues. After fixing Angelina’s B72 Brooks saddle, I am in love with rivets. Metal, low-profile, and you get to use things like chisels, nail-sets and BALL-PEEN HAMMERS!

    brackets - front (long) and rear (short)

    Let me say that again. BALL PEEN HAMMERS.
    (I don’t actually own a ball peen hammer)

    riveted fender bracket. custom.

    Here’s what I learned and how I scored:

    • Line the brackets up to mark for drilling UNDER the fender holes if that’s how you’ll mount them. Bend a nice curve into the metal, drill the fenders, and mark the metal through the fender holes. Simply measuring doesn’t work, because whatever’s on top will have holes further apart than what’s on the bottom. I actually figured this out before drilling the metal. 10 points to me.
    • Drill the holes before making the 90 degree bend for the bracket. It is orders of magnitude easier to hold the metal when it’s flat, rather than trying to hold a dinky piece of angled metal while the drill tries to grab it and snap it around into your fingers. Leverage. I learned this the hard way on the small bracket, and put it into practice on the big one. -10 for the first one, 10 points for learning.
    • Slots! All my boltholes were slots instead of holes. Drill a 1/4″ hole and go at it with a rat-tail file, or drill two holes and connect them by filing. Worked perfectly. 10 points.
    • Dry fit everything twice before drilling any holes. I ended up slotting the fender for the front bracket to come up through the fender in front of the rivet holes instead of behind them. Totally accurate, dead-on measuring. Fits perfectly. Backwards. The aluminum support goes behind the fork instead of out front, the mudflap is 4″ closer to the ground, and the forward projection is shorter than planned. My points? Negative 10,000.
    • If you give yourself some slack, it won’t be that bad. The mudflap picks up leaves riding through a Fall orchard, but the front bag still stays clean. I have a plan to make another bracket that uses the ‘bad’ slot and another slot to not only support the front fender extension, but also mount a dynamo light. Points to me? About 40 (if it works).

    pink front fender

    I’m happy with the setup. Obviously, my calves are not protected from the spray from the rear wheel. I have a mental image of what needs to happen back there, but it’s bizarre – the fender cutoff from the front needs to be channeled to fit around the seattube, and held in place somehow. Still way better coverage than the seatpost-mount filth prophylactics you see everywhere. The bike and the conditions presuppose a little ‘roughing it,’ so it’s not a dealbreaker for me. I think the rear fender looks very roadsterrific, which was the idea.

    gravel roadster with new pink Cascadia fenders. Also some hay.

    * I got this adjective from my brother in law tonight. He says it means “rich enough for a basketball player,” but I think it’s more along the lines of “in like Flynn.” I also got the euphemism “delta bravo,” which stands for d.b., which stands for douche bag. We’ve already moved on to “douche nozzle,” “douche pickle” and “king of the doucheteria” at my house, so “delta bravo” might be a little like suggesting Mrs O’Leary put the lantern out of range of the cow’s hoof. The Titanic has sailed. Sounds cool, though.

  • Rivendell LongLow

    Rivendell LongLow, originally uploaded by ftrentmeyer.

    Isn’t this the most beautiful bike you’ve ever seen? Top 5?

    It’s for sale. SOLD Buy the frame and build it up your way. Click through the the picture and get the scoop.

  • let’s just enjoy the skungy funk


    Quickbeam S3X – take II, originally uploaded by BikeTinker.

    stratigraphic bar tape. Top layer with adobe-like layer of ground-in mud removed, bottom layer of rotting shrouds taped over with fresh, clean Newbaum’s.

  • My first Instructable

    My first Instructable

    Use a worn cassette cog as a singlespeed cog

    I’ve been an Instructables member since 2007, but never made one. I love their newsletter, though. Maybe the next thing is to make a project based on someone else’s instructable. LED lights, maybe.


  • Inexpensive Alfine dynamo hubs

    Inexpensive Alfine dynamo hubs

    The OTHER killer deal on something I needed (that won’t make me throw up in my mouth a little*) was a $51 32 hole Alfine dynamo hub in black, exactly like the $120 one I’ve been saving up for. Total came to $63 with shipping to Oregon. If you live in Colorado, it’s cheaper.

    the picture doesn't show the packaging anyway...

    I saw an “OE Pack” hub on eBay for a great price, and then Googled it. After poking around a few sites that also carry the item, it turns out ebikestop.com has the same Alfine hub, at the best price. Since they have pretty helpful customer service, I emailed them to make sure it wasn’t just like the replacement internals or something, and yup, it’s the exact same hub as the more expensive Alfine hub they carry, but without the fancy packaging. Since I plan to build the hub into a wheel, rather than save it in acid-free plastic, I’m pretty pleased at the deal.

    I imagine this either means that Shimano is coming out with something much nicer for 2012, or the brief OEM flirtation with dynamo hubs on city bikes is officially over.  As someone who’s riding E6s instead of LED headlights and buys used CDs instead of downloading MP3s**, that’s fine with me.

    *to borrow a quote from Bike Snob commenters circa 2008.
    ** 10 mp3s for $3? In an archival re-rippable format? Okay.

  • Pink Fenders for the Gravel Roadster

    Pink Fenders for the Gravel Roadster

    I need fenders for the Fisher Utopia, since it rains up here pretty much non-stop, and I’ve gotten used to riding and staying dry and clean. The trouble with the 60mm (53mm actual? I can’t remember) Big Apples is that they need giant-sized fenders. Sixty millimeter Berthoud Stainless fenders might work, but Planet Bike Cascadias look like the real choice, since they are 65mm wide.

    EBay has some people listing Cascadias, but most of them are just selling at market value. But… I happened across a pair of PINK fenders for $20 (+$13 shipping). Hmmm. $33, and the best I’d seen elsewhere was about $45, with shipping.

    And they’re pink, which is incredibly obnoxious. It looks like they were a limited edition Planet Bike run in 2007 or so, which somehow makes it less likely that I’ll spray paint them. It kind of makes me want to paint the whole bike pink.

    …and it looks like the seller relisted another pair of pink Cascadias…


  • Dingle fail

    Dingle fail

    My Gravel Roadster has two singlespeed gears – two rings and two cogs. The outer, road gear works fine, the inner Baker Creek Road gear skips. Yesterday I re-measured my chainlines, and moved both cogs outboard 4mm. The real difference was 3.5mm, but I only have 2mm spacers.

    I don’t think that was the real problem, since the big gear works fine, even under fairly extreme load. Only fairly extreme, since I don’t actually get up over the stem with my 240 lbs on a drivetrain I think might skip…

    So… I also changed cogs, moving to a larger cog to take up more singleator slack, and also to be different. The previous cog was a cheap stamped chrome single-specific cog with deep valleys. The new one is pulled from a cassette – ramped, profiled and worn. I filed off the little tab so I could mount it backwards (and use the unworn tooth faces, a la Sheldon Brown), and I would have demonstrated that here, but… it didn’t work. Second assault on the Baker Creek ascent ended the same as the first – riding the hard gear, and pushing the steep pitches.

    I pretty much decided I was going to make it a geared bike, but I think I’ll try the low gear in the outer position as the ONLY gear first. That and get fenders for the monster Big Apples, since it’s going to be raining for the next 8 months.

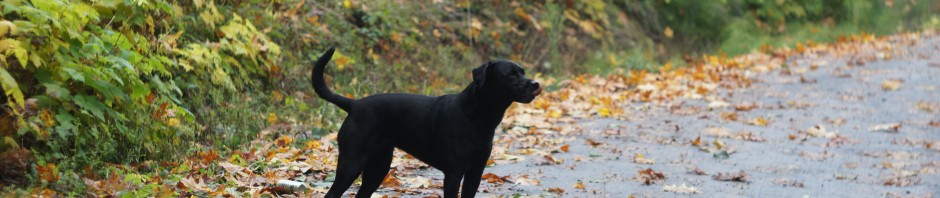
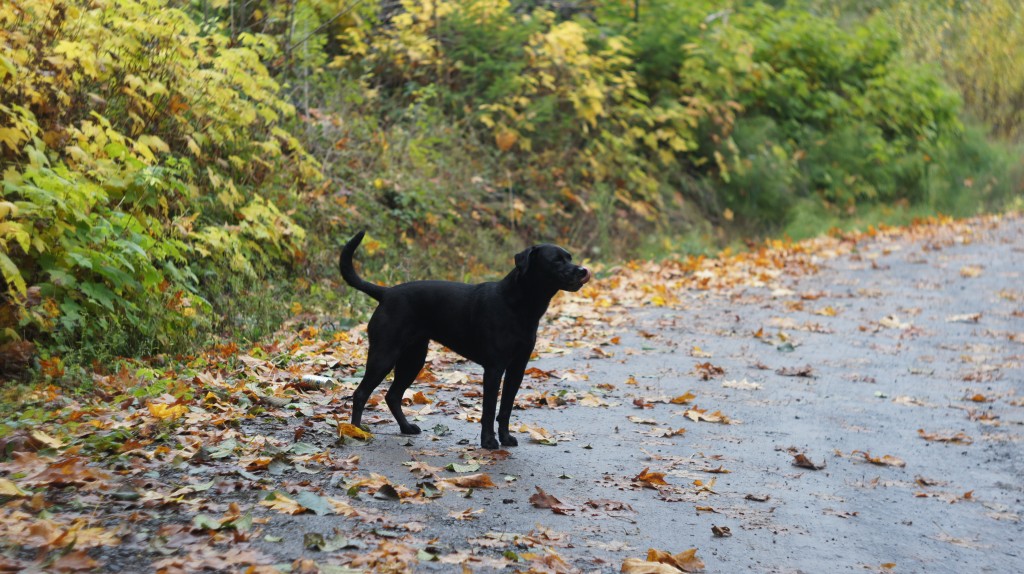
    So here are some pictures of the road and the dog. Still a nice time out, but a frustrating tinkering fail.

  • homemade straps for saddlebag

    homemade straps for saddlebag

    I bought a used Little Joe saddlebag, but it came without straps. I tried toe straps to close these up, but ended up using a trick my friend suggested – cheap belts.

    I cut a $1.99 Goodwill thin leather belt in half, removed the buckle, and riveted on some new buckle-y hardware. I had to Xacto the edges to fit the D rings on the bag, but then I had to cut the straps narrower again to fit the new buckling hardware. I used scissors for that, because my last Xacto blade had dulled on the first pass through.

    I would have liked to hold out for belts with brass D-ring buckles, but this is what I got. This and a green leather belt I’m using to hold up my pants. The Xacto knife did a way better job of cutting the leather than the scissors – do it right next time.

    Oh yeah, there are zip-ties holding the bags to the stem and seatpost, respectively. The black ones came with the Big Apples, holding them coiled in the box. Cheap much?