Pre-funky hubs. Someone favorited it on Flickr, which brought the picture back to my attention.
Wilderness Trail dirt drop bars, home-painted fenders and Salsa stem, skate-deck pedals.
Category: Projects
-
my Quickbeam
-

No opener?
 Just a free idea for opening beer when you’ve left your pocket knife at home. No knife (TSA), no keys (why bring them? my car and my home are 4300 miles away). No lighter (you know the lighter trick, right?), and my asthma inhaler was looking like it wasn’t going to open any more bottles lighter-style without bursting. Not really worth the risk.
I bought this Petaluma-brewed Lagunitas in a New York City drugstore, and my boss suggested the door-closing device in our hotel room as an opener. The other boss suggested a super-painful way involving my wedding ring (super-not-recommended).
Beer cap goes over the lower bar of the door-closer, and the top bar acts as the fulcrum. Perfect. I used the trick in the Javits Center, too.
-
the Thinny pedal?
Hmm… that pedal looks really good to me.
-
Bell at sunset on the bridge
I love this picture.
(btw I’m really into pinterest all of a sudden) -
first use of the new park stand
I tightened up the S3X cog carrier (using a tool, not my fingers), which will hopefully get rid of that “bzzzrp!” sound at low-speed high-torque right-pedal revolutions. Also made a tiny adjustment to the shifter tension, which was much much easier with the rear wheel off the ground.
I’m still viscerally uncomfortable with leaving a fixed gear bike in a stand, so I’m going to go put it on the ground now… -
Bubba’s barcon hack
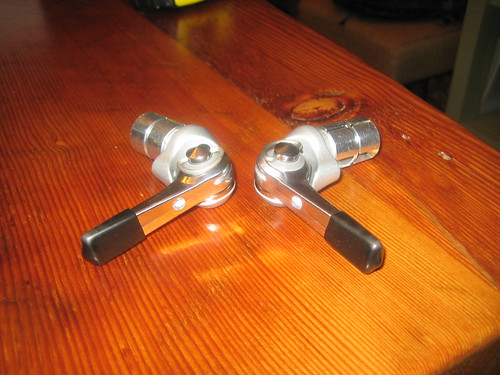
Short and sweet top-line barcons, made out of Rivendell thumbshifters and Silver barcon bodies. See more in Hillbubba’s flickr stream.
-
Grognard bars from NAHBS 2008
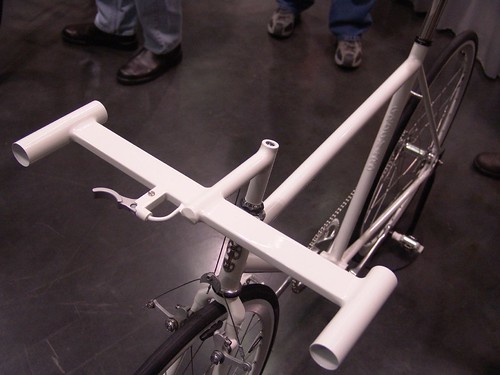
Flat bars in every sense of the word! Integrated single brake lever, and tubular bar-ends welded (fillet brazed?) on.
I think they’re kind of ugly, especially in contrast to the sweet lines of the rest of the bike (the stem extension itself, for example), but I really like that Grognard is trying something new.
I wonder if you could build LED lights into those extensions…
-
Light Mount Finished
Light Mount Finished, originally uploaded by Uncle Bicycle.
Yes! Give that a gander, and look at your bike for suitable spots to use it.
I saw this and thought, “Hey, that gives me an idea! It’s stupid that all bike accessories are supposed to go on a handlebar, instead of mount to an eyelet. What if I made a thing that mounted to threaded eyelets, but let you mount handlebar accessories on them?”
And then my brain said, “That’s exactly what you’re looking at, nimrod.”
My internet friend Gino came up with something that does the same job. Paint this one black, jam a bar-end reflector into it and call it done.
-
Mailed a set of pedal decks to CA
That was nice – a Bay Area randonneur just bought my last pair of pedal decks off Etsy. Time to put up some more. An internet hero sent me a skateboard deck recently, too – time to put it to use!
-
homebrew saddle rail taillight mount
DiNotte Lighting – 300R, originally uploaded by Freeheel Girl.
Extremely cool fabricated mount to attach a DiNotte 300R to the seat rails of a superslick roadified MB-1. Yeah, click through for the pictures!
She has a nice spiral-wrap innovation to run lighting wires along the brake cable, and… shows how to make your own spiral wrap out of tubing.
You would be well advised to check out the whole MB-1 Project Bike set!
17/19 1992 Bridgestone MB-1, originally uploaded by Freeheel Girl.
-
dynamo wiring inside a fender
Schmidt SON 28 Build-26, originally uploaded by stonehog.
A clothes pin holds a dynamo wire inside a hammered Honjo while the glue(?) dries. I like it – the pin fits over the rolled edge of the fender almost perfectly, to hold the wire firmly with the thing… and the other thing… and the way clothespins are made. you know, the hole part.
-
Minipump mounted inside Carradice saddlebag
I got an SKS “Supershort” minipump in my stocking this year*, which was pretty excellent, since my old minipump is pretty old and doesn’t seem to work on Schraeder valves anymore.
The Quickbeam has a Schraeder front and Presta rear, so I only had a 50/50 chance of repairing a flat. Less, actually, since I usually get the pump (and gloves, etc) off the other bike and leave it on the counter. I want a kit on each bike, but I don’t like random, semi-expensive items bolted to my bikes.
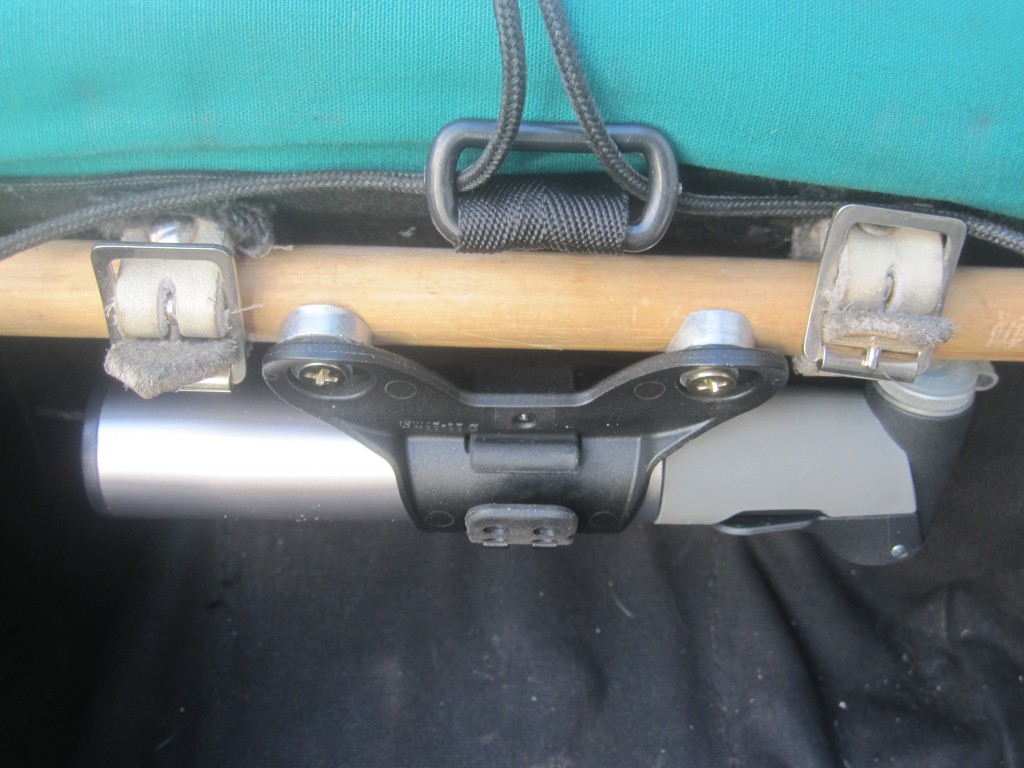
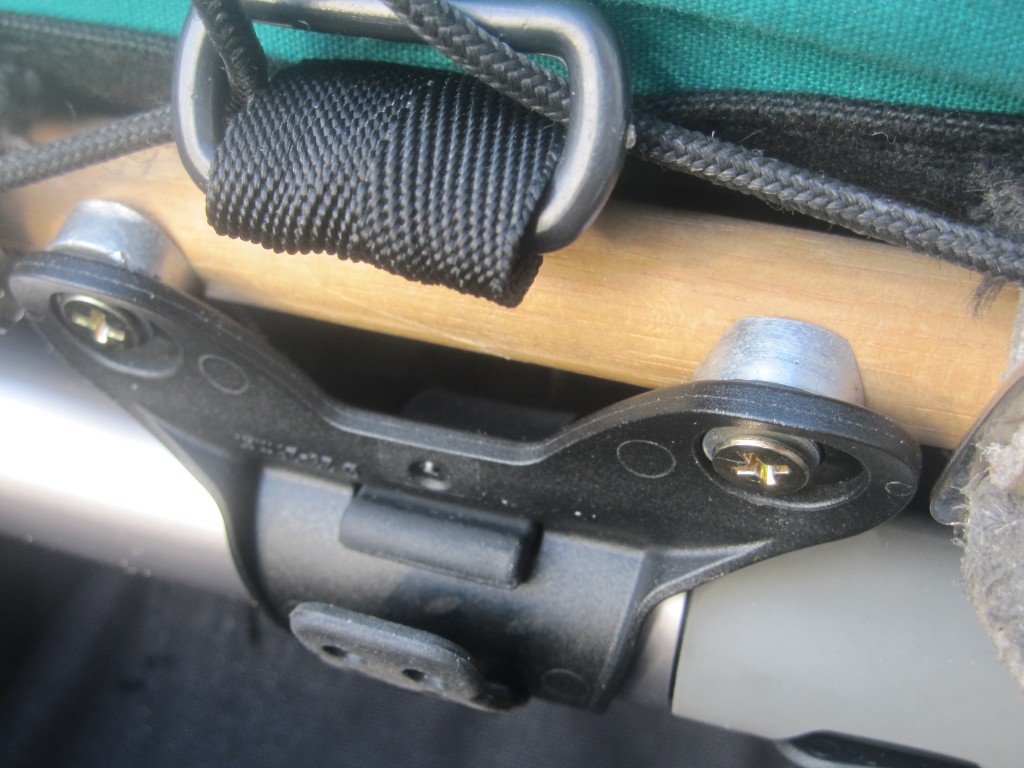
I have a couple of ideas for tool-stowage, and one of them is to hang a bag from the dowel of a classic saddlebag (Carradice, Baggins, Schwinn, Karrimor, etc). I decided to mount the Supershort pump bracket directly to the wooden dowel, instead of sandwiching it behind the bottle cage on the seat tube.
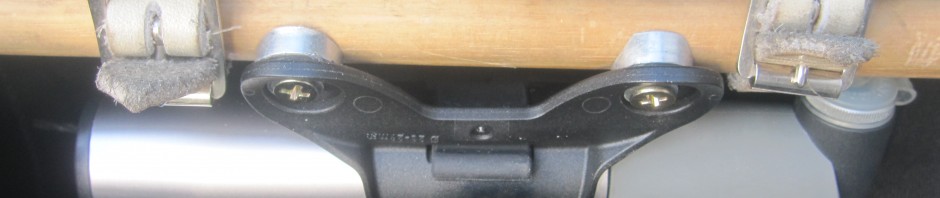
What you’ll need (go back up to the top picture):
- 2 small washers
- 2 short wood screws,
- 2 curved “brake bridge” washers (for mounting rear brakes)
- Screw driver to match your screws
The small washers go between the screw head and the plastic mount to keep things solid. The curved washers go between the dowel and the mount. They match the dowel radius better than I thought they would, and add some depth so my 1″ screws only poke through the back a tiny bit.
Make sure the attachment attaches in front, so you can get at it. On the next bag I do this on (oh yes), I will rotate the mount farther under the dowel, since there’s space back there. I may figure out a way to put a U-lock mount or toolbag in there as well.
Oh yeah – my saddlebags are almost always in the front. This one is hanging from the bars of the Quickbeam, in and over a basket. The Ross has a big Schwinn mounted to the rack, and the Utopia sometimes has a Baggins bag on the front.
*TWSS
-
Big Apple failure
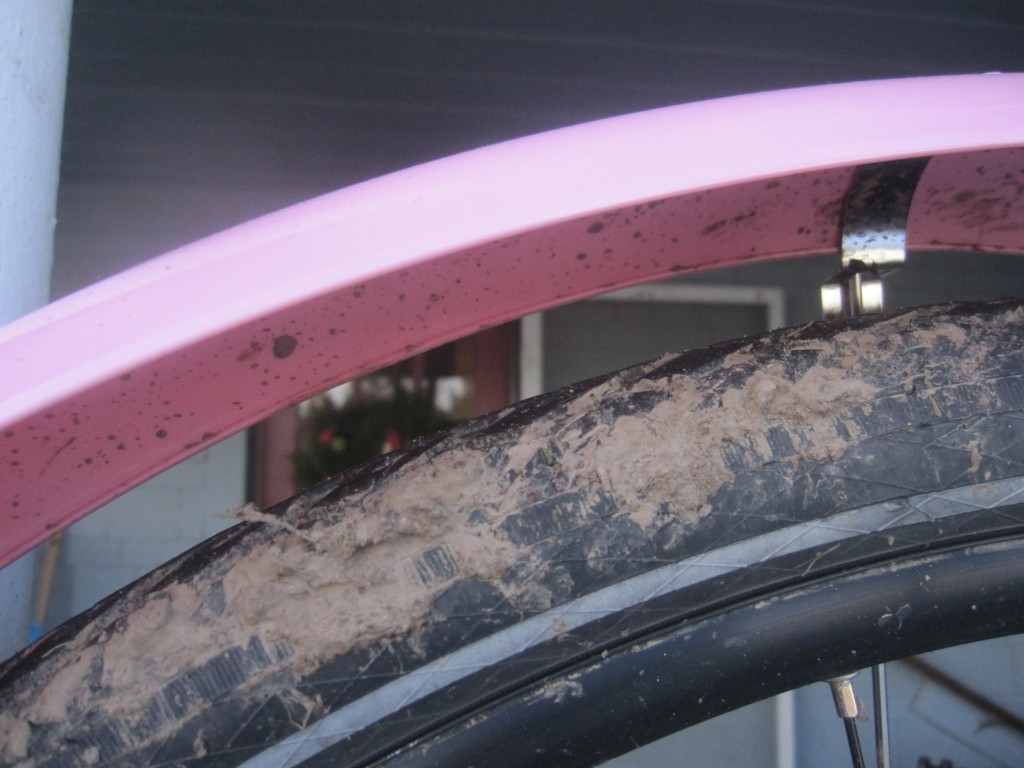
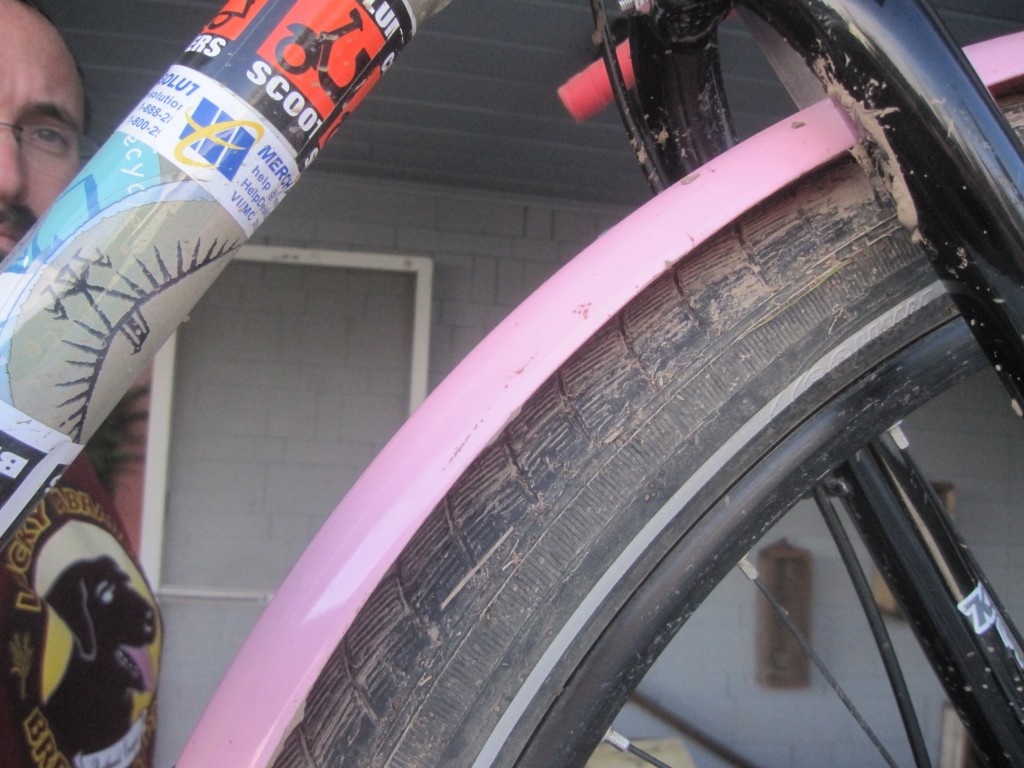
I haven’t been excited about the Fisher Utopia since I herniated the rear tire. The new tire is another Schwalbe (years of none, suddenly I have two sets), plenty large, but much much smaller than the Gigantor tires. It’s kind of a let-down.
For comparison, the old 60mm tire barely cleared that fender. Similar to the front.
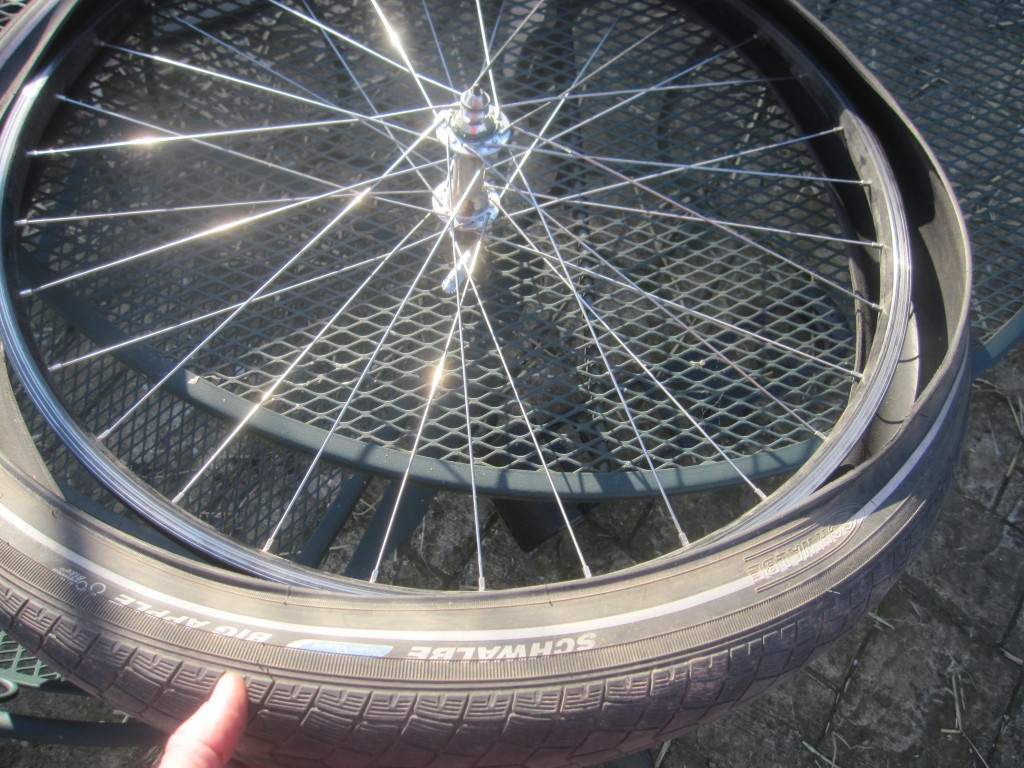
The old Big Appel (apfel?) is now too big for a normal rim.
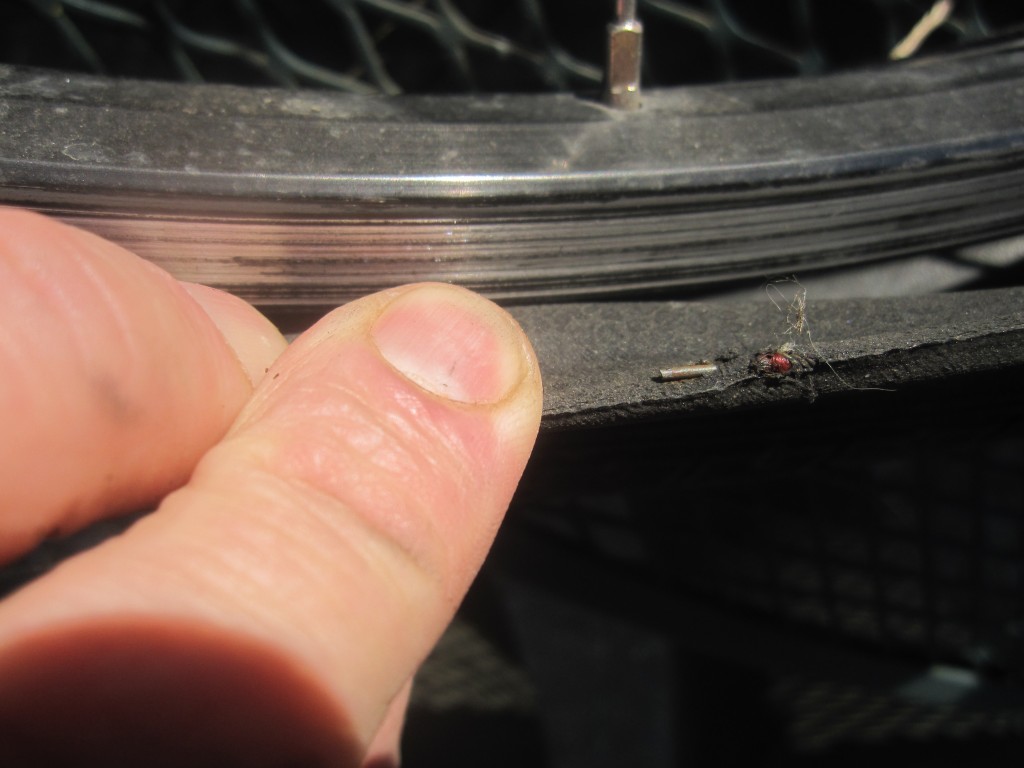
As careful as I am, there is always a little window of air between the bead and the rim.
I’m pretty sure the wire bead has broken. It’s the only thing I could think of (after dismissing my first thoughts, “maybe I overtightened the rim when I trued it up and now it’s too small?” and “is it the temperature?”). Also, I think this is one of the ends.
It doesn’t seem like a good thing to find in a tire, at any rate. I think I will see if I can get it replaced under warranty. Sturmey Archer have been really good about replacements, and Crank Bros says to send my busted 6 year old pedal back, so who knows?
It’s a low-mileage tire, and I’ve never abused it. I don’t think I ever used a tool to mount these tires, and they worked fine for several weeks. In light of spokes breaking in the garage, Schwalbe might just say “your wheel is cursed, our warranty doesn’t cover that.”
-
Post office Quickbeam
Overnighting a package to Tiburon, two days before Christmas. It’s for Angelina’s brother and sister, who will be having the traditional Christmas breakfast, even though dad is in Mexico (boo). It’s breakfast goods: homemade jam, Bob’s Red Mill pancake mix. Handmade napkins.
-
front bag attachment
I’ve put the large Schwinn saddlebag on the Ross’ front rack, but it’s a little droopy. I had an idea to reinforce it, and make the rack attachment sturdier.
I pulled a wooden ruler from my stash of art materials and made a shopping list:- 2 long split rivets
- 2 M5 flat head screws (20mm – a little long)
- 2 fender washers for the rivets (a good fit for the rivets)
- 2 nylock nuts (M5)
- 2 P-clamps (to fit the 5/16″ rack tubes)
I blew an hour in the hardware store looking for P clamps (they got none), and being angrily puzzled at the English hex keys in the 3mm bin like a silverback gorilla with a fake coconut. “Urgh! No fit! Tool no fit hex head!” I ended up with nylon p-clamps from the electrical aisle, and I bought a a 3mm hex key from the 2/3 upcharge aisle.It is really tedious living in the hinterlands sometimes.
The genius of using a ruler for your bag brace is that the measuring is much, much simpler. Mark the ruler with a sharpie where you want the rivet holes, and where the P-clamps will line up, once they’re on the rails. The P-clamps needed to be mounted over a couple turns of bar tape, since they had none that were a good fit.Countersink a divot in the top of the ruler so the rivet-heads have a good flat contact with the wood. I used some lino-cutting tools. I could have turned the ruler upside-down, but the aesthetic imbalance made me itch. Trivial woodworking – don’t stab yourself.Once you’ve measured twice (or thrice, like me), the important part is just drilling through the ruler and the bag in one good go. I put a rivet 15mm from each end, and skipped the middle one. The flat head M5 bolts hold everything together closer-in. I beveled the bolt-holes a bit for a better metal to wood connection.There it is; rack connection, zip ties and toe straps. My original plan called for P-clamps on the backstop, but I used zip ties for the rear attachment instead. I think I could remove a toe strap and have it be just as secure. I didn’t even know there was a strappable flap on the back until today. I also replaced one of the stupid rivets into the wooden dowel the whole bag hangs from with a wood screw after it popped out for the 7th time.